Doors & Windows DIY Guide 2026: Hanging Doors, Fitting Locks, Draught-Proofing & More
Doors & Windows
A complete UK guide to installing, adjusting and maintaining timber, uPVC and composite doors and windows — from hanging new doors to replacing glass and fitting door furniture.
Most door and window DIY jobs in the UK are well within reach of a competent homeowner, provided you measure carefully, use the right fixings for your door material, and don’t rush the setting-out stage. uPVC and composite doors generally need less adjustment than timber, but timber offers more scope for on-site modification. Always check that any new locks or glazing meet current Building Regulations and British Standards before you start.

- Cordless drill/driver with a full bit set
- Sharp wood chisels (12 mm and 25 mm)
- Combination square and spirit level
- Tape measure and marking gauge
- Mallet
- Plane (jack plane for timber doors)
- Jigsaw or wood saw
- Silicone gun and sealant nozzle trimmer
- Wood screws (stainless steel for external use)
- Expanding polyurethane foam or low-expansion frame sealant
- Draught-proofing strips (brush, foam or rubber fin type)
- Silicone or low-modulus sealant (clear or colour-matched)
- Timber packing shims or plastic frame packers
- Replacement double-glazed sealed unit (correct dimensions and energy rating)
The Process Overview
Measure and Plan Before Ordering or Cutting Anything
Measure the opening at three points — top, middle and bottom for width, and left, centre and right for height — and use the smallest dimension. For external doors, account for a 2 mm clearance on each side and 2 mm at the top; the bottom gap depends on your threshold and floor covering. Getting this stage wrong is the single most expensive mistake you can make, so double-check every measurement before ordering materials.
Prepare the Frame and Check for Square
Use a spirit level and combination square to check that the frame or lining is plumb, level and square before hanging anything. On older UK properties, frames are often out of true and will need packing out with timber or plastic shims before you proceed. A door hung in a twisted frame will never close or seal correctly, no matter how many times you adjust the hinges afterwards.
Mark Out and Chop Hinge Recesses
Standard UK practice is to position the top hinge 150 mm from the top of the door, the bottom hinge 225 mm from the bottom, and a third hinge centrally between them on doors over 1980 mm tall or any external door. Use a sharp chisel and mallet to chop the recess to the exact depth of the hinge leaf — too deep and the door will bind on the latch side; too shallow and it won’t close flush. Always cut across the grain first before paring with the grain.
Hang the Door and Check Operation
Offer the door up using wedges to hold it at the correct height and have a helper hold it steady while you drive the first screws into each hinge — one screw per leaf initially. Check the door swings freely and the gaps are even before driving all fixings home. On uPVC and composite doors, hinge adjustment is made via Allen key adjustment points built into the hinge; on timber, you pack behind or deepen the recess as needed.
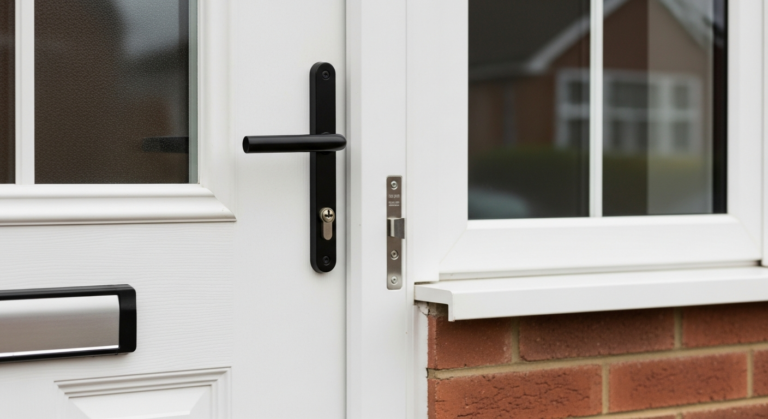
Fit the Lock, Latch and Door Furniture
For external doors, a five-lever mortice deadlock to BS 3621 is the minimum standard required by most UK home insurers, and it must be fitted at the correct height (typically centre of the door or at a mid-rail). Mark the lock body position carefully, drill the keyhole with a holesaw, and chop the mortice with a sharp chisel working from both faces to avoid breakout. Strike plates must be recessed flush and fixed with long 75 mm screws into the stud or frame behind the lining for security.
Seal, Draught-Proof and Finish
Fit draught-proofing strips around the door stop before hanging is complete — brush seals suit uneven surfaces; rubber fin or foam strips give an excellent seal on flat, square frames. On windows, self-adhesive EPDM rubber strips work well on casement rebates, while sliding sashes need woven pile or brush strip to the meeting rail and jambs. Apply frame sealant or silicone externally around any new frame installation, tooling it smooth with a wetted finger, and allow full cure time before painting or decorating.
Frequently Asked Questions
Do I need Building Regulations approval to replace an external door or window in England?
Yes, in most cases replacing an external door or window in England requires compliance with Part L (energy efficiency) and Part K (safety glazing) of the Building Regulations, though you don’t necessarily need a full application. If you use a FENSA or Certass registered installer, they self-certify the work and notify your local authority on your behalf. If you do the work yourself, you must notify your local building control department and obtain a completion certificate. Failure to certify can cause problems when you come to sell the property.
What is the correct way to adjust uPVC door hinges that are causing the door to drop or bind?
Modern uPVC door hinges have three-dimensional adjustment built in — typically accessible via Allen key points on the hinge body. Lateral (side-to-side) adjustment moves the door across the frame, vertical adjustment raises or lowers the door, and compression adjustment controls how tightly the door presses against the frame seal. Start with lateral adjustment to centre the door in the frame, then use vertical adjustment to set even gaps at top and bottom. Always adjust in small increments (half a turn at a time) and check operation between adjustments.
Can I replace just the glass in a double-glazed sealed unit myself?
You can replace a failed sealed unit yourself provided the outer frame and beading are intact and you can measure the unit accurately. Remove the glazing beading using a wide putty knife, measure the unit height, width and thickness at multiple points, and order a replacement sealed unit to match — including the correct spacer bar width and any Low-E or safety glass specification. Refit using the correct glazing packers at the quarter points and a compatible sealant. Bear in mind that glazing in critical locations (doors, low-level windows) must meet BS EN 12150 safety glazing requirements.
What is the best type of draught-proofing for an old sash window?
Woven pile (brush) draught strips are almost universally regarded as the best solution for traditional sliding sash windows because they allow the sashes to slide freely while still providing an effective seal. Fit brush strip to the parting bead and staff bead channels where the sashes run, and use a rubber or EPDM fin strip at the meeting rail. Avoid thick foam strips on sash windows as they will prevent the sashes from closing fully. The Draught Proofing Advisory Association (now absorbed into wider energy efficiency guidance) and Historic England both recommend the brush strip approach for heritage properties.
How do I fit a letterbox neatly in a composite or timber door?
Mark the aperture position centrally on the door at the recommended height (typically 760–1450 mm from the floor to comply with Royal Mail guidelines). Drill a large clearance hole at each corner of the marked aperture to allow the jigsaw blade to start, then cut carefully along the lines with a sharp jigsaw blade — go slowly on composite doors to avoid chipping the outer skin. Offer up the letterbox plate, mark and drill the fixing holes, and use the bolts supplied to clamp the inner and outer plates together. On composite doors, use a backing plate or washer to spread the load and prevent the fixings from crushing the foam core.
The single biggest time-saver in door and window work is investing five minutes in a proper story rod before you start any installation. A story rod is simply a length of timber onto which you transfer all the critical dimensions — hinge positions, lock height, letterbox aperture, glazing bead positions — directly from the job, rather than relying on a tape measure each time. Once you’ve set out the rod from your first door, every subsequent identical door on the same job can be marked out in under two minutes with no maths and no risk of transposing figures. Experienced joiners use story rods as standard practice; it’s the kind of habit that separates a clean, professional result from one that always seems to be slightly off.
Sources
- HSE guidance on safe working practices when installing and replacing glazing, including safety glass requirements and working at height regulations relevant to window installation. — hse.gov.uk
- FENSA — the UK’s official government-authorised scheme for the self-certification of replacement windows and doors, explaining when certification is required and how to comply with Building Regulations. — fensa.org.uk
- Planning Portal — UK government planning and Building Regulations guidance covering when door and window replacements require approval and the energy efficiency standards that apply under Part L. — planningportal.co.uk
This guide is for general information only. Always work safely and follow manufacturer instructions. DIYnut accepts no liability for injury or damage arising from DIY work.