How to Tile a Bathroom Wall – 2026 Guide
How to Tile a Bathroom Wall
Get professional-looking bathroom tiles fitted straight, level, and built to last.
To tile a bathroom wall, prepare and prime the surface, set a level datum line, apply tile adhesive with a notched trowel, press tiles firmly into place, leave to cure, then grout and seal all joints. Allow 24–48 hours before exposing to water.

Establish a Level Starting Line
Use a spirit level to draw a horizontal datum line across the wall, positioned one tile height up from the lowest point of the floor or bath edge — this compensates for any unevenness in the floor or tray. Fix a temporary timber batten along this line with screws; it acts as a ledge to keep your first row of tiles perfectly level. Plumb vertical lines from the centre of the wall outward so cut tiles at each end are equal in size and do not look lopsided.
Apply Adhesive and Set the First Tiles
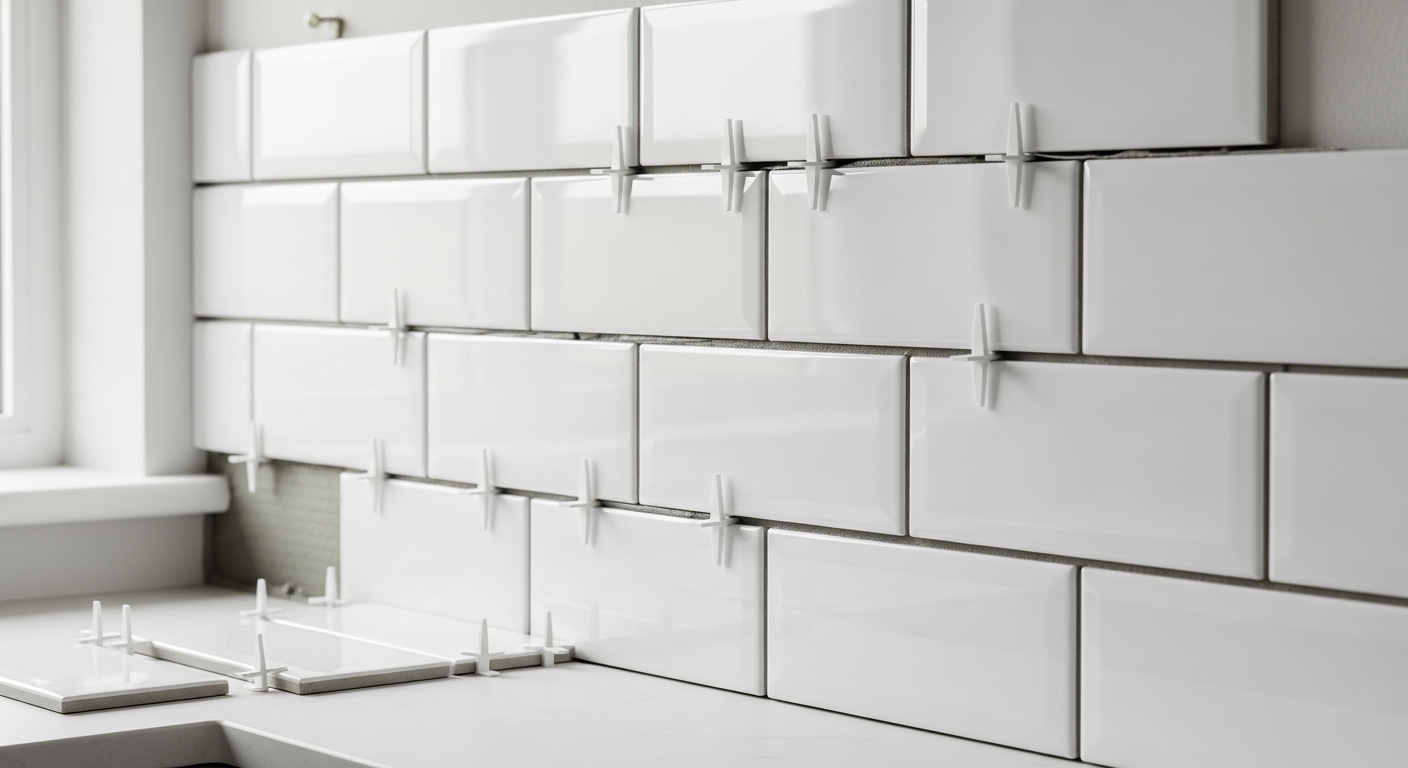
Mix waterproof tile adhesive to the manufacturer’s consistency — it should hold a peak without slumping. Spread a workable section (roughly half a square metre) onto the wall with the flat edge of the notched trowel, then comb through with the notched edge to create even ridges. Press each tile firmly into the adhesive with a slight twisting motion and use tile spacers at every joint to maintain consistent gaps. Check with a spirit level every few tiles and tap adjustments in gently with a rubber mallet.
Cut Tiles for Edges and Obstacles
Measure and mark cut tiles accurately before taking them to the tile cutter. Score-and-snap cutters work well for straight cuts on ceramic tiles; a wet-cutting angle grinder with a diamond tile blade handles porcelain and complex shapes around pipes or switches. Always wear safety goggles and a dust mask when cutting tiles. Remove the timber batten once the field tiles have set, then cut and fit the bottom row of tiles to fill the gap at the floor or bath edge.
Allow Adhesive to Cure, Then Grout
Leave the adhesive to cure for a minimum of 24 hours — do not rush this step. Remove all tile spacers once the adhesive has set. Mix grout to a smooth, lump-free consistency and work it into the joints diagonally with a grout float , pressing firmly to fill each joint completely. Wipe away excess grout with a damp sponge before it hardens, rinsing the sponge frequently. Buff the tile faces with a dry cloth once the grout has dried to a haze. For more detail on tiling techniques and finishes, see our Tiling Guide .
Seal Joints and Apply Silicone
Once the grout has fully cured (typically 24 hours), apply a grout sealer to protect against moisture penetration and staining. Fill all movement joints — corners, junctions between tiles and the bath or shower tray, and any internal angles — with bathroom-grade silicone sealant rather than grout. Grout is rigid and will crack at movement points; silicone flexes with the structure. Smooth the silicone bead with a wet finger or sealant tool and allow it to cure fully before using the shower or bath.
Frequently Asked Questions
Do I need to use special adhesive for a bathroom?
Yes. Always use a waterproof or flexible tile adhesive rated for wet areas in bathrooms. Standard adhesive is not formulated to withstand sustained moisture and will fail behind a shower or bath surround.
Can I tile directly onto plasterboard in a bathroom?
How long should I wait before using the shower after tiling?
Allow at least 24 hours for adhesive to cure and a further 24 hours after grouting. With silicone sealant, check the manufacturer’s guidance — most bathroom silicones require 24 hours before water exposure. Rushing this risks joint failure.
How do I calculate how many tiles I need?
Measure the total wall area in square metres, then add 10–15% for cuts and breakages. Work out how many tiles fit into a square metre based on the tile size given in the packaging, then multiply. Always order slightly more than you think you need — batch colours can vary.
What size grout joint should I use for bathroom wall tiles?
For standard wall tiles, a 2–3 mm joint is typical and gives a clean, contemporary look. Larger format tiles (above 600 mm) often suit a 3–5 mm joint. Check the tile manufacturer’s guidance, as some rectified tiles can be laid with joints as tight as 1.5 mm.
When setting out your tile layout, always dry-lay a row of tiles along the floor first to check that the cut tiles at each end are no less than half a tile width — anything narrower looks awkward and is harder to cut cleanly. Shift your vertical centre line by half a tile if needed before you touch the adhesive.
Sources
- HSE — Construction: Tiling and associated risks — hse.gov.uk
- Which? — How to tile a wall — which.co.uk
- GOV.UK — Building regulations: bathrooms and wet rooms — gov.uk
This guide is for general information only. Always work safely and follow manufacturer instructions. DIYnut accepts no liability for injury or damage arising from DIY work.


