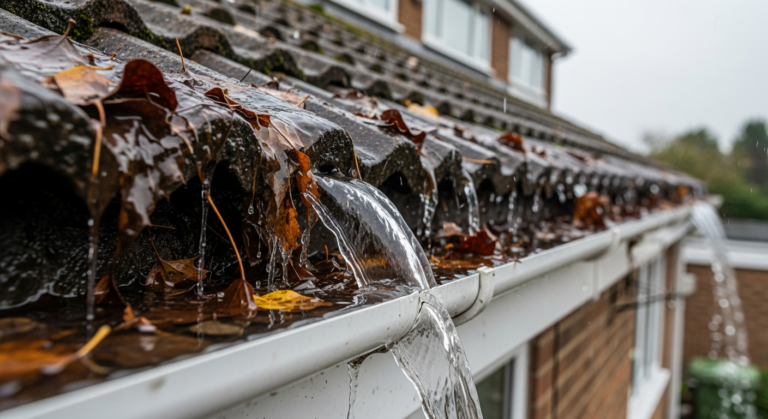
How to Fix Leaking Gutters – DIY Guide
Fix leaking gutters by cleaning out debris, then sealing cracks or joints with gutter sealant. Replace cracked sections or split unions where sealant alone won’t hold. Most repairs take under two hours and cost £15–£40 in materials.


- Ladder with standoff bracket
- Wire brush
- Stiff-bristle brush
- Putty knife or scraper
- Cloth rags
- Bucket
- Safety gloves
- Safety glasses
- Gutter sealant (waterproof, flexible)
- Replacement gutter union or joint connector
- Replacement gutter section (if required)
- Gutter clips or brackets
- Exterior-grade primer
- Fine wire wool or abrasive pad
- Masking tape
- Damp-proof cloth or paper towel
Step-by-Step Guide
Set Up Your Ladder Safely
Position a ladder on firm, level ground and use a standoff bracket to keep it clear of the gutter itself — resting the ladder against the gutter will distort or crack it. Always have someone foot the ladder or use a ladder-stay anchored to the fascia. Work in dry conditions; wet plastic guttering is slippery. The HSE guidance on ladder use recommends maintaining three points of contact at all times when working at height.
Clear the Gutter of Debris
Scoop out leaves, moss, and compacted silt by hand, then flush the gutter run with a bucket of water to identify where the leak originates. Water pooling at a joint indicates a failed seal; water weeping through the gutter body indicates a crack or hole. This step is essential — attempting to seal a blocked or dirty gutter traps moisture and the repair will fail within weeks. If blockages are persistent, our guide to fixing a roof leak covers upstream causes that force water into gutters under pressure.
Prepare the Repair Area
Once dry, use a wire brush and fine wire wool to remove rust, paint flakes, or old sealant residue from around the leak site. On plastic guttering, scuff the surface lightly with an abrasive pad — this gives the new sealant a key to bond to. Wipe the area clean with a dry cloth. Any trace of damp, grease, or loose material will prevent the sealant from adhering properly.
Apply Gutter Sealant to Joints and Cracks
For a leaking joint, separate the two gutter sections by releasing the union clip, clean both mating faces thoroughly, then apply a continuous bead of flexible waterproof gutter sealant inside the union before pressing the sections back together and clipping them home. For a crack in the gutter body, apply masking tape either side of the crack to keep edges clean, press sealant firmly into and over the crack with a putty knife, then smooth flat and remove the tape before the sealant skins. Allow the full cure time stated on the product — typically 24 hours — before testing with water. For larger structural issues such as emergency roof repair situations that are forcing water into the gutter system, address the roof first.
Replace Damaged Sections or Unions
Where a gutter section is split, badly cracked, or corroded beyond repair, sealant is a temporary fix at best — replace the section entirely. Measure the run carefully, buy matching profile guttering (half-round, square, or ogee), and remove the damaged section by releasing the union clips at each end. Fit the new section with fresh sealant in every union and snap the clips firmly. Check gutter brackets at the same time; any loose or corroded bracket will cause the repaired section to sag and pool water at the wrong point. Sagging gutters are a common reason repairs fail — see our full guide on fixing a sagging gutter if the fall is wrong.
Test and Check the Downpipe Flow
Pour a full bucket of water into the highest point of the gutter run and watch the entire length — check every joint for seepage and confirm water flows freely into the downpipe without backing up. A blockage in the downpipe can cause water to overflow at the joints even after a perfect repair, so rod the downpipe with a flexible drain rod if flow is sluggish. Once water runs clear and all joints are dry, the repair is complete. For ongoing protection, consider fitting a leaf guard to reduce future blockage build-up.
Frequently Asked Questions
How do I find where my gutter is leaking?
Pour a bucket of water in at the highest point of the run during dry weather and watch carefully. Leaks at unions will show as a drip from the joint line; leaks from the gutter body will seep or spray directly through the material. Staining on the fascia or wall below is a reliable indicator of where to look first.
Can I fix a leaking gutter in winter?
Most gutter sealants require a minimum application temperature of around 5°C and a dry surface, so cold, frosty, or wet conditions will prevent proper curing. In urgent situations, a self-adhesive waterproof repair tape can provide a temporary fix until conditions allow a proper sealant repair.
How long does gutter sealant last?
A correctly applied flexible gutter sealant on a clean, dry surface can last 10–15 years, though UV exposure and thermal cycling on south-facing elevations may shorten this. Inspect gutter joints every two to three years as part of routine maintenance.
My gutter leaks at the downpipe connection — how do I fix it?
Remove the downpipe outlet from the gutter, clean both surfaces thoroughly, apply a fresh bead of waterproof gutter sealant around the outlet socket, and refit. Ensure the outlet clip or bracket is secure — a loose connection allows movement that breaks the sealant seal. You may also want to replace the gutter section if the outlet itself is cracked.
Is a leaking gutter a serious problem?
Yes — persistent gutter leaks saturate the fascia boards and soffit, causing rot, and allow water to track down the external wall into the cavity or through the foundations. Which? advises treating gutter leaks promptly to avoid much costlier damp and structural repairs. You can also review our complete roofing guide for a broader maintenance checklist.
Before applying any sealant, run a heat gun or hot-air gun briefly over the repair area on cold days — not to make it hot, but to drive off any residual surface moisture invisible to the eye. A surface that looks dry can still carry enough condensation to prevent sealant adhesion, particularly on north-facing elevations in winter.
Sources
- HSE — Working at height: A brief guide — hse.gov.uk
- Which? — How to maintain your gutters — which.co.uk
- Gov.uk — Repair or maintenance of your home: permitted development rights — gov.uk
This guide is for general information only. Always work safely and follow manufacturer instructions. DIYnut accepts no liability for injury or damage arising from DIY work.