How to Fix Damp on Interior Walls – DIY Guide
How to Fix Damp on Interior Walls
Identify the cause, treat it correctly, and stop damp coming back for good.
To fix damp on interior walls, identify whether it is rising damp, penetrating damp, or condensation, treat the root cause, apply a damp-resistant treatment or membrane, then replaster and redecorate. Skipping diagnosis means the damp returns regardless of how well you finish the surface.


Fix the Root Cause Before Any Repairs
No internal treatment will work long-term if the source of damp has not been resolved. For penetrating damp, check and repair the external wall, repoint missing mortar, fix guttering, or seal around window frames before doing anything inside. For rising damp, inject a chemical damp-proof course into the mortar course just above ground level — drill holes at 115 mm intervals, inject the fluid, and allow it to cure fully per the manufacturer’s instructions. For condensation, improve ventilation by fitting extractor fans in kitchens and bathrooms, and consider insulating cold external walls to raise their surface temperature.
Hack Off Damaged Plaster
Once the source is fixed, remove all salt-contaminated and blown plaster from the affected area using a cold chisel and club hammer — tap the wall and listen for a hollow sound to find the full extent of the damage. Hygroscopic salts left in old plaster will continue to draw moisture from the air even after damp-proofing, so do not try to patch over them. Aim to hack back at least 300 mm beyond the visible tide mark or staining. Brush the exposed masonry thoroughly with a stiff brush to remove dust, loose material, and salt deposits. If you are unsure how to assess blown plaster, see our guide to filling large cracks in plaster for related background on plaster failure.
Apply a Damp-Resistant Treatment
For rising or penetrating damp, apply a waterproof tanking slurry or sand and cement render coat mixed with a waterproofing additive directly to the bare masonry. Work the slurry into the surface with a stiff brush, building up two coats, and allow each coat to cure before applying the next — typically 24 hours between coats. For condensation-related mould, treat the bare surface with an anti-mould solution diluted to the correct ratio, allow it to dry fully, and apply a stabilising primer before replastering. If the damp area is large and you plan to skim the whole wall afterwards, read our guide on how to skim coat a wall before mixing any plaster.
Replaster the Area
Once the waterproof render or treatment has fully cured, apply a bonding coat plaster to build back the thickness of the wall, followed by a finish coat to achieve a smooth surface ready for decoration. Dampen the surface before applying each coat to prevent it drying too fast and cracking. Allow the plaster to dry thoroughly — new plaster can take several weeks to fully dry out depending on wall thickness and room conditions — before attempting to paint or hang wallpaper. For guidance on achieving a flat finish, see our plaster a wall for beginners guide.
Redecorate with Appropriate Products
Once the plaster is fully dry, apply a stabilising primer to seal the surface and promote adhesion. In areas prone to condensation — bathrooms, kitchens, and poorly ventilated rooms — use a moisture-resistant or bathroom-specific emulsion rather than standard matt paint, as this resists mould growth long-term. Two coats are standard; allow each coat to dry fully before applying the next. If you plan to paint the entire room, our guide on how to paint a room covers preparation, cutting in, and achieving a professional finish.
Frequently Asked Questions
How do I know if I have rising damp or condensation?
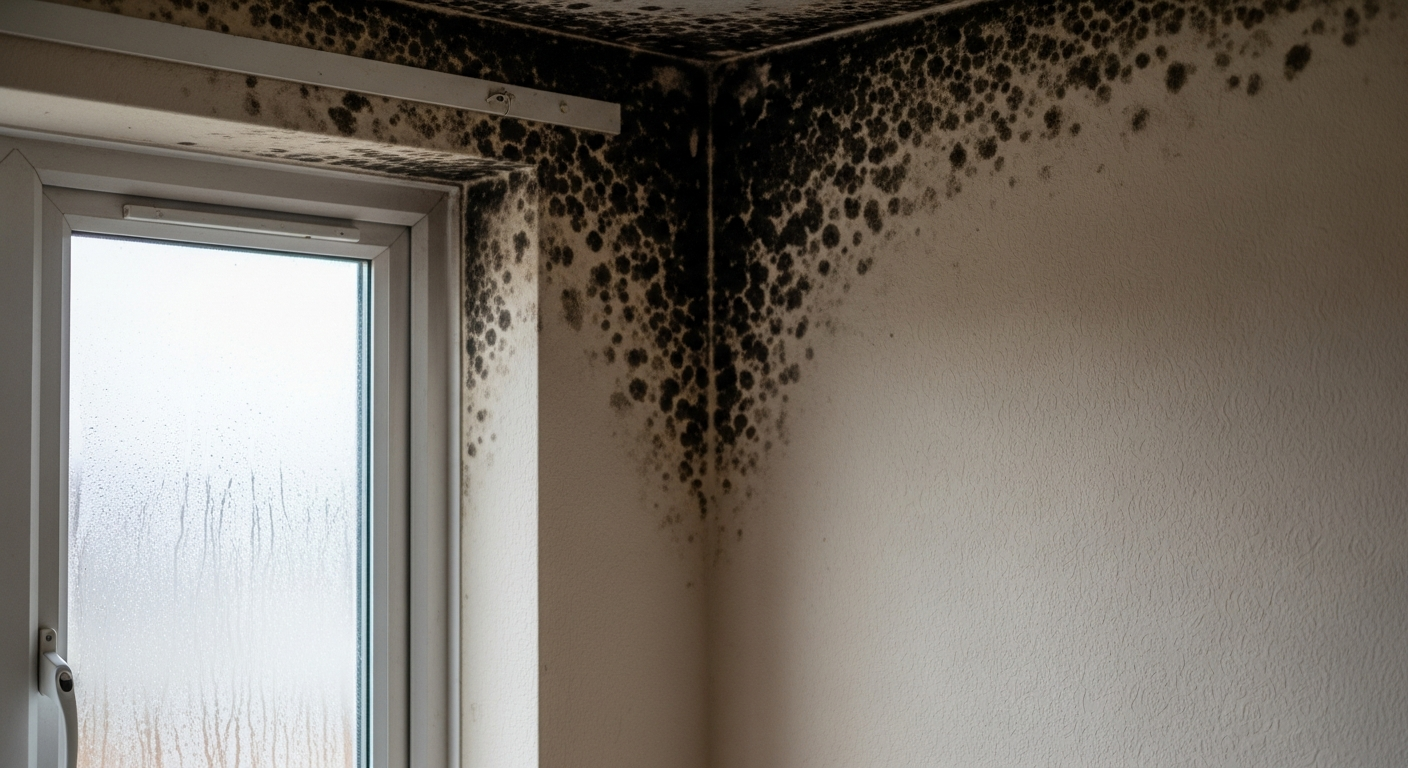
Rising damp leaves a distinct tide mark up to about one metre above floor level and is often accompanied by white salt deposits (efflorescence) on the wall surface. Condensation, by contrast, tends to appear as black mould concentrated in corners, around windows, and on cold external walls — usually without a tide mark. A moisture meter can help confirm whether moisture is present deep in the masonry (rising or penetrating damp) or only on the surface (condensation). For a detailed comparison, see our Insulation & Damp Guide.
Can I fix rising damp myself or do I need a specialist?
Injecting a chemical damp-proof course is a DIY-achievable task if the damp is limited to a single wall and you are comfortable with basic masonry work. Hire a specialist survey if the damp is widespread, affects a basement, or if the existing damp-proof course appears structurally compromised — a one-sided view from inside the property can miss the full extent of the problem.
How long does new plaster take to dry after treating damp?
As a general rule, allow one week of drying time per millimetre of plaster thickness, though this varies with room temperature, ventilation, and humidity. A standard 12–15 mm two-coat repair on an external wall can take three to six weeks to dry fully. Do not apply paint or wallpaper until the plaster has turned from dark to an even pale colour throughout.
What is the best paint to use on a wall that had damp?
Use a moisture-resistant emulsion or a specialist anti-mould paint in rooms prone to condensation. Always apply a stabilising primer first on freshly plastered or repaired surfaces to seal the substrate and prevent uneven absorption. Standard matt emulsion on a previously damp wall with no primer will show patchy coverage and may allow mould to return more quickly.
Do I need to tell my insurer or landlord about damp?
If you rent your property, damp that is not caused by tenant behaviour is generally the landlord’s responsibility to fix under the Landlord and Tenant Act 1985 — report it in writing promptly. Homeowners should check their buildings insurance policy, as some structural damp issues may be covered. The government’s guidance on housing disrepair is available at gov.uk.
When injecting a chemical damp-proof course, drill at a slight downward angle of 10–15 degrees rather than horizontally — this lets the injection fluid pool and fully saturate the mortar course instead of running out before it can be absorbed. Always inject slowly with steady pressure and allow the fluid to draw in naturally rather than forcing it.
Sources
- HSE — Dampness in Buildings: Causes and Remedies — hse.gov.uk
- Which? — Damp problems: how to identify and fix them — which.co.uk
- GOV.UK — Landlord responsibilities: property repairs and damp — gov.uk
This guide is for general information only. Always work safely and follow manufacturer instructions. DIYnut accepts no liability for injury or damage arising from DIY work.


