How to Prep and Undercoat Wood – DIY Guide
Painting & Decorating › Woodwork
How to Prep and Undercoat Wood
Get a flawless, lasting paint finish by prepping and undercoating wood correctly.
Prep and undercoat wood by sanding it smooth, filling any holes or cracks, wiping away dust, then applying a suitable wood primer or undercoat before topcoating. Proper prep prevents peeling, uneven coverage, and raised grain ruining your final finish.


Fill Holes, Cracks and Dents
Apply wood filler to any nail holes, splits, dents, or open grain using a putty knife or your finger, pressing it firmly into the void. For deeper holes, build up in layers rather than one thick application — thick filler shrinks as it dries and will crack. Use fine surface filler for hairline cracks or shallow imperfections. Overfill slightly so you can sand back to a flush finish once dry. Allow the filler to cure fully according to the manufacturer’s time — rushing this step means you’ll sand through wet filler and create a mess. Once dry, the surface should feel completely solid with no flex.
Sand the Wood Smooth
Start with medium-grit paper (80–120 grit) to knock back rough grain, filled areas, and any remaining nibs of old paint. Always sand in the direction of the grain — sanding across it leaves visible scratches that show under a gloss or satinwood topcoat. Once the surface is even, move to fine-grit paper (180–240 grit) for a final smooth pass. On moulded sections — such as skirting boards or architrave — wrap sandpaper around a shaped block or use a folded sheet to follow the profile. If you’re prepping skirting boards for painting, our guide on how to paint skirting boards covers the full process from here.
Remove All Dust Before Priming
Sanding dust is the hidden enemy of a good paint finish — even a thin layer left on the surface will create a gritty, porous undercoat. Use a soft brush or vacuum to remove the bulk of dust, then wipe the entire surface with a tack cloth or a lint-free cloth lightly dampened with water (for water-based systems) or white spirit (for oil-based systems). Pay particular attention to rebates, mouldings, and corners where dust collects. Allow the surface to dry completely before applying primer — typically 10–15 minutes. Wear a dust mask throughout the sanding and cleaning stages to protect your lungs from fine timber dust.
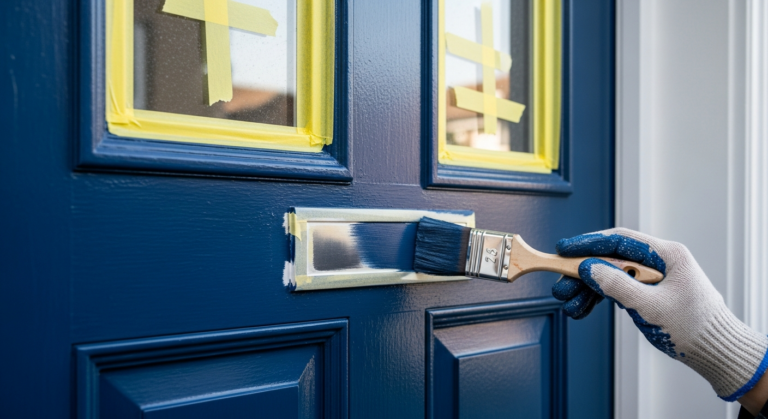
Apply Wood Primer or Undercoat
Choose the correct primer for your situation: a dedicated wood primer for bare timber, an all-surface undercoat for previously painted wood in sound condition, or a stain-blocking primer if you’re covering deep stains or knots you missed earlier. Apply with a 50mm paintbrush using long, even strokes in the direction of the grain. Work the primer into any mouldings and recesses first, then finish with light strokes along the flat faces. One coat is usually sufficient for previously painted wood; bare timber often benefits from two coats to fully seal the grain. Allow each coat to dry according to the product instructions — typically 2–4 hours for water-based primers, longer for oil-based. Once dry, lightly sand with 240-grit paper to remove any raised grain or brush marks, then wipe clean before applying your topcoat. For a full overview of how prep fits into the wider decorating process, see our Painting & Decorating Guide.
Check the Surface and Apply a Second Coat if Needed
Once the first coat of primer is fully dry, inspect the surface in raking light — angle a torch or work lamp low across the surface to reveal any remaining imperfections. Fill and sand any remaining nibs, dents, or grain lift, wipe clean, and apply a second coat of primer if the wood is still visibly absorbing product or if you can see bare patches. The surface should be uniform in sheen and colour before you proceed to topcoating. A well-primed surface makes topcoating far easier: fewer coats needed, better adhesion, and a finish that lasts. When you’re ready to paint the room woodwork as a whole, our guide on how to paint a room covers sequencing woodwork with walls and ceilings.
Frequently Asked Questions
Do I need to sand wood before applying undercoat?
Yes — always sand before undercoating. Sanding removes loose material, flattens the surface, and gives the primer a mechanical key to grip. Without it, even good-quality primer is more likely to peel over time.
What is the difference between a wood primer and an undercoat?
A wood primer is designed to seal bare timber and penetrate the grain, creating a stable base for subsequent coats. An undercoat is applied over a primed or previously painted surface to build opacity and provide a uniform base for the topcoat — the two products work together rather than being interchangeable. For guidance on choosing the right finish for your topcoat, see our gloss vs satinwood paint guide.
Can I use the same primer on interior and exterior wood?
Not always — exterior wood primers are formulated to cope with moisture, temperature change, and UV exposure, so they contain different binders to interior versions. Always check the product label and use an exterior-grade primer for any wood exposed to the elements.
How long should I leave primer before applying a topcoat?
Water-based primers are typically recoatable in 2–4 hours; oil-based primers usually need a minimum of 16 hours and sometimes up to 24. Check the manufacturer’s drying time on the tin and always err on the side of longer — topcoating too soon is one of the most common causes of wrinkling.
Do I need to prime wood that has already been painted?
If the existing paint is sound, well-adhered, and you’re recoating in a similar colour, a light sand and a coat of all-surface undercoat is usually sufficient. However, if you’re painting bare patches, changing from a dark to a light colour, or the surface is stained, a proper primer coat will give a far better result. If you’re also dealing with damaged areas, our guide on filling wall cracks can help with adjacent surfaces before you prime.
After applying the first primer coat on bare softwood, thin the primer by around 10% with the appropriate solvent (water for water-based, white spirit for oil-based) — this first ‘mist coat’ soaks deeper into the grain, sealing it more thoroughly than a full-strength coat and dramatically reducing grain-raise on the second coat. Most DIYers apply full-strength primer from the start and spend twice as long sanding out the roughness afterwards.
Sources
- HSE — Woodworking: dust and health — hse.gov.uk
- Which? — How to paint wood — which.co.uk
- Historic England — Practical Building Conservation: Timber — historicengland.org.uk
This guide is for general information only. Always work safely and follow manufacturer instructions. DIYnut accepts no liability for injury or damage arising from DIY work.