How to Install a Bathroom Extractor Fan – DIY Guide
How to Install a Bathroom Extractor Fan
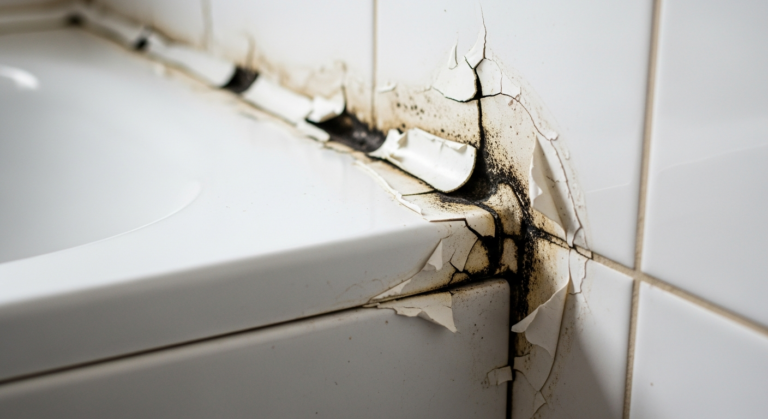
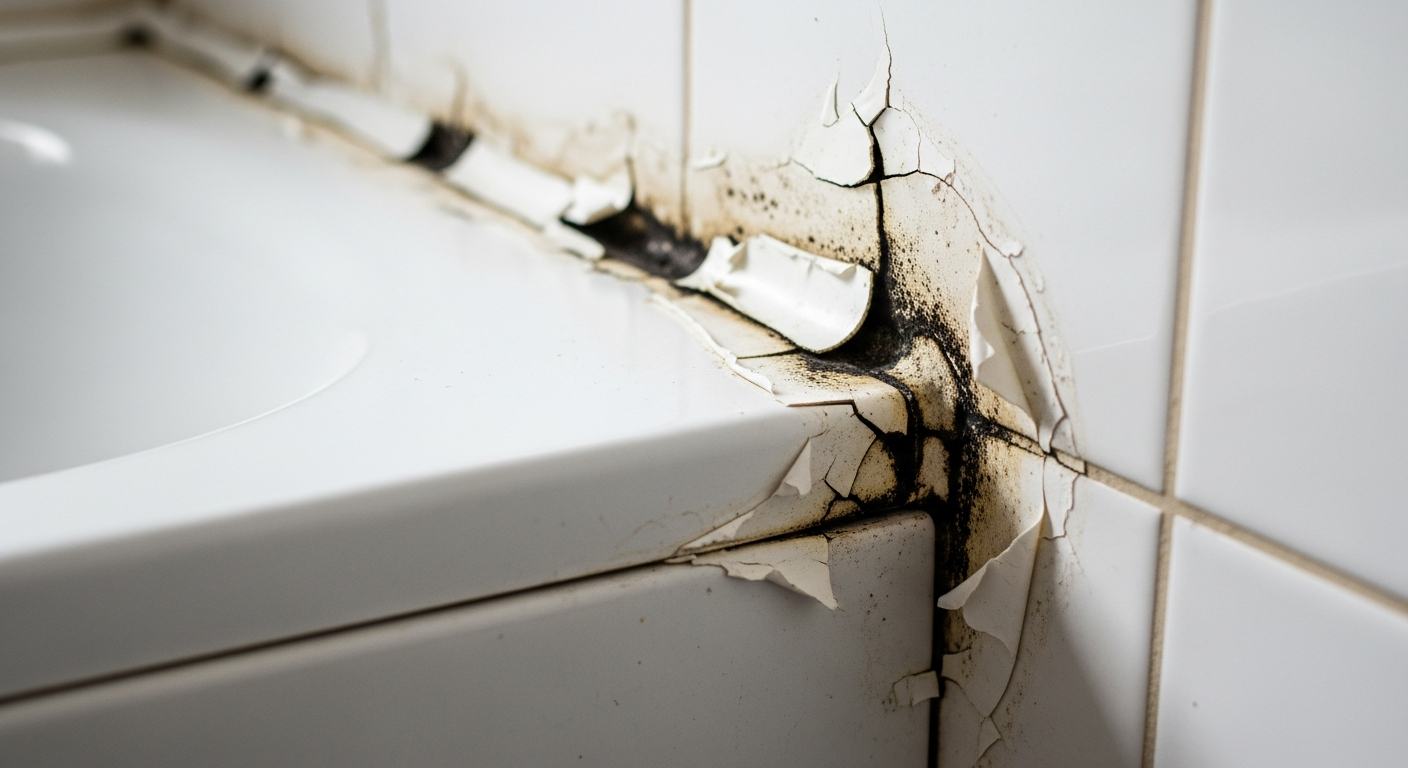
Stop mould before it starts by fitting a bathroom extractor fan yourself.
Installing a bathroom extractor fan involves cutting a hole in the wall or ceiling, routing ducting to the outside, wiring the fan to a switched or timer circuit, and securing the unit in place. Most installations take 2–3 hours with basic tools.

- Cordless drill
- Hole saw or jigsaw
- Flat-head and cross-head screwdrivers
- Wire stripper
- Voltage tester
- Spirit level
- Fish tape or cable rods
- Pencil and tape measure
- Bathroom extractor fan unit
- Rigid or flexible ducting
- External wall or soffit vent grille
- Duct connector and reducer if required
- Heat-resistant duct tape
- 2.5mm² twin-and-earth cable
- Waterproof electrical junction box
- Foam draught-excluding tape
Step-by-Step Guide
Turn Off the Power and Plan the Route
Switch off the circuit at the consumer unit and confirm it is dead using a voltage tester before touching any wiring. Decide whether you are ducting through an external wall, ceiling void, or soffit — the shorter and straighter the duct run, the more effective the fan will be. If you are running new cable, plan a route that avoids joists and existing services. Mould on the bathroom ceiling is often a sign the current ventilation is already failing, so take time to position the fan as close to the moisture source as possible.
Cut the Fan Aperture and Duct Hole
Mark the fan position on the ceiling or wall using a pencil and the template supplied with the unit — most fans require a circular cut-out between 100mm and 150mm in diameter. Use a hole saw on plasterboard or a jigsaw on timber-framed panels, keeping the tool steady to produce a clean edge. At the external wall, cut a corresponding hole using a core drill or masonry bit to accept the duct spigot, angling the hole very slightly downward toward the outside so condensation cannot track back into the room.
Fit the Ducting and External Grille
Push rigid ducting or flexible duct through the wall or ceiling void, connecting the internal spigot to the fan housing and the external spigot to the wall grille. Keep duct runs as short and straight as possible — every bend reduces airflow. Seal all joints with heat-resistant duct tape rather than standard PVC tape, which degrades in humid conditions. Fix the external grille to the wall using the fixings provided, and bed it on a thin line of exterior sealant to prevent draughts and water ingress.
Wire the Fan to the Circuit
Bathroom fan wiring must comply with Part P of the Building Regulations — in most cases this means the work must be notified to your local authority or carried out by a registered electrician. Fans in bathroom zones 1 or 2 require an IP44-rated unit as a minimum. Connect the fan into the lighting circuit or a dedicated spur, wiring to run continuously when the light is on or to a timer overrun as appropriate. All connections within the bathroom must be made inside suitable waterproof enclosures. If you are in any doubt about the electrical work, contact a registered electrician via the NICEIC find-a-contractor tool before proceeding.
Secure the Fan Unit and Test
Offer the fan housing into the aperture, securing it with the screws or clips provided by the manufacturer. Apply foam draught-excluding tape around the perimeter of the housing where it meets the ceiling or wall surface to prevent air bypassing the unit. Restore power at the consumer unit, switch the light on, and confirm the fan starts — hold a strip of tissue near the grille to check airflow is drawing air out of the room. If the fan has a timer function, test that it runs on for the set period after the light is switched off. For guidance on keeping your bathroom free from moisture problems long-term, see our fix for mould on bathroom ceilings.
Frequently Asked Questions
Do I need an electrician to install a bathroom extractor fan?
Bathroom electrical work is notifiable under Part P of the Building Regulations in England and Wales. You can do the work yourself but must notify your local building control authority, or use a registered electrician who can self-certify the work. Failing to notify can cause problems when selling your home.
Where is the best place to position a bathroom extractor fan?
Position the fan as far as possible from the main air inlet — usually the gap under the door — so fresh air is drawn across the whole room before being exhausted. Directly above the shower or bath is ideal, provided the fan carries the correct IP rating for that zone.
Can I vent a bathroom fan through the ceiling into the loft?
No. The duct must pass through the loft and terminate at an external vent on the soffit, roof, or gable wall. Venting into the loft void is a common cause of roof condensation and structural timber damage, and does not comply with Building Regulations Approved Document F.
What size extractor fan do I need for a bathroom?
Building Regulations require a minimum extract rate of 15 litres per second for an intermittent fan in a bathroom. For larger bathrooms or rooms with poor natural ventilation, size up accordingly — the fan’s rated airflow figure is usually printed on the packaging or listed in the product specification. Our bathroom guide covers ventilation requirements in more detail.
Should a bathroom extractor fan run all the time or only when the light is on?
An intermittent fan wired to run with the light switch plus a timer overrun of 10–15 minutes is the most common and energy-efficient setup, and meets Building Regulations requirements. Continuously running fans are also compliant but consume more electricity and are typically used only where a room has no opening window at all. Persistent humidity issues can contribute to problems like failing bath silicone, so getting the overrun timing right matters.
Before cutting any holes, tape a piece of tissue over the proposed fan position, open the bathroom door slightly, and check whether there is a natural draught flowing toward that point — it confirms your chosen location is within the main air-flow path. Also, always order a duct reducer collar at the same time as the fan: fan outlet diameters and rigid duct sizes rarely match exactly straight out of the box, and waiting days for the right adaptor is the most common cause of a half-finished installation.
Sources
- HSE — Electricity at Work in Wet Areas — hse.gov.uk
- Planning Portal — Building Regulations Part F: Ventilation — planningportal.co.uk
- NICEIC — Find a Registered Electrician — niceic.com
Safety Notice: Electrical and plumbing work can be dangerous if done incorrectly. In the UK, certain electrical work must comply with Part P of the Building Regulations and certain plumbing work with Part G. If in doubt, consult a qualified electrician (NICEIC/NAPIT registered) or plumber (CIPHE/WaterSafe registered). This guide is for general information only — it is not a substitute for professional advice.