How to Replace Bathroom Taps – DIY Guide
Replace bathroom taps by isolating the water supply, disconnecting the old tap, and fitting the new one using the correct fittings for your basin or bath. Most jobs take 1–2 hours with basic plumbing tools and no specialist knowledge required.


- Adjustable spanner
- Basin wrench
- Slip-joint pliers
- Flathead screwdriver
- Bucket
- Cloth or old towel
- Pipe cutter
- Replacement bathroom taps
- Flexible tap connectors
- Tap back nuts
- Fibre tap washers
- PTFE tape
- Silicone sealant
- Penetrating oil
Step-by-Step Guide
Isolate the Water Supply
Turn off the hot and cold water supply to the basin or bath before touching anything else. Look for isolating valves on the supply pipes beneath the basin — turn the screw slot a quarter-turn until it runs across the pipe. If there are no isolating valves, you will need to turn off the water supply at the mains stopcock. Once isolated, open the old tap fully to release residual pressure and drain the pipes.
Remove the Old Taps
Place a bucket and old towel beneath the basin to catch drips. Use an adjustable spanner or basin wrench to loosen the back nuts securing the tap to the basin — these are often awkward to reach, which is where the long-handled basin wrench earns its keep. If the nuts are corroded and stubborn, apply penetrating oil and leave it for 10–15 minutes before trying again. Disconnect the flexible tap connectors from the supply pipes, then lift the old taps clear. If your taps have been sealed with silicone, carefully cut through it with a craft knife to avoid chipping the basin.
Prepare the Tap Holes
Clean the tap holes and the surrounding surface thoroughly, removing any old silicone, limescale, or debris. A flat scraper works well on ceramic; take care not to scratch the basin. Check the diameter of your tap holes — standard UK basin holes are typically 22 mm, but baths and older basins can vary. Measure before buying replacement taps to confirm the body shank will fit. If fitting a monobloc tap onto a basin with two holes, you will need a blanking plate to cover the redundant aperture.
Fit the New Taps
Feed the tap tails and any included top-hat washers or back plates through the tap hole from above. Below the basin, fit the rubber sealing washer, then the back nut — tighten by hand first, then a further half-turn with a basin wrench. Do not overtighten; ceramic basins crack if back nuts are forced. If the tap body rocks on a curved basin surface, bed it on a thin run of silicone sealant before tightening. For a bath, refer to our guide on replacing a kitchen tap for the same fundamental principles applied to deck-mounted fittings.
Connect the Water Supply
Wrap two to three layers of PTFE tape clockwise around the threaded tap tails before connecting the flexible tap connectors — this ensures a watertight seal at every threaded joint. Hand-tighten the connectors onto the tap tails first, then snug them up with a spanner — half to three-quarter of a turn beyond hand-tight is sufficient. Do not use an open-ended spanner on soft brass connectors without supporting the fitting; the threads strip easily. If you notice the tap won’t turn off properly during testing, the valve cartridge or washer may not be seated correctly — disassemble and re-check before leaving the job.
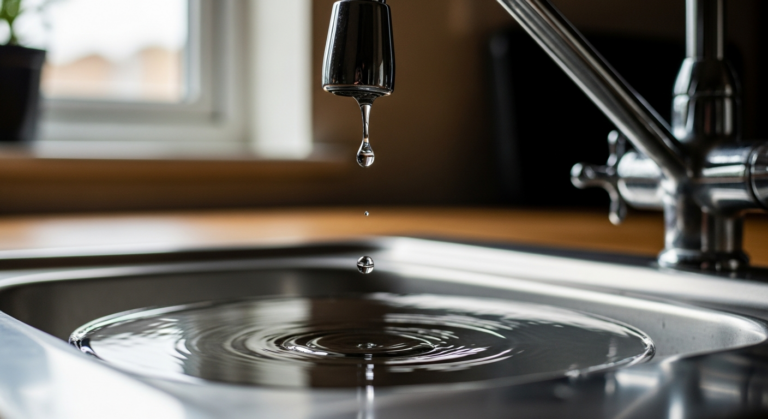
Test and Check for Leaks
Slowly reopen the isolating valves or mains stopcock and allow the system to repressurise. Run both hot and cold through the new taps and visually inspect every connection underneath — back nuts, tap connectors, and pipe joints — with dry hands so any drips are immediately obvious. A single drop at a compression joint means the nut needs a further quarter-turn; a weep at a threaded joint needs the connector removed and fresh PTFE tape applied. If you fitted a silicone bead around the tap base, leave it to cure for at least 24 hours before getting it wet. Once satisfied, remove the bucket, clean up, and run the taps for 30 seconds to clear any debris from the supply pipes.
Frequently Asked Questions
Do I need a plumber to replace bathroom taps?
Not for a straightforward like-for-like tap swap — this is well within DIY capability. However, if the job involves moving pipework, adding new supply pipes, or any electrical work near water (such as a heated tap), a qualified plumber or electrician registered with a competent persons scheme should carry out that element.
What is a basin wrench and do I really need one?
A basin wrench is a long-handled tool with a pivoting jaw designed specifically to reach back nuts in the confined space behind and beneath a basin. Without one, removing or fitting the back nut on most basins is extremely difficult — attempting it with a standard spanner usually results in a scraped hand and a nut that barely moves.
How do I know if my new taps will fit my existing holes?
Measure the diameter of the existing tap holes — standard UK basins are typically 22 mm (7/8 inch). Also measure the centres between holes on a two-tap basin, as the standard UK spacing is 180 mm. Check both measurements against the manufacturer’s specification sheet before purchasing.
My tap drips constantly after fitting — what have I done wrong?
A dripping tap after installation usually means the tap washer or ceramic cartridge is not seated correctly, or a fibre washer was omitted between a tap tail and connector. Shut off the supply, disassemble the connection, inspect the washer, and reassemble — it almost never requires a new tap.
Can I replace pillar taps with a monobloc mixer on the same basin?
Yes, but only if your basin has a single central hole — a monobloc tap will not fit a basin with two holes without a deck plate to bridge them. Also check your water system: a monobloc with a pull-out spray requires a pressure-balanced supply, which can cause problems on gravity-fed systems where hot and cold pressures differ significantly.
Before buying flexible tap connectors, measure the exact distance from the tap tail to the supply pipe stub rather than estimating — connectors that are too long kink under the basin and eventually fatigue and split. Buy connectors that are 20–30 mm shorter than the gap and allow them to curve gently rather than bend sharply.
Sources
- WaterSafe — Find an approved plumber and plumbing advice — watersafe.org.uk
- HSE — Water supply regulations and safe working guidance — hse.gov.uk
- Which? — How to replace a tap — which.co.uk
Safety Notice: Electrical and plumbing work can be dangerous if done incorrectly. In the UK, certain electrical work must comply with Part P of the Building Regulations and certain plumbing work with Part G. If in doubt, consult a qualified electrician (NICEIC/NAPIT registered) or plumber (CIPHE/WaterSafe registered). This guide is for general information only — it is not a substitute for professional advice.