How to Re-Ridge a Roof – DIY Guide
To re-ridge a roof, remove loose or cracked ridge tiles, chip back the old mortar bed, re-bed each tile on fresh mortar, and point the joints neatly. Work ridge-to-hip and allow 24 hours for the mortar to cure before exposing the roof to rain.


- Extension ladder with stand-off bracket
- Roof ladder (cat ladder)
- Cold chisel
- Club hammer
- Pointing trowel
- Bucket and mixing paddle
- Safety harness and anchor point
- Stiff-bristle brush
- Ridge tiles (matching profile)
- Bagged ready-mix mortar or sand and cement
- Plasticiser additive
- Mortar colouring pigment (to match existing)
- Roofing felt strip or soaker underlap
- Waterproof sealant
- Ridge tile clips or mechanical fixings
- Clean water
Step-by-Step Guide
Set Up Safe Access
Fix an extension ladder with a stand-off bracket so it clears the guttering and rests against the wall, not the gutter. Hook a roof ladder over the ridge to give you a safe working platform. Fit a safety harness anchored to a ridge hook or chimney strap before you climb. Never work on a roof without fall protection — the HSE is clear that roof work is one of the most common causes of serious falls at work and at home.
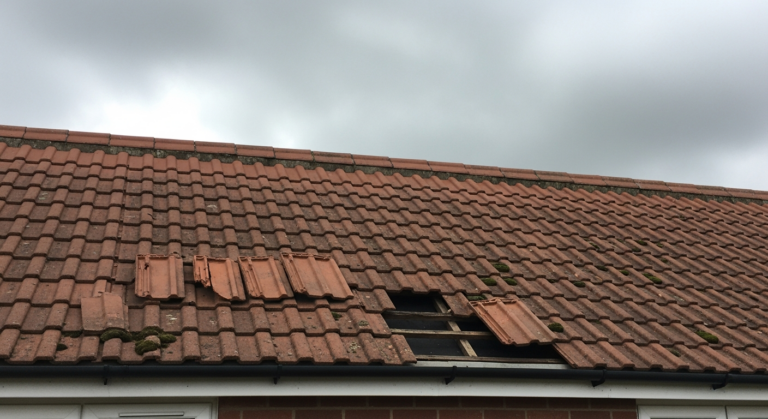
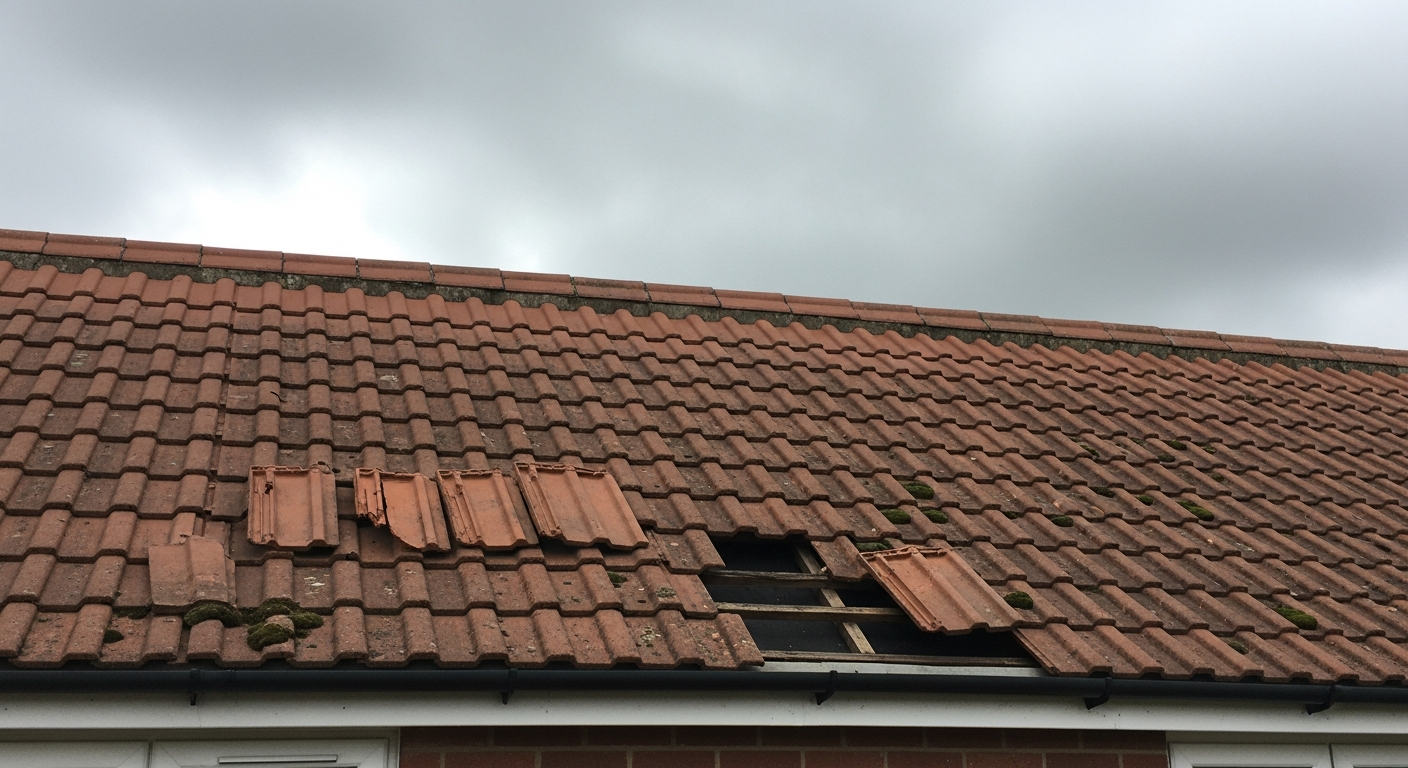
Remove the Old Ridge Tiles
Work from one end of the ridge towards the other. Use a cold chisel and club hammer to break away the old mortar around each ridge tile, then lift the tile clear. Stack them on the roof ladder or pass them down carefully — ridge tiles are heavy. If any tiles are cracked, chipped, or the profile no longer matches your roof tiles, set them aside and use them as a template when ordering replacements. Check our guide to replacing broken roof tiles if you find damage to the field tiles below.
Prepare the Mortar Bed
Chip all old mortar off the tile courses beneath the ridge using a cold chisel, working carefully to avoid cracking the tiles below. Brush away all loose debris with a stiff brush. Dampen the tile surfaces with clean water — dry tiles will draw moisture from the fresh mortar too quickly, weakening the bond. Mix your mortar to a ratio of 3 parts sharp sand to 1 part cement, adding a small amount of plasticiser to improve workability. Match the pigment to the existing mortar where visible from ground level.
Bed the Ridge Tiles
Lay a continuous mortar bed approximately 25–30 mm thick across both top courses of tiles, running along the length of the ridge. Set each ridge tile into the mortar, pressing it down firmly and checking it is aligned with the ridge line and the adjacent tiles. On modern re-ridging work, mechanical ridge tile clips are strongly recommended alongside mortar bedding — these prevent tiles lifting in high winds and are considered best practice. If you spot any cracked flashing or failed mortar around a nearby chimney, address this now; our guide on how to fix a roof leak around a chimney covers the method in full.
Point the Joints
Once all ridge tiles are bedded and aligned, fill the joints between each tile with fresh mortar using a pointing trowel. Work the mortar into each joint fully and finish with a smooth, slightly recessed weatherstruck point — this sheds rainwater rather than holding it. Wipe away any mortar smeared onto tile faces with a damp cloth before it sets. Check the ridge line from the ladder for any tiles that have shifted; re-seat them now before the mortar begins to go off. For persistent roof leak issues more broadly, our emergency roof repair guide covers temporary fixes while you work.
Allow to Cure and Inspect
Leave the mortar to cure for at least 24 hours before any rain exposure — if rain is forecast, drape a tarpaulin over the ridge without touching the wet joints. After curing, descend and inspect the ridge line from ground level with binoculars. Check that all tiles are evenly seated, joints are fully filled, and no tile has shifted. Clear any mortar droppings from the gutters below and check the gutters are still correctly aligned — our guide to fixing leaking gutters will help if they have been disturbed during access.
Frequently Asked Questions
Can I re-ridge a roof myself, or do I need a professional roofer?
Physically the task is achievable for a competent DIYer, but it demands confident working at height with proper fall arrest equipment and a roof ladder. If you are not experienced with roof access, this is a job to leave to a qualified roofer — the HSE reports that falls from roofs are among the most common causes of fatal DIY accidents in the UK.
What mortar mix is correct for bedding ridge tiles?
Use a 3:1 mix of sharp sand to Portland cement with a small amount of plasticiser for workability. Avoid using soft building sand or a mix that is too wet — either will produce a weak bed that fails prematurely under freeze-thaw cycles.
How long does re-ridging a roof last?
A well-bedded and mechanically clipped ridge should last 20–30 years under normal UK weather conditions. Mortar-only ridging on older properties typically fails after 10–15 years as freeze-thaw action breaks down the mortar joints progressively.
Do I need planning permission to re-ridge my roof?
Re-ridging using the same materials and profile is considered routine maintenance and does not normally require planning permission in England. However, if your property is listed or in a conservation area, check with your local planning authority before starting work. See our roofing guide for more on permitted development for roof repairs.
What causes ridge tiles to fail or become loose?
The main cause is mortar degradation through repeated freeze-thaw cycles, where water enters hairline cracks, freezes, expands, and breaks the mortar down over time. UV exposure, settlement movement, and original mortar that was poorly mixed all accelerate the process.
When bedding ridge tiles in cold or dry weather, mist the underlying tile surfaces twice — once five minutes before you lay the mortar bed, and again just before placing each tile. This slows suction enough for the mortar to hydrate fully and achieve full bond strength, which makes a measurable difference to long-term adhesion without softening the mix.
Sources
- HSE — Working on Roofs: Safety in Roofwork (HSG33) — hse.gov.uk
- Planning Portal — Permitted Development: Roofs and Roof Coverings — planningportal.co.uk
- Which? — Roof Repairs: What You Need to Know — which.co.uk
This guide is for general information only. Always work safely and follow manufacturer instructions. DIYnut accepts no liability for injury or damage arising from DIY work.