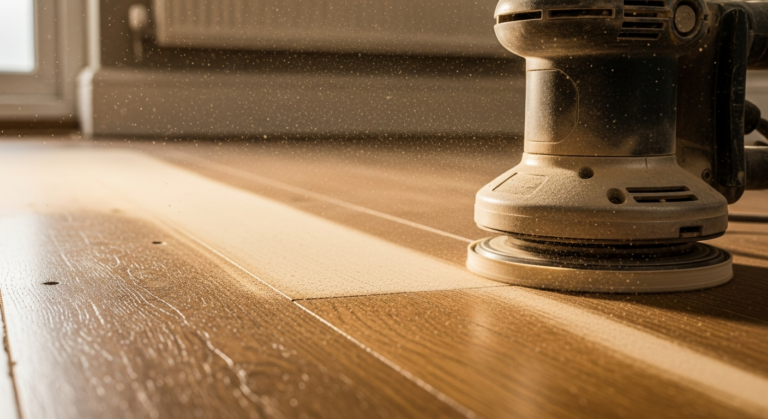
How to Repair Damaged Hardwood Floor – DIY Guide
To repair damaged hardwood floor, clean the area, fill shallow scratches with a colour-matched wax filler stick, and use a two-part wood filler for deeper gouges. Sand flush when dry, then finish with a matching oil or lacquer to blend the repair into the surrounding boards.

- Orbital sander
- Sanding block
- Putty knife
- Hammer
- Chisel
- Vacuum cleaner
- Paint brush
- Lint-free cloth
- Colour-matched wax filler stick
- Two-part wood filler
- Fine-grit sandpaper (120 grit)
- Medium-grit sandpaper (80 grit)
- Hardwood floor finish (oil or lacquer)
- Wood stain (matching existing colour)
- Painters masking tape
- Replacement hardwood board (if needed)
Step-by-Step Guide
Assess and Clean the Damaged Area
Inspect the floor carefully to identify the type of damage — surface scratches, deep gouges, split boards, or boards that have lifted. Vacuum the area thoroughly and wipe down with a dry lint-free cloth to remove all dust and debris. Clean wood accepts fillers and finishes far more reliably; any grit left in a gouge will prevent a proper bond and leave the repair visible. If the board is structurally split or has moved significantly, plan to replace it rather than fill it — filler alone will not hold a board under foot traffic.
Treat Shallow Scratches with a Wax Filler Stick
For surface scratches that have not broken through to bare wood, a colour-matched wax filler stick is the fastest and most effective solution. Rub the stick firmly along the scratch, working it into the groove, then buff away the excess with a lint-free cloth using circular motions. Wax fillers are not suitable for deep gouges or high-traffic areas where they will compress and dislodge over time — if the scratch catches your fingernail, move to the two-part filler in the next step. You can find wax filler sticks in a range of wood tones to match common hardwood species. For similar surface repairs on engineered boards, the same approach applies as when you repair a chipped laminate floor.
Fill Deep Gouges with Two-Part Wood Filler
Mix the two-part wood filler according to the packet instructions — working quickly, as most variants begin to set within five to ten minutes. Press the filler firmly into the gouge with a putty knife, overfilling slightly above the board surface to allow for shrinkage as it cures. Apply masking tape to the edges of adjacent boards to keep the repair clean. Once fully hardened (typically 30–60 minutes), use an 80-grit sanding block to knock back the bulk of the excess, then switch to 120-grit to bring the filler perfectly flush with the surrounding timber. Wipe clean with a dry cloth before moving to the staining stage.
Stain the Repair to Match the Existing Floor
Even a perfectly flush fill will stand out if the colour does not match the surrounding boards. Apply a small amount of wood stain to the repaired area using a lint-free cloth or fine brush, working along the grain. Build the colour in thin layers rather than one heavy coat — it is far easier to add depth than to remove excess stain. Test on a hidden area first if you are unsure of the match. Allow the stain to dry fully before assessing the colour in natural light. Getting the tone right at this stage makes the final finish blend seamlessly and is the step most DIYers rush — take your time here. If you are unsure whether to finish with oil or lacquer, our guide to oil vs lacquer wood floor finish covers the trade-offs in detail.
Apply the Matching Floor Finish
Once the stain is dry, apply a thin coat of the matching floor finish — either a hardwax oil or a water-based lacquer, depending on what was originally used on the floor. Use a clean brush or applicator pad and work along the grain, feathering the edges out beyond the repaired area to blend with the existing finish. A hard edge between new and old finish will catch the light and be more visible than the original damage. For oil finishes, buff gently with a lint-free cloth once touch-dry. For lacquer, lightly key the surface between coats with fine-grit sandpaper if a second coat is needed, then allow to cure fully before returning furniture to the area. Keep foot traffic off the repaired boards for a minimum of 24 hours.
Replace Boards Too Damaged to Fill
If a board is split along its length, badly cupped, or has a deep structural gouge that filler cannot bridge, replacement is the correct fix. Use a chisel and hammer to carefully remove the damaged board, working along the tongue-and-groove joint to avoid splitting adjacent boards. Cut the replacement board to length, remove the lower lip of the groove to allow it to slot in from above, apply wood adhesive to the tongue-and-groove edges, and tap the new board into position. Clean off any adhesive squeeze-out immediately. Allow to set for at least two hours before sanding, staining, and finishing to match. Sanding and refinishing the whole floor after a board replacement gives the most consistent result across the room.
Frequently Asked Questions
Can I repair a hardwood floor without sanding the whole room?
Yes — localised repairs to individual boards or small areas can be done without full-room sanding. The main challenge is blending the new finish with the old, but careful stain-matching and feathering the finish edges means a patch repair is often invisible in normal lighting conditions.
How do I know if my hardwood floor has an oil or lacquer finish?
Rub a small amount of white spirit onto an inconspicuous area. If the finish turns white or hazy, it is likely a lacquer. If the spirit soaks in and the wood looks refreshed rather than damaged, it is probably an oil finish. Always match your repair finish to the existing one — mixing the two causes adhesion failures and a patchy appearance. See our guide on oil vs lacquer wood floor finish for a full breakdown.
My floorboard is squeaking after a repair — what should I do?
A squeak after repair usually means the board is not sitting fully flat on the subfloor, or the tongue-and-groove joint has a gap allowing movement. For boards that were filled rather than replaced, try injecting wood adhesive into the joint and weighting the board overnight. For persistent squeaks, our guide on how to fix a squeaky floor covers all the main causes and fixes.
What is the best way to hide deep scratches on a dark stained hardwood floor?
Use a two-part wood filler tinted to match, then layer dark wood stain over the cured filler in thin coats until the depth of colour matches the surrounding boards. On very dark floors, a slightly warm (not cold) undertone in the stain tends to blend better under artificial light.
How long should I leave the floor before walking on it after a repair?
Allow at least 24 hours before light foot traffic, and 48–72 hours before moving furniture back onto a lacquer finish. Oil finishes may feel dry to the touch within a few hours but continue to cure over 5–7 days — avoid scrubbing or heavy loads during this period.
When blending a localised finish repair into an existing lacquered floor, lightly abrade a wider area around the patch with 400-grit wet-and-dry paper before applying the new coat — this removes the sheen from the old finish and gives the new coat something to grip, eliminating the hard halo edge that otherwise appears once the floor dries.
Sources
- HSE — Woodworking health and safety guidance — hse.gov.uk
- Which? — How to repair and maintain wood floors — which.co.uk
- gov.uk — Health and Safety at Work guidance for DIY dust and sanding — hse.gov.uk
This guide is for general information only. Always work safely and follow manufacturer instructions. DIYnut accepts no liability for injury or damage arising from DIY work.