How to Lay Floor Tiles Without Lippage – DIY Guide
To lay floor tiles without lippage, start with a flat, primed subfloor, use a notched trowel to apply even adhesive coverage, back-butter large format tiles, and use a tile levelling clip system throughout. Check each tile with a spirit level as you go.


- Notched trowel
- Spirit level
- Rubber mallet
- Tile levelling clip pliers
- Tile cutter or angle grinder with diamond blade
- Bucket and mixing paddle
- Tape measure
- Grout float
- Floor tile adhesive (large format rated)
- Tile levelling clips and wedges
- Floor tiles
- Flexible floor grout
- Self-levelling compound
- Tile primer
- Spacers
- Silicone sealant
Step-by-Step Guide
Flatten and prime the subfloor
Lippage almost always starts beneath the tiles, not on top of them. Check the entire floor with a long spirit level or a straight edge — any dip or rise greater than 3mm over 2 metres needs filling with self-levelling compound before you lay a single tile. Once level, apply a floor tile primer to seal the surface and improve adhesive bond. Skipping this step is the single biggest cause of an uneven finish. See our complete flooring guide for more on subfloor preparation.
Plan your layout and dry-lay tiles
Find the centre point of the room and snap chalk lines along both axes. Dry-lay a row of tiles in both directions to check how cut tiles will fall at the edges — you want balanced cuts on opposite walls, ideally no less than half a tile width. Adjust your starting point if needed before mixing any adhesive. A poor layout plan forces awkward small cuts at skirting boards, which increases the chance of lippage at the edges where adhesive coverage is hardest to control.
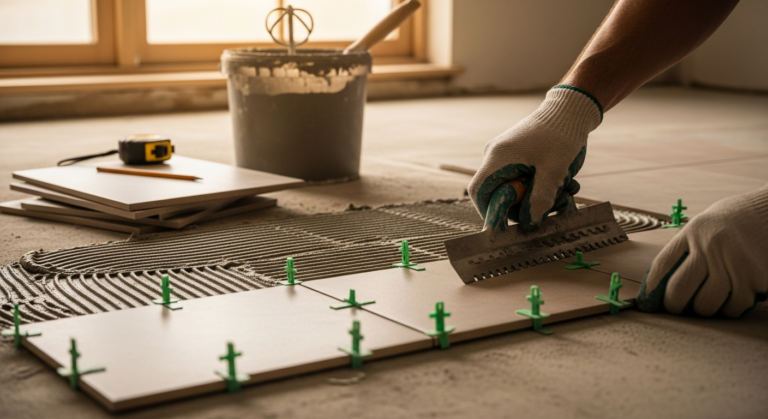
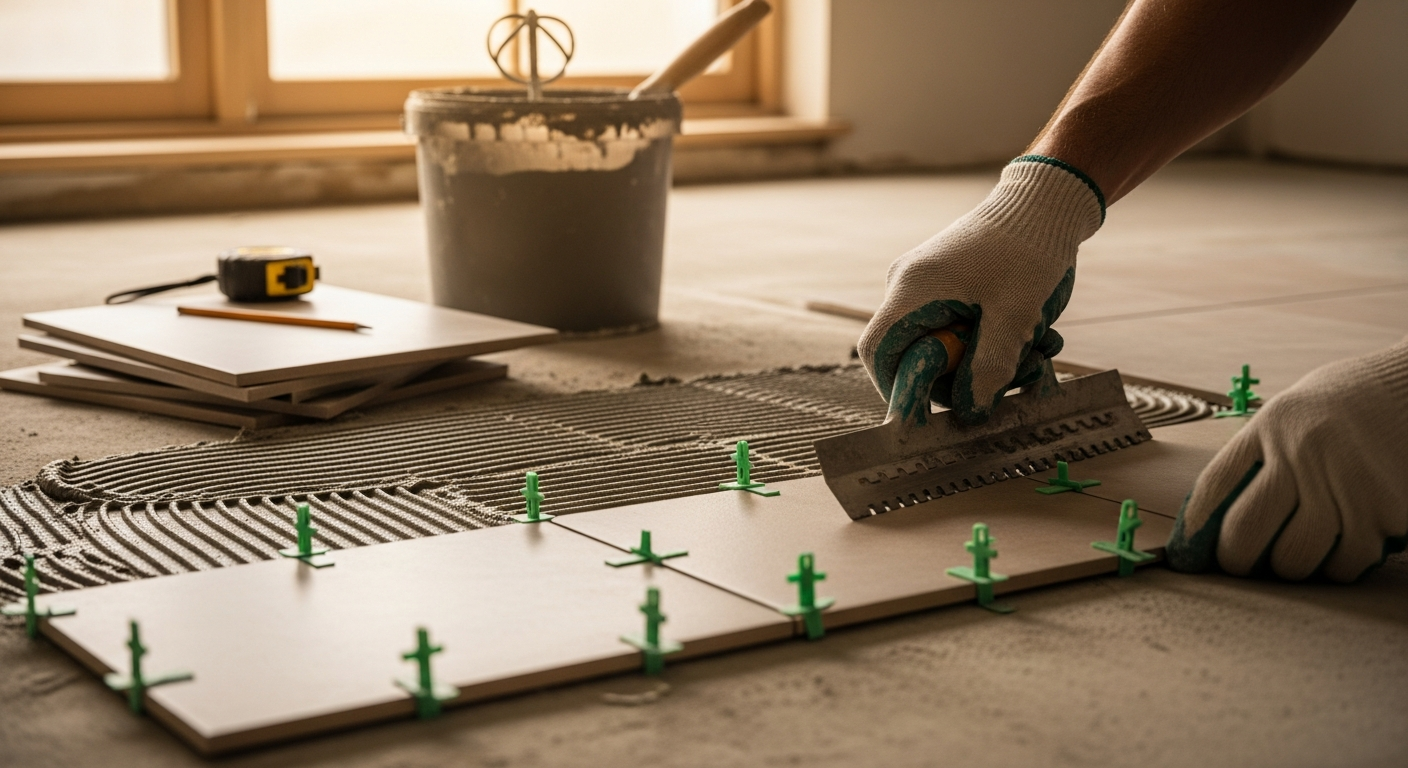
Apply adhesive with a notched trowel and back-butter large tiles
Mix your adhesive to a smooth, stiff consistency with no lumps. Spread it onto the subfloor with a notched trowel held at a consistent 45-degree angle — use a 12mm notch for tiles larger than 60cm. For any tile over 30cm in either direction, also back-butter the tile itself with a thin, flat skim of adhesive. Full contact between tile and adhesive is essential: air pockets directly beneath tile edges are what cause one edge to sit higher than its neighbour. Aim for at least 95% coverage on floor tiles in wet areas. Our guide on how to lay floor tiles covers adhesive selection in detail.
Bed tiles using a rubber mallet and fit levelling clips
Press each tile firmly into position and tap across the surface with a rubber mallet to seat it evenly into the adhesive. Immediately insert tile levelling clips beneath the shared edges of adjacent tiles, then push a wedge through each clip. Use the clip pliers to tighten the wedge until the system pulls both tile faces flush. Work in sections of four to six tiles at a time so the adhesive does not begin to skin before you fit the clips. Check across each group of tiles with your spirit level before moving on — do not rely on the levelling system alone to correct a poorly bedded tile.
Remove clips and grout once adhesive has cured
Leave the adhesive to cure fully — typically 24 hours, but check the manufacturer’s instructions. Snap off the levelling clip tabs by striking them sideways with a rubber mallet; they are designed to break cleanly at the tile surface. Remove all spacers. Mix grout to the correct consistency and work it into the joints with a grout float, holding it at 45 degrees and pressing firmly. Wipe excess grout from tile faces with a damp sponge before it dries. Seal movement joints at walls and doorways with flexible silicone rather than grout to prevent cracking.
Inspect and remedy any remaining high spots
Once grout is dry, run a straight edge across the finished floor in multiple directions. If a tile face stands proud by more than 0.5mm, the cause is nearly always insufficient adhesive contact or a high spot in the subfloor that was missed. Minor lippage on an otherwise sound tile can be carefully ground back using a hand-held angle grinder with a fine diamond cup wheel and a sanding pad, but this is a last resort. A well-prepared subfloor, consistent adhesive coverage, and a levelling system used correctly should produce a finish that needs no remedial work. For advice on fixing a dip in the floor before tiling, see our repairs guide.
Frequently Asked Questions
What causes lippage in floor tiles?
Lippage is caused by one or more of three things: an uneven subfloor, inconsistent adhesive coverage beneath the tile, or tiles that are not fully pressed into the adhesive bed. Large format tiles are especially prone because any variation across their surface is amplified at the joint.
Do I need a tile levelling system for small tiles?
For mosaic or tiles smaller than 30cm, a levelling system is less critical provided your subfloor is flat and adhesive coverage is good. For anything over 30cm, a clip-and-wedge levelling system is strongly recommended and will save considerable time correcting lippage later.
What is the acceptable amount of lippage for floor tiles?
BS 5385 recommends a maximum lippage of 1mm between adjacent tiles for standard residential floors. For large format tiles with a rectified edge, most installers aim for no more than 0.5mm. Anything over 2mm is a trip hazard and constitutes a poor finish. You can read more in our flooring guide.
Can I fix lippage after the adhesive has set?
If adhesive has fully cured, grinding back a high edge with an angle grinder and fine diamond pad is possible but risks damaging adjacent tiles and the grout joint. If multiple tiles are affected, lifting and relaying is usually the better outcome. Prevention during laying is always preferable to remedial work.
What tile adhesive should I use for large format floor tiles?
Use a flexible, large-format rated floor tile adhesive — look for one compliant with EN 12004 Class C2 (cementitious, improved) or better. These have higher polymer content, better sag resistance, and improved coverage, all of which reduce the risk of lippage. Check the how to lay floor tiles guide for a full adhesive comparison.
When laying large format tiles, comb the adhesive in one consistent direction across the whole bay — never swirl it. When you press the tile down and slide it slightly against the combed ridges, you can feel and hear the adhesive collapsing evenly beneath the tile, which confirms full contact before the levelling clips go in.
Sources
- BS 5385-5: Wall and floor tiling — design and installation of terrazzo, natural stone and agglomerated stone tile and slab flooring — bsigroup.com
- HSE — Slips and trips: guidance for the construction industry — hse.gov.uk
- Which? — How to tile a floor — which.co.uk
This guide is for general information only. Always work safely and follow manufacturer instructions. DIYnut accepts no liability for injury or damage arising from DIY work.