Best Underlay for Laminate Flooring – DIY Guide
The best underlay for laminate flooring depends on your subfloor. Use foam underlay on a flat concrete or wooden subfloor, combination underlay where you need added moisture protection, and acoustic underlay in flats or upper floors to reduce impact noise.


- Stanley knife or scissors
- Tape measure
- Straight edge
- Pencil
- Roller or hand roller
- Utility knife
- Foam underlay roll
- Combination underlay (foam with integral moisture barrier)
- Acoustic underlay roll
- Rubber crumb underlay
- Polythene damp proof membrane (if using separate DPM)
- Jointing tape (to seal underlay seams)
- Moisture test strips
Step-by-Step Guide
Test your subfloor for moisture
Before selecting underlay, check whether your subfloor is concrete or timber and whether it holds moisture. Tape a square of polythene sheeting to the floor and leave it for 24–48 hours — if condensation forms beneath it, you have a moisture issue and must use an underlay with an integral damp proof membrane (DPM) or lay a separate polythene DPM first. Skipping this step is the single most common cause of laminate failure. If you are unsure whether your subfloor is level and sound, address any dips or soft spots before laying anything on top.
Choose the correct underlay type for your situation
Match the underlay to your subfloor and room conditions. Standard foam underlay (3–5 mm) suits dry timber or concrete subfloors in ground-level rooms. Combination underlay (foam with an integrated polythene moisture barrier) is the go-to for concrete subfloors where damp is a risk — it removes the need for a separate DPM. Acoustic or rubber crumb underlay is essential in flats or on upper floors where impact noise must be reduced; check your lease or building regulations, as many require a minimum impact sound reduction rating. If you are also choosing your laminate boards, our laminate flooring buying guide covers thickness and wear ratings in full.
Check your laminate manufacturer’s underlay specification
Nearly all floating laminate floors are sold with a maximum permitted underlay thickness and compressibility rating — typically no more than 3–5 mm total combined compression. Using an underlay that is too thick or too soft causes the click-lock joints to flex excessively under foot traffic, which breaks the locking mechanism over time and leads to gaps or edges lifting. Check the installation instructions supplied with your laminate before purchasing underlay. Some laminate boards come with underlay pre-attached to the back; if yours does, do not lay additional underlay beneath it or you will void the warranty.
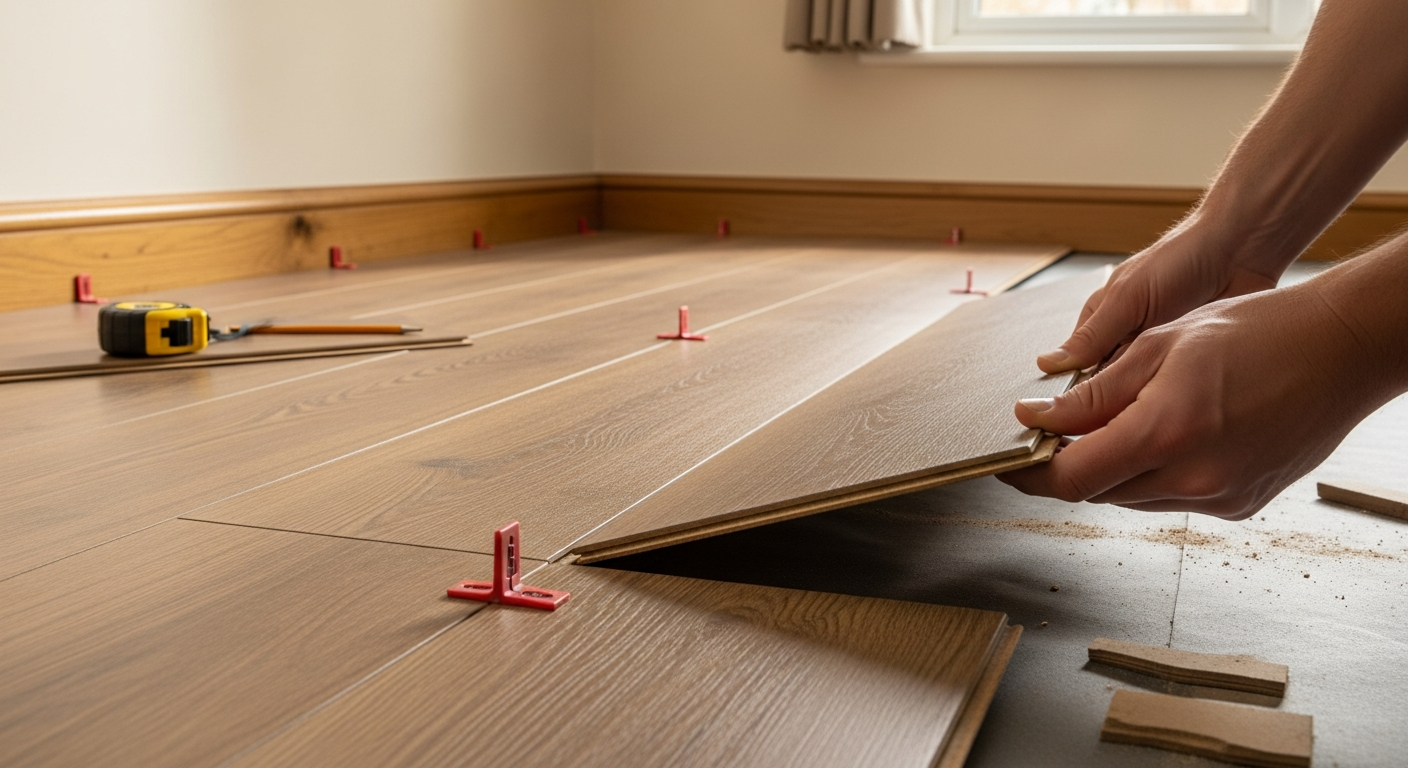
Lay the underlay correctly across the subfloor
Roll out the underlay at 90 degrees to the direction you intend to lay the laminate boards — this prevents the underlay seams and the board joints from lining up, which would create a weak point. Butt the edges together without overlapping; overlapping underlay creates a ridge that causes laminate boards to rock and joints to fail. Secure the seams with jointing tape as you go. If you are using a separate polythene DPM beneath a foam underlay, run the DPM 50–75 mm up the walls and tape it in place before laying the underlay on top. Trim the underlay neatly at doorways — our guide to laying laminate around doors covers the correct approach at thresholds.
Tape all seams and check for movement before laying boards
Once the underlay is fully laid, walk over the entire surface and check for any areas that slide, bunch, or lift. Tape every seam securely with jointing tape — an untaped seam will migrate under foot traffic and create an uneven surface beneath the laminate. If you are fitting underfloor heating, confirm the underlay is rated for use with that system; standard foam underlay insulates against heat and will reduce system efficiency or cause overheating. Specialist low-tog underlay is required — check the heating system manufacturer’s maximum tog rating before purchasing. Any squeaks or movement in a timber subfloor should be fixed now; once the laminate is down, access is difficult. See our advice on fixing lifting laminate edges if problems develop later.
Proceed to lay your laminate boards immediately
Underlay should not be left exposed for extended periods before the laminate goes down — foot traffic will compress and dirty it, and in damp conditions moisture can become trapped. Begin laying laminate boards from the straightest, most visible wall, maintaining the recommended expansion gap around the perimeter. If you discover the laminate has chipped or been damaged during installation, our guide on repairing chipped laminate explains how to fix individual boards without lifting the whole floor.
Frequently Asked Questions
Do I need underlay if my laminate already has it attached?
No. If your laminate boards have pre-attached underlay on the reverse, do not add a second layer beneath. Doubling up exceeds the manufacturer’s compression tolerance and will cause joint failure. You may still need a separate thin polythene DPM on concrete subfloors — check the installation instructions.
What thickness of underlay is best for laminate flooring?
3 mm is the most common and versatile thickness for laminate underlay. It provides adequate cushioning without exceeding the compression limits of most laminate systems. Only go to 5 mm if your laminate manufacturer explicitly permits it — thicker is not always better.
Can I use carpet underlay beneath laminate?
No. Carpet underlay is far too soft and compressible for a floating laminate floor. It will compress unevenly under foot traffic, causing the click-lock joints to flex and fail. Always use underlay specifically manufactured and rated for floating laminate or wood floors.
What is the best underlay for laminate on underfloor heating?
Use a specialist low-tog underlay rated for underfloor heating — typically 0.5 tog or below. Standard foam underlay acts as an insulator, reducing heat transfer and potentially causing the system to overheat. Always check your heating manufacturer’s maximum underlay tog rating before purchasing.
Does underlay make laminate flooring quieter?
Yes, but the degree of noise reduction varies significantly by type. Acoustic or rubber crumb underlays provide much greater impact sound reduction than standard foam and are often required by building regulations or lease agreements in flats and upper-floor rooms. If sound reduction is your priority, check the product’s decibel rating before buying.
On concrete subfloors, tape the DPM 50–75 mm up the wall before trimming — skirting boards will then pin it down and seal the edge without needing adhesive, giving you a fully continuous vapour barrier that won’t lift at the perimeter over time.
Sources
- Which? — Laminate flooring buying guide: underlay explained — which.co.uk
- HSE — Damp in buildings: moisture in concrete floors — hse.gov.uk
- GOV.UK — Building regulations: Approved Document E (resistance to sound) — gov.uk
This guide is for general information only. Always work safely and follow manufacturer instructions. DIYnut accepts no liability for injury or damage arising from DIY work.