How to Damp Proof a Basement – DIY Guide
How to Damp Proof a Basement
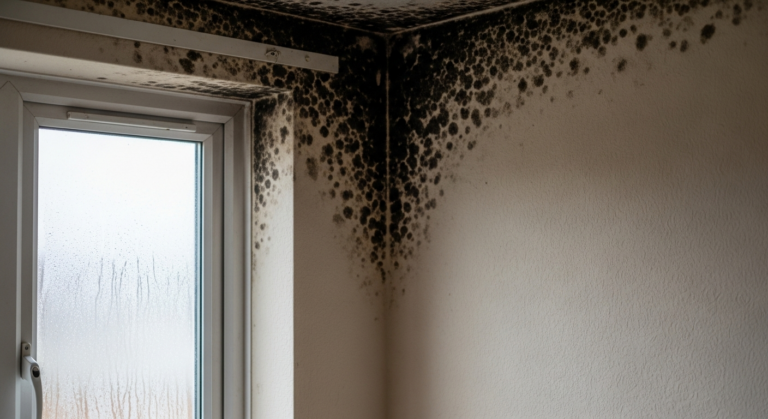
Stop water ingress for good and turn your basement into usable space.
To damp proof a basement, identify the type of damp (penetrating, rising, or condensation), prepare and clean the walls, apply a waterproofing slurry coat, install a drainage membrane if needed, and seal all joints and cracks before finishing.


- Wire brush
- Cold chisel
- Club hammer
- Stiff-bristle brush
- Bucket and mixing paddle
- Margin trowel
- Notched trowel
- Angle grinder with diamond blade
- Waterproofing slurry (cementitious tanking slurry)
- Drainage cavity membrane
- Hydraulic quick-setting cement
- Waterproofing admixture
- Bonding primer
- Wall plugs and fixings
- Waterproof render mix
- Joint tape for membrane
Step-by-Step Guide
Identify the Source of Damp
Before applying any product, you must establish what type of damp you’re dealing with — penetrating water through walls, rising damp from the ground, or condensation from internal moisture. Each requires a different approach. Tape a piece of polythene sheet to the wall and seal all four edges; if moisture forms behind it after 24–48 hours, water is coming through the structure. If moisture forms on the surface, it’s condensation. Getting this wrong wastes time and money. For guidance on telling types of damp apart, see our article on Insulation & Damp.
Prepare the Walls Thoroughly
Hack off any loose, blown, or salt-contaminated render using a cold chisel and club hammer — tanking slurry will not bond to a compromised surface. Wire brush the masonry to remove efflorescence (white salt deposits), organic growth, and any paint or coating. Rake out damaged mortar joints to a depth of at least 12 mm and re-point with a waterproof mortar. The HSE advises that working in confined basement spaces requires adequate ventilation throughout, so prop open windows and doors or use a fan before you start. Fix rising damp in the wall structure before attempting to tank over it.
Fill Cracks and Seal Active Leaks
Any crack or joint that is actively leaking must be stopped before the waterproofing coat goes on. Mix hydraulic quick-setting cement to a stiff paste and press it firmly into the crack, holding it in place for two to three minutes as it sets — it hardens in under five minutes and stops water flow almost immediately. For larger voids or pipe penetrations, use a waterproof expanding filler. Pay particular attention to the wall-to-floor joint (the cove), which is the most common point of water entry in basements. Fixing hairline cracks in walls gives you the technique for minor surface cracks.
Apply the Waterproofing Slurry Coat
Dampen the wall with clean water before applying — cementitious tanking slurry bonds to damp masonry, not dry. Mix the slurry to a thick paste following the manufacturer’s ratio, then apply the first coat with a stiff brush, working it well into the surface. Build up a minimum of two coats, allowing each to reach an initial set (typically 3–6 hours) before applying the next. The total dry film thickness should be at least 2–3 mm. For floor areas, apply with a trowel. Slurry is a negative-side waterproofing method — it resists water pressure from the outside. For walls that face very high hydrostatic pressure, consider a cavity drain membrane system instead.
Install a Cavity Drain Membrane (Where Required)
For basements with sustained high water pressure or where slurry alone is insufficient, a cavity drain membrane (studded HDPE sheet) provides a more robust solution. Fix the membrane to the wall using the manufacturer’s specified plugs, starting from the floor and overlapping joins by at least one stud row. Seal all joints with the appropriate tape or mastic. The membrane diverts any water that breaches the wall into a drainage channel at floor level, which directs it to a sump pump. This is a Type C waterproofing method as described in BS 8102:2009. Our solid wall insulation guide covers how to build out from a waterproofed basement wall if you plan to insulate and board out afterwards.
Finish and Allow Full Cure Before Decorating
Once the tanking or membrane system is complete, allow a minimum of 28 days before applying a waterproof sand-and-cement render or before fixing plasterboard on battens. Do not apply standard gypsum plaster directly onto tanking slurry — it is not compatible with the alkaline surface and will fail. Ventilate the basement during curing to manage moisture levels. Check for any weeping or damp patches after the first heavy rainfall before proceeding with finishing. Fix condensation damp once the basement is sealed and in use, as enclosed spaces can develop new moisture problems from internal sources.
Frequently Asked Questions
What is the best method to damp proof a basement?
For most UK basements, a combination of cementitious tanking slurry for low to moderate water pressure and a cavity drain membrane system for high hydrostatic pressure gives the best results. The right approach depends on the severity and source of damp — always diagnose before committing to a method.
Do I need planning permission to damp proof a basement?
Waterproofing a basement internally does not typically require planning permission in England and Wales. However, if the work forms part of a basement conversion that changes the use of the space, building regulations approval is likely required — check with your local authority before starting.
How long does basement tanking last?
A properly applied cementitious tanking system on sound, prepared masonry can last 20–30 years. Cavity drain membrane systems, when correctly installed with a maintained sump pump, can last the lifetime of the building. The key variable in both cases is surface preparation.
Can I damp proof a basement myself or do I need a specialist?
Cementitious tanking is within the capability of a competent DIYer with attention to surface prep. Full cavity drain membrane systems with sump pumps are more complex and many homeowners choose a specialist for those. For severe structural water ingress, a qualified waterproofing contractor with BBA-certified materials is the safer choice.
How do I stop condensation in a damp-proofed basement?
Once the structure is waterproofed, condensation can still occur because basements are cool and poorly ventilated. Install mechanical ventilation or a dehumidifier to control internal humidity, and consider insulating the walls to raise the surface temperature above the dew point.
Always form a waterproof cove fillet — a concave 45-degree bead of tanking slurry at the wall-to-floor junction — before coating the walls and floor separately. This cove distributes hydrostatic pressure evenly and eliminates the right-angle joint, which is the weakest point in any tanking system and the first place to crack under ground movement.
Sources
- HSE — Health and safety in construction: confined spaces and basements — hse.gov.uk
- GOV.UK — Building regulations guidance: basement conversions and waterproofing — gov.uk
- Which? — Damp proofing and waterproofing your home — which.co.uk
This guide is for general information only. Always work safely and follow manufacturer instructions. DIYnut accepts no liability for injury or damage arising from DIY work.