How to Update Cabinets Without Replacing – DIY Guide
Update cabinets without replacing by sanding, priming, and painting the carcasses, then swapping doors, hinges, and handles. Add new worktop edging or a splashback for a complete refresh. Total cost is a fraction of a full kitchen replacement.


- Orbital sander
- Paint brushes (various sizes)
- Small foam rollers
- Screwdriver (flathead and cross-head)
- Drill and drill bits
- Spirit level
- Tape measure
- Cleaning cloths
- Cabinet primer
- Cabinet paint (water-based, satin or eggshell finish)
- Medium-grit sanding sheets (120 grit)
- Fine-grit sanding sheets (240 grit)
- Sugar soap or degreaser
- Replacement cabinet handles and screws
- Soft-close hinge sets (if upgrading)
- Decorator’s masking tape
Step-by-Step Guide
Remove Doors, Drawers, and Hardware
Unscrew all cabinet doors and drawer fronts and lay them flat on a dust sheet. Remove all existing handles, knobs, and hinges, keeping any screws you plan to reuse. Working flat prevents paint runs and gives you full access to edges — skipping this step is the single biggest cause of patchy results. Label each door with masking tape so you know exactly where it came from when it goes back up.
Clean and Degrease Every Surface
Kitchen cabinets carry years of grease, cooking residue, and fingerprints that will stop paint from bonding. Mix sugar soap or a dedicated degreaser with warm water and scrub every surface — carcasses, door faces, backs, and edges. Rinse with clean water and allow to dry completely before touching them again. If you’re updating cabinet door fronts only, this stage is still non-negotiable — paint over grease and it will peel within weeks.
Sand All Surfaces to a Key
Use 120-grit sanding sheets with an orbital sander on flat door faces, then switch to a folded sheet to hand-sand moulded details, edges, and frame sections. The goal is not to strip the finish — it is to scuff the existing surface so primer has something to grip. Wipe away all dust with a damp cloth and let surfaces dry before moving on. If your cabinets have a vinyl or thermofoil wrap that has started to peel, remove it fully at this stage rather than painting over it.
Apply Primer Coat and Allow to Cure
Apply a dedicated cabinet or furniture primer using a foam roller on flat areas and a brush on detail. Two thin coats beat one thick coat — allow the first to dry to touch before the second. Primer is not optional here; it seals the surface, blocks stains, and means your topcoat colour goes on true. Pay attention to cut edges on MDF doors — they are absorbent and may need a third coat of primer. Once fully dry, sand lightly with 240-grit paper and wipe clean. For guidance on prepping and painting other wooden surfaces, see our complete kitchen guide.
Paint Cabinets and Fit New Hardware
Apply your topcoat with a foam roller to minimise brush marks, working in the same direction with each pass. Two to three thin coats will give a durable, uniform finish — allow each coat to dry fully between applications. Once dry, drill new handle holes if needed (use a template cut from card for consistency across all doors), then fit your replacement handles. Upgrading to soft-close hinges at this point costs little but transforms how the kitchen feels to use — it is worth doing while everything is already off.
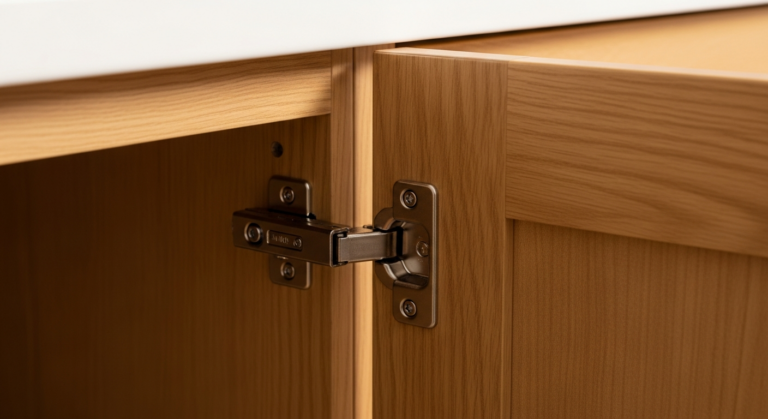
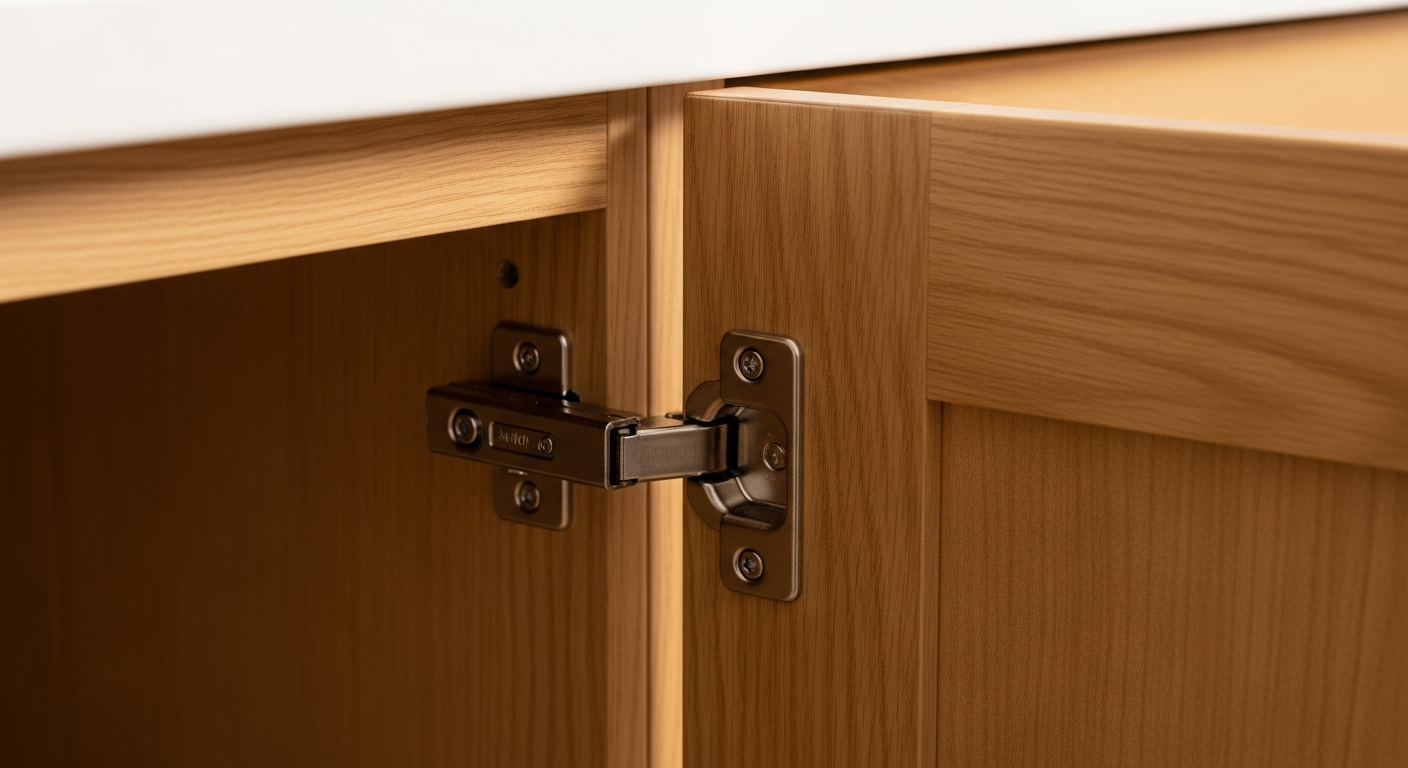
Rehang Doors and Make Final Adjustments
Rehang all doors using the labelled positions from Step 1. Modern cup hinges are adjustable on three axes — use the adjustment screws to align each door so gaps are consistent and doors sit flush. Step back and check alignment at eye level before tightening fully. If handles have exposed the original screw holes, fill with a small amount of wood filler, sand flush, and touch up with paint. If you’re also replacing the cabinet hinges entirely, check the new hinge cup size matches the existing bore holes to avoid unnecessary drilling.
Frequently Asked Questions
Do I need to strip the existing paint or finish before I start?
Not usually. As long as the existing finish is sound — not peeling, bubbling, or flaking — sanding to a key and priming over the top is sufficient. If the finish is failing in places, strip back those areas fully before priming. Painting over a failing surface will only cause the new paint to fail in the same spots.
Can I paint laminate or vinyl-wrapped cabinet doors?
Yes, provided the wrap is fully adhered with no lifting edges. Sand with 120-grit, clean thoroughly, and use a bonding primer designed for slick surfaces before your topcoat. If the wrap has started to peel, remove it completely — painting over a peeling wrap will not hold.
What is the best paint finish for kitchen cabinets?
Water-based eggshell or satin in a hard-wearing cabinet formulation is the best all-round choice. It is washable, resists grease and steam, and levels well when applied with a foam roller. Avoid full gloss unless you are very experienced — it shows every imperfection and brush mark.
How long should I leave painted cabinets before putting items back inside?
Water-based cabinet paints are typically touch-dry in 2–4 hours, but full hardness takes significantly longer — allow at least 7 days before loading shelves heavily or closing doors for extended periods. The paint will continue to cure and harden over several weeks. Check the manufacturer’s data sheet for specific guidance. If you notice any issues with hinges or fixings during this process, our guide to replacing kitchen cabinet hinges covers everything you need.
Is it worth replacing just the doors rather than painting the existing ones?
Replacing doors is a strong option if the existing doors are heavily damaged, warped, or moulded in a style you dislike. It costs more than painting but gives a cleaner result and is still far cheaper than a full kitchen refit. The carcasses — the boxes themselves — rarely need replacing and are nearly always worth keeping.
Apply your topcoat in thin passes with a short-pile foam roller, then finish each panel with a single light drag of a soft brush (‘tip off’) in one direction before the paint sets — this eliminates roller stipple and gives a near factory-smooth finish without specialist spray equipment.
Sources
- Which? — How to paint kitchen cupboards — which.co.uk
- HSE — Guidance on using chemical cleaning products safely — hse.gov.uk
- GOV.UK — Disposing of paint and DIY waste responsibly — gov.uk
This guide is for general information only. Always work safely and follow manufacturer instructions. DIYnut accepts no liability for injury or damage arising from DIY work.