Damp Patches on Walls
Walls & Plastering › Walls & Plastering
Damp Patches on Walls
Diagnose the exact cause of damp patches and fix them for good.
Damp patches on walls are most commonly caused by penetrating damp from defective render, mortar, or guttering. Other causes include rising damp, condensation, and leaking pipes. Identifying where the patch appears — and whether it grows in wet weather — points to the cause.

What’s Causing This?
Penetrating damp is the most common cause of damp patches on UK walls. Water gets in through cracked or failed render, eroded mortar joints, damaged flashings, or blocked guttering and works its way through the wall. Patches typically appear on external-facing walls and worsen after heavy rain. See the full guide to rendering an outside wall if your external render is cracked or crumbling.
Rising damp causes patches low down on walls — usually within 1 metre of floor level — and often leaves a tide mark or white salt deposits (efflorescence) on the plaster. It occurs when the damp-proof course (DPC) has failed, is bridged, or is absent in older properties. See how to fix rising damp for a step-by-step approach.
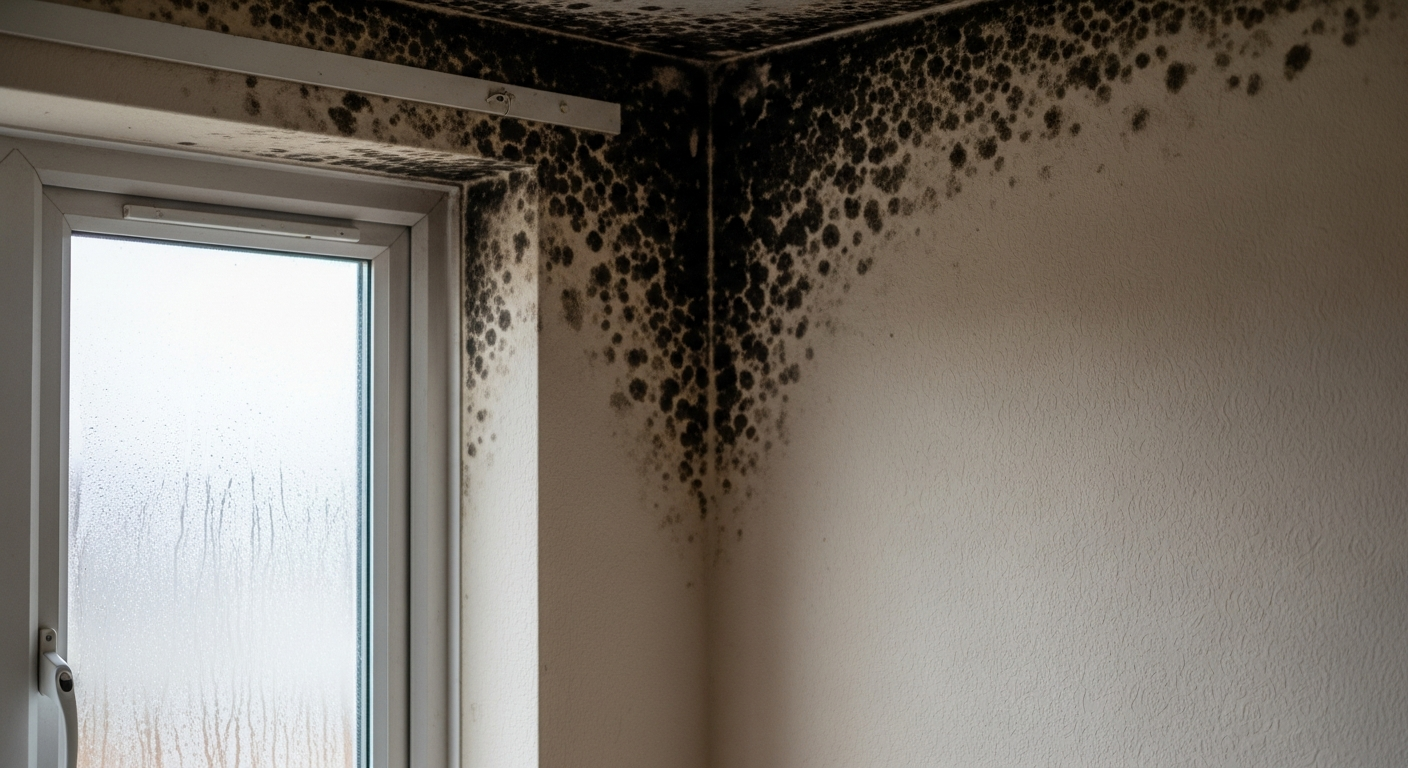
Condensation damp is caused by warm, moisture-laden air hitting a cold wall surface. It typically affects internal walls, corners, and areas behind furniture, and is more common in poorly ventilated rooms such as kitchens and bathrooms. Black mould growth is a strong indicator. Read the guide on how to fix condensation damp for targeted solutions.
Leaking or sweating pipes hidden inside walls can create localised wet patches that appear regardless of weather conditions. Cold-water pipes can also sweat in warm, humid conditions. If the patch is circular or localised, and doesn’t change with rain, a plumbing fault is likely.
Defective or missing roof and guttering allows water to track down into the wall cavity or soak through the top of an external wall, creating damp patches near the ceiling line or at the top of a chimney breast. Check gutters, downpipes, and roof flashings before investigating internally.
How to Diagnose the Exact Cause
- Note the location. Low on an external wall (below 1 m) suggests rising damp. Mid-wall or high up on an external wall after rain suggests penetrating damp. On an internal wall or in a corner, condensation is the most likely cause.
- Check the timing. Does the patch appear or worsen after heavy rainfall? If yes, look outside for cracked render, failed pointing, or blocked guttering above that area. If the patch is always wet regardless of weather, suspect a leaking pipe.
- Look for tide marks and salts. A brown tide mark above the damp area, or white powdery deposits (efflorescence) on the plaster surface, indicates rising or penetrating damp rather than condensation.
- Check for mould. Black or grey mould growth — especially in corners, on cold surfaces, or behind furniture — strongly indicates condensation rather than structural damp.
- Test the plaster. Press firmly on the plaster around the patch. If it sounds hollow, feels soft, or crumbles, the plaster has blown and will need to be repaired once the moisture source is fixed.
- Inspect externally. Check render, pointing, window sills, flashings, guttering, and downpipes directly outside the affected area. Defects here are often the root cause of internal damp patches.
- Isolate plumbing. If the patch is near a bathroom, kitchen, or where pipes run, turn off the water and monitor whether the patch stops spreading. This rules in or out a plumbing leak.
How to Fix It
Penetrating damp from failed render: Hack off any defective render, allow the wall to dry thoroughly, and apply fresh render using the correct mix for the substrate. Full instructions in the render an outside wall guide. Repoint any eroded mortar joints at the same time.
Rising damp: Address the DPC by installing a chemical injection DPC, repairing bridged mortar, or raising external ground levels. Allow the wall to dry for several months before replastering with a sand-cement backing coat. Follow the complete guide on fixing rising damp.
Condensation damp: Improve ventilation with extractor fans, trickle vents, or positive-input ventilation. Insulating cold walls reduces surface condensation significantly — see the solid wall insulation guide for options. Treat existing mould with a fungicidal wash before redecorating.
Leaking pipes: Locate and repair the leak — this is often a job for a plumber if the pipe is within the wall structure. Once repaired, allow the wall to dry fully before assessing plaster damage.
Defective guttering or roof: Clear blockages, reseal joints, or replace broken sections of guttering. Defective flashings should be re-bedded or replaced; this is a roofer’s job in most cases. Once the external fault is fixed, repair interior plaster following the guide on fixing damp on interior walls.
When to Call a Tradesman
Call a qualified damp surveyor (look for CSRT or CRDS credentials via the Property Care Association) if you cannot identify the source of damp after a thorough external and internal inspection, or if damp patches are widespread across multiple walls. A proper independent survey is worth having before spending money on remedial work — some damp specialists offer free surveys but be cautious of those who also sell treatments.
Call a Gas Safe registered engineer immediately if damp patches appear near a gas boiler, flue, or heating pipes — water near gas appliances is a safety issue. Never attempt this yourself.
Call a structural engineer if damp is accompanied by significant cracking, bowing walls, or if the property is older than 1919 and has solid walls with no DPC. Rising damp in older properties can indicate more serious structural issues that need professional assessment before any remedial work begins.
Call a roofer for any defective flashings, lead work, or roof-level repairs — working at height without proper access equipment is covered under the Work at Height Regulations 2005 (HSE), and DIY roof repairs carry serious fall risks.
How to Prevent It Happening Again
- Inspect external render and pointing annually. Hair-fine cracks in render can admit significant water over winter. Repair them early — render an outside wall before cracks widen and penetrating damp takes hold.
- Keep gutters and downpipes clear. Clear gutters at least once a year — twice if you have overhanging trees. Overflowing gutters are one of the most common causes of damp patches on UK external walls.
- Ventilate kitchens and bathrooms properly. Fit extractor fans that vent to outside air, not into a wall cavity or loft, and use them every time moisture is generated. This tackles condensation damp at source.
- Maintain a clear DPC zone. Keep soil, render, decking, and raised flower beds at least 150 mm below the damp-proof course level on all external walls to prevent bridging.
Frequently Asked Questions
How do I tell the difference between rising damp and condensation?
Rising damp appears low on walls (below 1 metre), leaves tide marks and salt deposits, and affects external walls only. Condensation appears in corners, on cold surfaces, and behind furniture, and is usually accompanied by black mould growth rather than tide marks.
Can I just paint over a damp patch?
No — painting over a damp patch without fixing the source will fail quickly and may make diagnosis harder. Fix the cause first, allow the wall to dry fully, then apply a specialist stain-blocking primer before redecorating.
How long does a damp wall take to dry out after the source is fixed?
A rough guide is one month of drying time for every 25 mm of wall thickness, though this varies with ventilation, heating, and the type of construction. Solid brick walls can take several months to dry fully before replastering.
Do I need to strip the plaster before fixing damp patches?
If the plaster is blown (hollow-sounding, soft, or crumbling), it must be removed before the wall can dry and be replastered. Sound plaster can often be retained once the moisture source is resolved, though any salts in the plaster may continue to draw moisture.
Is a free damp survey from a specialist company reliable?
Be cautious — the Property Care Association advises homeowners to seek a survey from an independent surveyor with no financial interest in selling treatment products. Free surveys from companies that also sell damp-proofing treatments can result in unnecessary work being recommended.
When diagnosing damp on solid brick walls, a simple foil tape test can distinguish condensation from penetrating damp: tape a piece of kitchen foil flat to the wall surface and seal all edges for 24–48 hours. If moisture forms on the room-side face of the foil, it’s condensation; if moisture forms between the foil and the wall, water is coming through the wall itself.
Sources
- Property Care Association — Damp in Buildings guidance for homeowners — property-care.org
- HSE — Work at Height Regulations 2005 — hse.gov.uk
- Which? — How to get rid of damp — which.co.uk
This guide is for general information only. Always work safely and follow manufacturer instructions. DIYnut accepts no liability for injury or damage arising from DIY work.


