How to Fix Leaking Shower Seal – 2026 Guide
How to Fix a Leaking Shower Seal
— 2026 Guide
Stop water escaping your shower tray in an afternoon with basic tools.
To fix a leaking shower seal, remove the old silicone sealant completely, clean and dry the joint thoroughly, then apply a fresh bead of mould-resistant silicone and smooth it with a wet finger. Allow 24 hours to cure before using the shower.
- Silicone sealant remover tool
- Craft knife or Stanley knife
- Plastic scraper
- Caulking gun
- Masking tape
- Clean cloths or paper towels
- Mould-resistant bathroom silicone sealant
- Silicone remover gel or solvent
- Methylated spirits or isopropyl alcohol
- Fine-grain sandpaper
- Masking tape
- Disposable gloves
Step-by-Step Guide
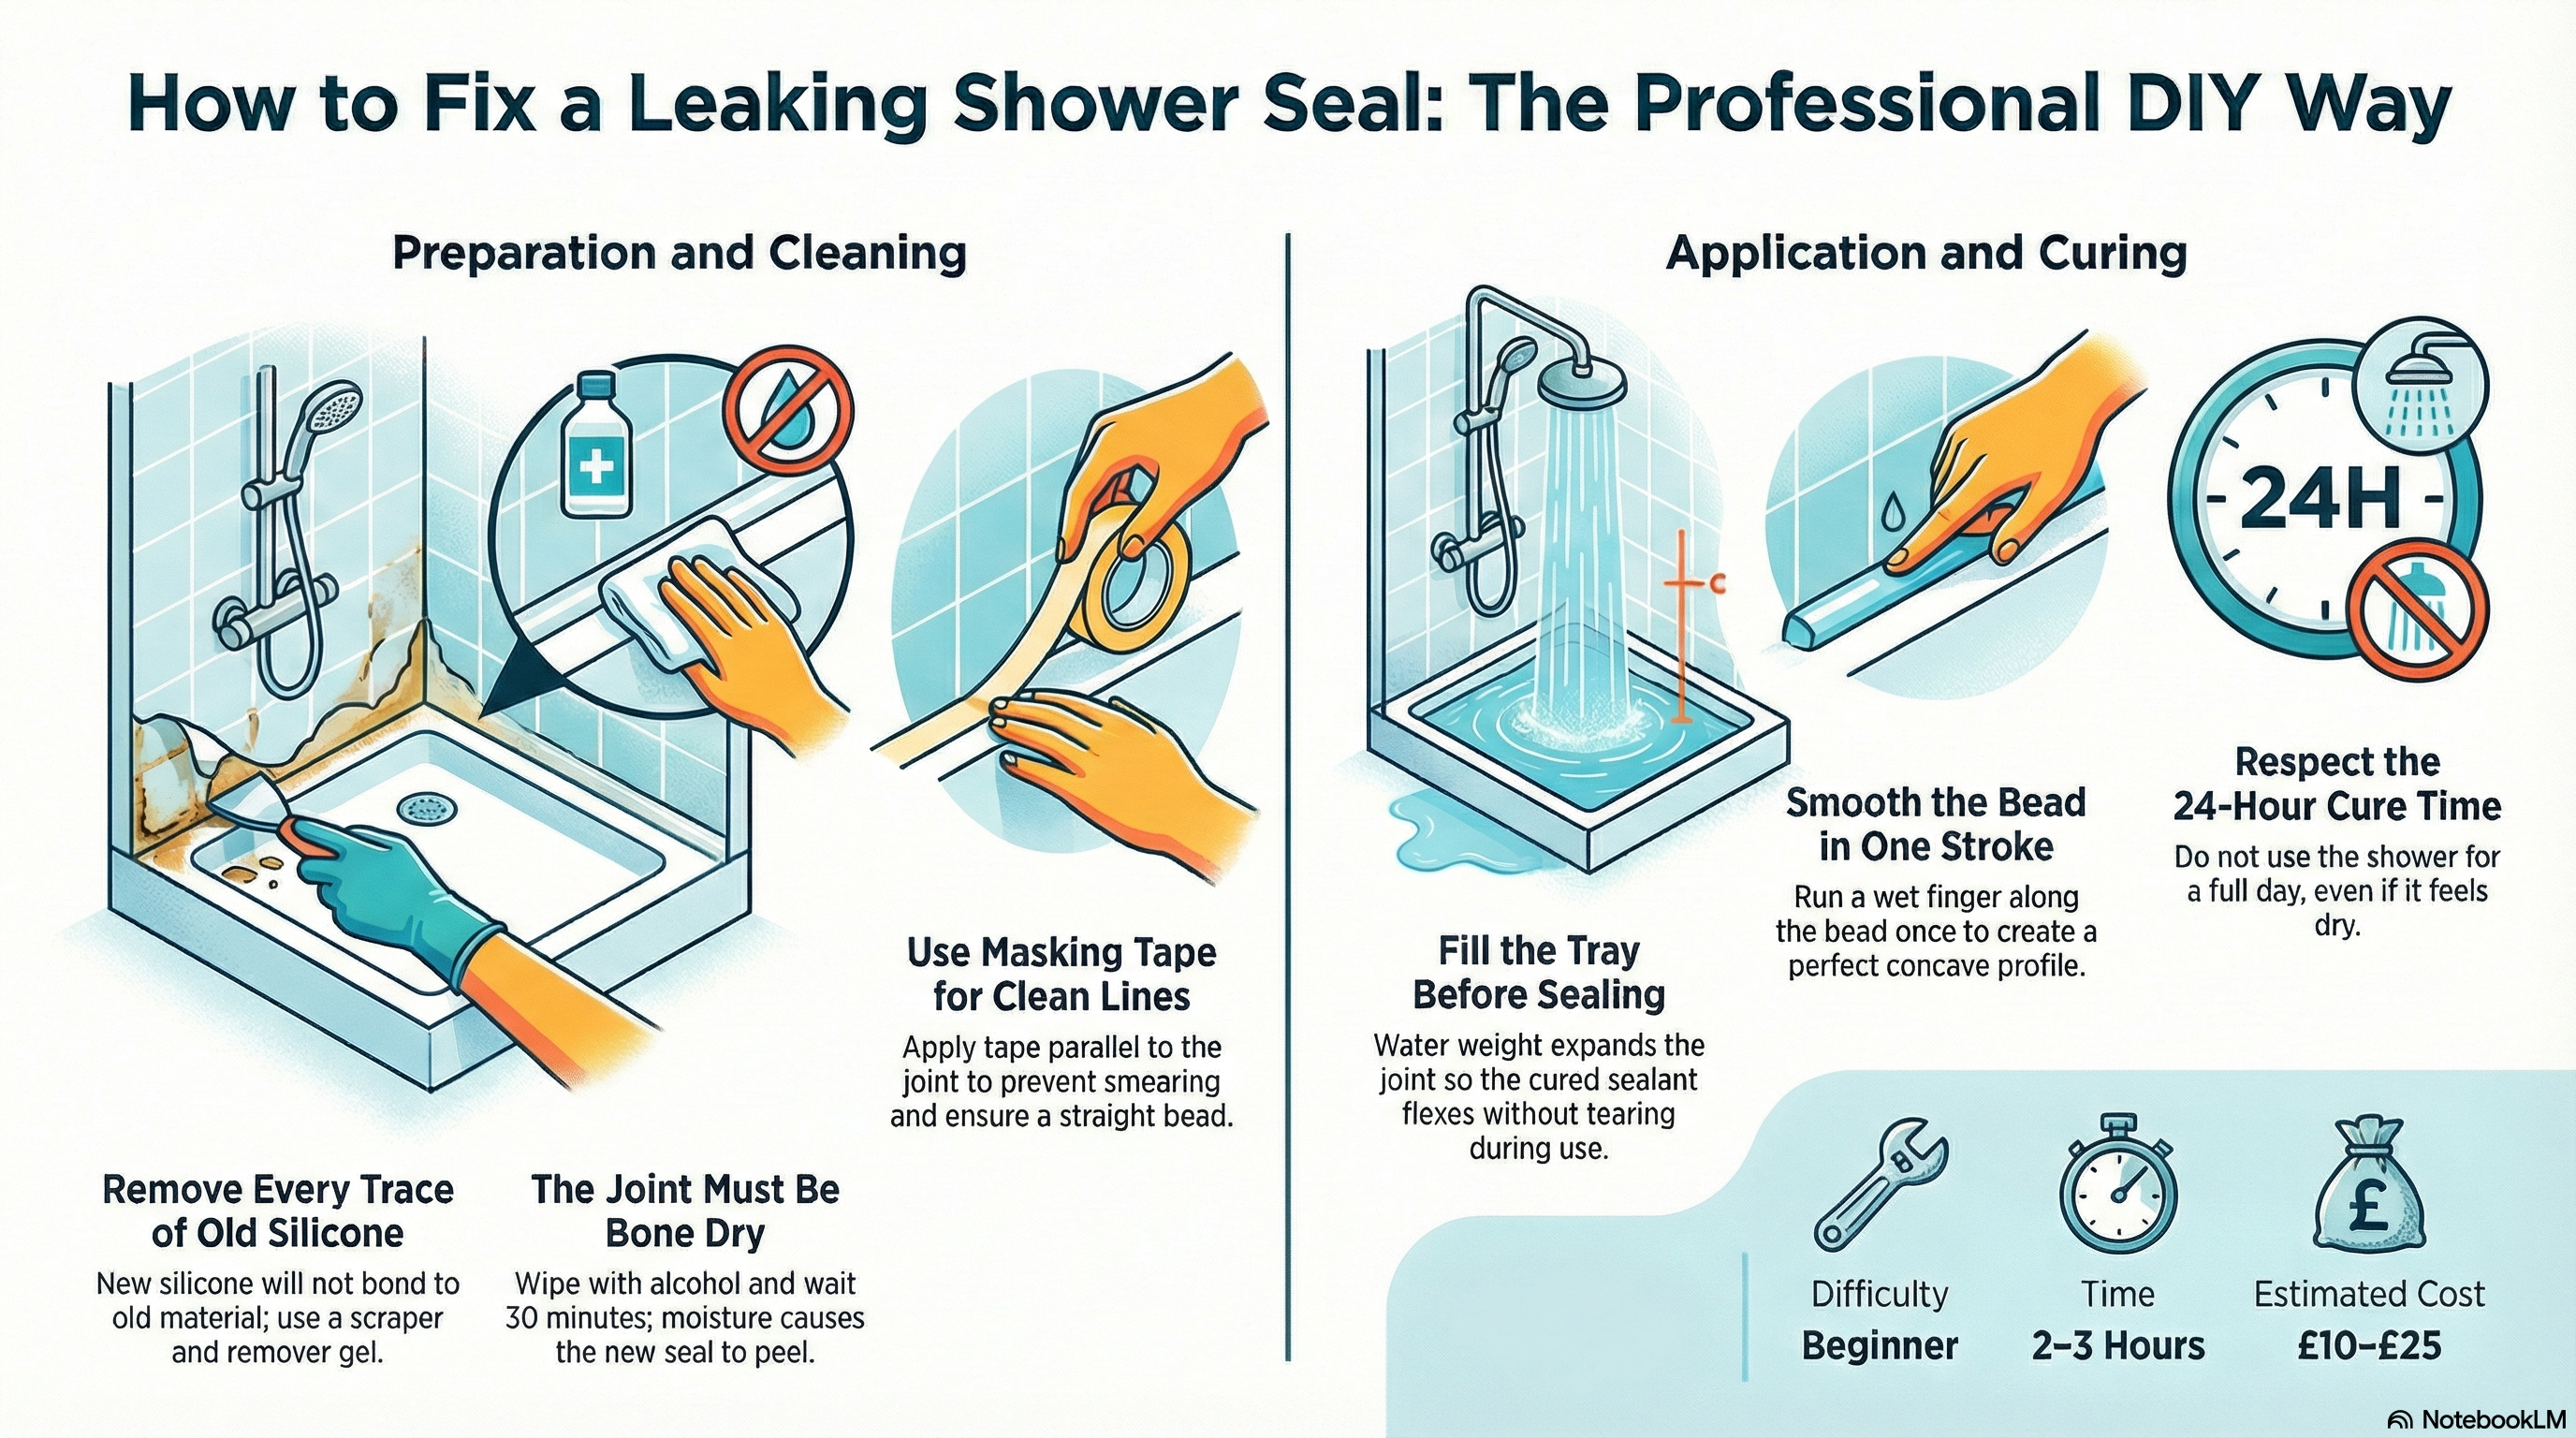
Remove the old sealant
Score along both edges of the existing sealant bead with a craft knife, then use a silicone remover tool or plastic scraper to peel it away in strips. Apply silicone remover gel to any stubborn residue, leave for the time stated on the packaging, then scrape clean — removing every trace is essential or the new sealant will not bond correctly.
Clean and dry the joint
Wipe down the entire joint with methylated spirits or isopropyl alcohol on a clean cloth to remove soap scum, grease, and any remaining remover residue. Allow the surface to dry completely — at least 30 minutes in a ventilated room — because silicone applied to a damp surface will fail and peel within weeks.
Apply masking tape either side of the joint
Run two strips of masking tape parallel to the joint, leaving only the gap you want to fill exposed. This keeps the sealant bead straight and prevents smearing onto the tiles or tray, giving a clean, professional finish when the tape is removed.
Fill the shower tray and apply the sealant
Fill the shower tray with water before applying sealant — the weight of water expands the tray joint to its widest point, so the cured sealant will flex correctly rather than tearing when the tray is in use. Load the cartridge into the caulking gun, cut the nozzle at a 45-degree angle, and pipe a continuous bead along the full length of the joint without stopping.
Smooth and shape the bead
Wet your finger and run it along the sealant bead in a single smooth stroke to press it into the joint and create a concave profile — do not go back over the same section twice or you will drag the silicone. Pull the masking tape away immediately at a 45-degree angle before the sealant skins over, then leave undisturbed.
Allow to cure fully before use
Leave the sealant to cure for a minimum of 24 hours before running the shower — most bathroom silicones require this regardless of what the packaging suggests for surface dry time. Drain the water from the tray only once the sealant has fully set.
Common Mistakes to Avoid
Frequently Asked Questions
How long does shower sealant take to dry?
Most mould-resistant bathroom silicones are touch-dry within 30–60 minutes but require a full 24 hours to cure before water contact. Always check the manufacturer’s instructions on the cartridge, as cure times vary by product.
Why does my shower sealant keep going mouldy?
Black mould on sealant is usually caused by inadequate ventilation — steam and moisture remain trapped, feeding mould growth. Always use a mould-resistant bathroom silicone and run an extractor fan or open a window during and after showering to reduce humidity.
Can I apply new sealant over old sealant?
What type of sealant should I use for a shower?
Use a mould-resistant, neutral-cure or acetoxy-cure silicone sealant specifically formulated for bathrooms and wet areas. Standard decorator’s acrylic caulk is not waterproof enough for shower joints and will break down rapidly under constant water exposure.
When should I call a plumber instead of DIYing the shower seal?
When piping the bead, keep the cartridge nozzle pressed firmly into the joint and push the gun forward rather than pulling it — this packs the silicone in from behind rather than dragging it across the surface, eliminating air pockets that cause premature seal failure. A bead that looks full on the surface but has voids underneath will crack and lift within months.
Sources
- WaterSafe — Find a WaterSafe approved plumber: watersafe.org.uk
- HSE — Water systems: legionella risks in domestic properties: hse.gov.uk
- Which? — How to regrout tiles and reseal a bath or shower: which.co.uk
Safety Notice: Electrical and plumbing work can be dangerous if done incorrectly. In the UK, certain electrical work must comply with Part P of the Building Regulations and certain plumbing work with Part G. If in doubt, consult a qualified electrician (NICEIC/NAPIT registered) or plumber (CIPHE/WaterSafe registered). This guide is for general information only — it is not a substitute for professional advice.
How to Fix a Leaking Shower Seal – Visual Guide