How to Fix Low Shower Pressure – DIY Guide
Fix low shower pressure by cleaning the shower head of limescale, checking the flow restrictor, inspecting the isolating valve, and verifying your home’s water pressure. Most causes are simple DIY fixes taking under an hour.

- Adjustable spanner
- Flathead screwdriver
- Phillips screwdriver
- Soft-bristled brush
- Bowl or bucket
- PTFE tape
- Torch
- White vinegar or descaling solution
- Replacement rubber washers
- Replacement shower head filter mesh
- PTFE tape
- Limescale remover spray
- Plastic bag and elastic band
Step-by-Step Guide
Check Your Home’s Water Pressure
Before touching the shower, confirm whether the issue is isolated to the shower or affects your whole home. Turn on a kitchen cold tap fully — if that flow is also weak, you have a wider pressure problem rather than a shower-specific fault. For whole-home low pressure, see our guide on how to fix low water pressure before proceeding. If only the shower is affected, move to the next step.
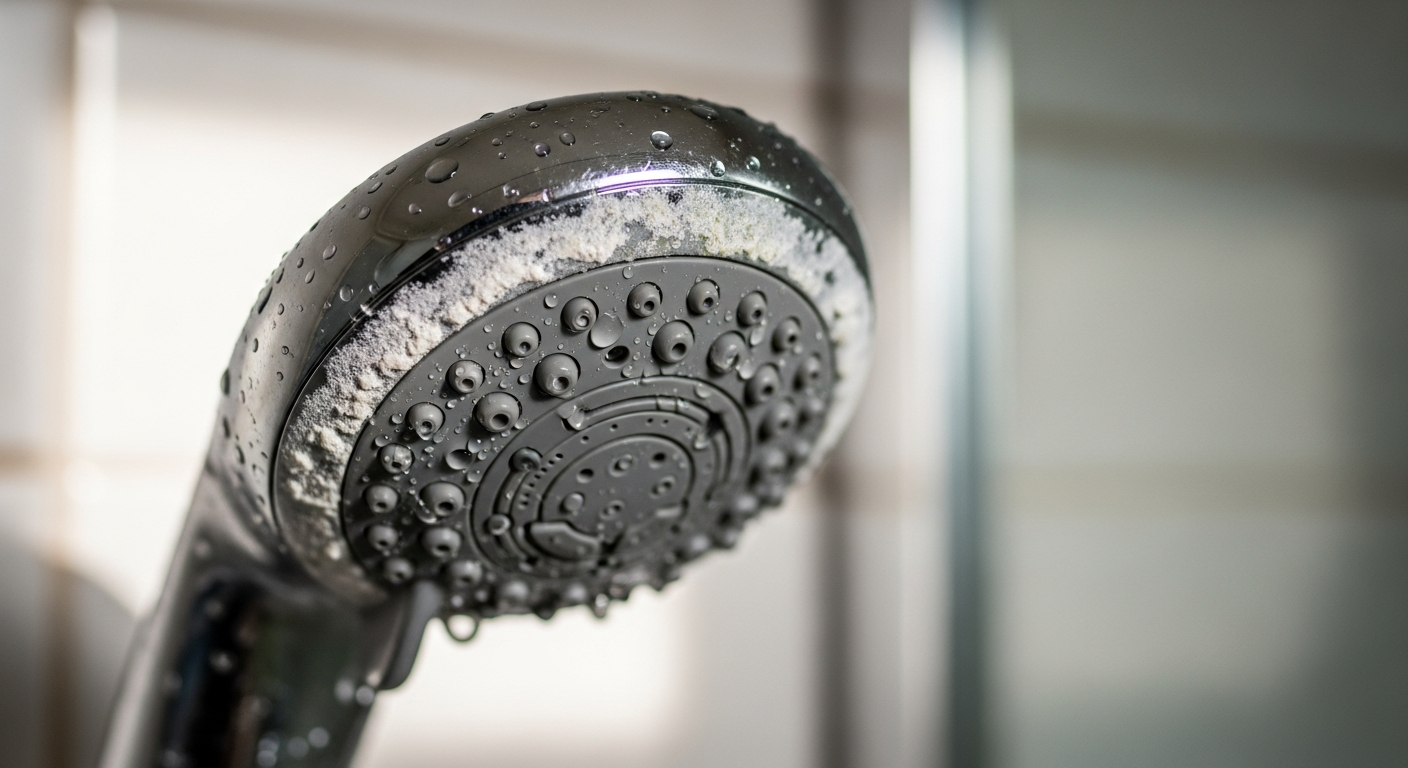
Inspect and Clean the Shower Head
Limescale build-up inside the shower head nozzles is the single most common cause of poor shower pressure in hard-water areas. Unscrew the shower head from the hose or arm — hand-tight for most models, use a cloth-padded spanner if necessary. Fill a bowl with white vinegar or a proprietary descaling solution, submerge the shower head completely, and leave it to soak for a minimum of one hour (overnight for heavy scale). Use a soft brush to scrub the nozzles clean, rinse thoroughly, and reattach using PTFE tape on the thread. If the shower head is fixed to the wall, fill a plastic bag with vinegar, secure it over the head with an elastic band so the nozzles are submerged, and leave it to soak.
Remove and Check the Flow Restrictor
Many modern shower heads and mixer cartridges include a built-in flow restrictor — a small plastic disc designed to limit water use. While useful for saving water, they significantly reduce pressure on already-low-pressure systems. Unscrew the shower head from the hose and look inside the inlet connection for a small disc or mesh insert. Remove it with a flathead screwdriver or small pick tool. Reattach the shower head and test the pressure. Note: removing the flow restrictor will increase water consumption, so weigh this against your household’s usage.
Check the Isolating Valve and Supply Pipes
Locate the isolating valve on the water supply pipe feeding the shower — usually found under the bath panel, behind the shower enclosure, or in the airing cupboard. If the valve is only partially open, it will throttle flow to the shower. Ensure the slot on the valve head is aligned with the pipe (parallel = fully open). While you are checking this, inspect the supply pipes for any kinks or tight bends in flexible hose connections that could be restricting flow. Knowing how to turn off the water supply before inspecting pipework prevents accidental leaks.
Test or Replace the Shower Cartridge
On electric showers and thermostatic mixer showers, a worn or scaled-up cartridge can restrict flow. Turn off the water supply at the isolating valve before proceeding. Remove the shower control handle (usually one screw under a cover cap) and expose the cartridge. Check for visible debris or scale around the cartridge body. Clean the housing with a damp cloth and, if scale is present, apply descaling solution and leave for 20 minutes. If cleaning does not restore pressure, the cartridge itself may need replacing — cartridges are model-specific, so photograph the unit and take it to a plumbers’ merchant for a direct replacement. For showers with persistent dripping or pressure loss, our guide on fixing a leaking shower tray covers related water management checks.
Consider a Pump or Pressurised System Upgrade
If all the above checks have been completed and pressure remains poor, the root cause is likely an inherently low-pressure gravity-fed system. In gravity-fed homes, the cold-water storage tank in the loft feeds the shower and the head of water (vertical distance between tank and shower head) determines pressure. A dedicated shower pump fitted to the hot and cold feeds can increase pressure significantly. This is a straightforward plumbing task but involves working on water supply pipes — if you are not confident, contact a WaterSafe-approved plumber. If you also have no hot water, resolve that issue first before assessing shower pressure.


Similar Posts
How to Replace a Shower Head – DIY Guide
Replace a shower head in under 30 minutes with PTFE tape and a spanner. Step-by-step guide for UK homes — no plumber needed.
How to Fix Leaking Shower Seal – 2026 Guide
Fix a leaking shower seal in an afternoon. Remove old silicone, clean the joint, and apply a fresh mould-resistant bead for a watertight finish.
How to Fix a Shower Head – DIY Guide
Fix a shower head yourself in under an hour. Covers descaling, washer replacement, and swivel joint repairs — no plumber needed.
How to Fix a Dripping Shower – DIY Guide
Fix a dripping shower yourself in 1–2 hours. Replace the cartridge, washer, or disc valve and stop the drip for good — step-by-step guide.

