How to Fix a Shower Head – DIY Guide
Fix a shower head by descaling the nozzles with white vinegar, replacing a worn washer at the hose connection, or tightening a loose swivel joint. Most shower head problems are caused by limescale build-up or a failed rubber seal — both are straightforward DIY repairs requiring basic tools.

- Adjustable spanner
- Flathead screwdriver
- Old toothbrush
- Cloth or rag
- Plastic container or bag
- PTFE tape dispenser
- White vinegar
- Replacement rubber washer
- PTFE tape
- Descaling solution
- Rubber O-ring (if applicable)
- Cable tie or elastic band
Step-by-Step Guide
Isolate the Water Supply
Turn off the water supply to the shower before starting — either at the shower valve isolator, the zone valve, or the main stopcock under the kitchen sink. If you are unsure how to turn off your water supply, follow our step-by-step guide before touching any fittings. Open the shower valve briefly to release residual pressure in the pipework before you begin.
Remove the Shower Head
Wrap a cloth around the shower head connection to protect the chrome finish, then use an adjustable spanner to unscrew it anticlockwise from the hose or fixed arm. If it has been in place for years, it may be stiff — apply firm, steady pressure rather than jerking it. Once removed, inspect the rubber washer inside the threaded connection: a flattened, cracked, or missing washer is the most common cause of dripping at the joint.
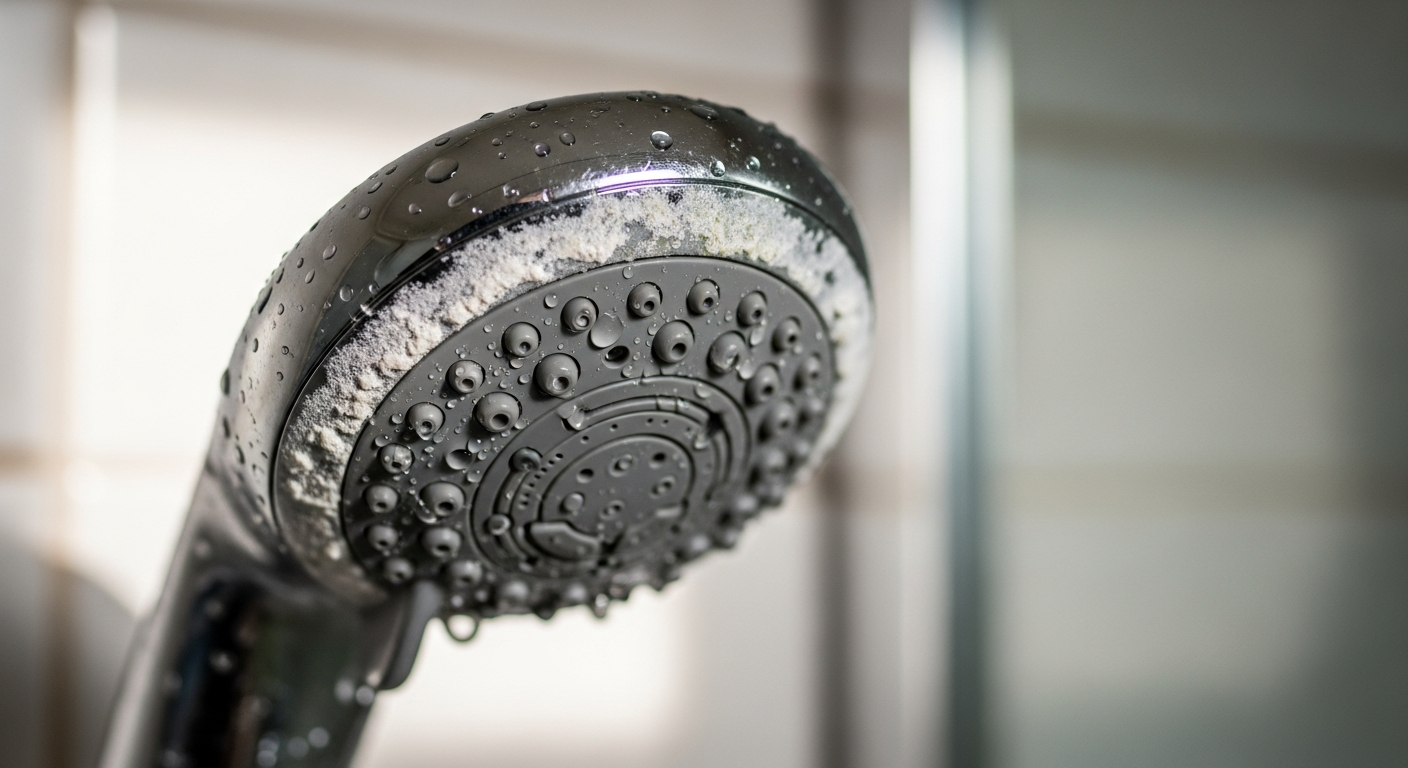
Descale the Shower Head Nozzles
Submerge the shower head in a container of undiluted white vinegar for a minimum of two hours — overnight is better for heavy limescale. If the head cannot be removed, fill a plastic bag with white vinegar, secure it around the head with a cable tie so the nozzles are fully submerged, and leave it in place. After soaking, use an old toothbrush to scrub the rubber nozzles, then rinse thoroughly. This resolves the majority of blocked-spray and low-pressure complaints without replacing any parts. If low pressure persists across your whole bathroom, see our guide on fixing low shower pressure.
Replace the Washer and Check the O-ring
Fit a new rubber washer into the recess inside the threaded inlet of the shower head — the washer should sit flat and fill the groove without bulging. If the hose connector has an O-ring as well as a washer, replace both at the same time; they cost pence and failing to do so often means redoing the job within months. Take the old washer to a plumbers’ merchant to match the diameter exactly. If you have a dripping shower even with a new washer, the fault may lie in the valve cartridge rather than the head itself.
Refit the Shower Head and Test
Wind two to three layers of PTFE tape clockwise around the male thread on the hose or arm before screwing the shower head back on — this ensures a watertight seal without over-torquing the fitting. Hand-tighten first, then give it no more than a quarter-turn with the spanner. Restore the water supply, turn on the shower, and check the connection point for drips. If you spot any weeping at the joint, isolate the supply again, add another layer of PTFE tape, and refit. Once watertight, check that the spray pattern is even across all nozzles.
Address a Loose or Stiff Swivel Joint
If the shower head swivel joint is loose and will not hold position, or is so stiff it will not pivot, unscrew the head from the ball-and-socket joint. A loose joint usually needs the internal O-ring replacing; a stiff joint is typically dry and benefits from a thin smear of silicone grease on the O-ring surface. Reassemble the joint and check the pivot action before refitting the head. For persistent water-flow problems that are not resolved by cleaning or washer replacement, also check for a leaking pipe joint behind the wall or at the riser rail bracket, as these can reduce pressure and cause intermittent flow issues.
Frequently Asked Questions
Why has my shower head lost pressure all of a sudden?
A sudden drop in shower pressure is most commonly caused by limescale blocking the nozzles or a debris particle lodged in the inlet filter mesh. Remove the shower head, soak it in white vinegar overnight, and clean the inlet filter — this resolves the majority of sudden pressure drops without any further investigation.
Can I fix a shower head without turning off the water?
You should always isolate the water supply before removing a shower head — water will flow as soon as the head is unscrewed if the valve is open. Turning off the supply takes less than a minute and prevents an avoidable soaking.
How often should I descale my shower head?
In hard water areas (much of the South East, Midlands, and East of England), descaling every three to four months keeps nozzles clear and maintains full flow. In soft water areas, once or twice a year is usually sufficient. You can check your water hardness at your supplier’s website.
My shower head is dripping even when the shower is off — what is causing it?
A drip from the shower head when the valve is off usually points to a worn cartridge or valve seal inside the shower body rather than a fault in the head itself — a new washer at the head connection will not cure it. Our guide to fixing a dripping shower covers cartridge diagnosis and replacement in full.
When should I replace the shower head rather than repair it?
If the shower head body is cracked, the ball-joint housing is split, or descaling no longer restores the spray pattern after repeated treatments, replacement is more cost-effective than continued repair. Our guide to replacing a shower head walks through the full process including matching thread types.
Before you reassemble any shower head fitting, run your finger around the inside of the female thread on the hose — if you can feel a groove worn into the brass, the thread is on its way out and PTFE tape alone will not give you a lasting seal. A small amount of plumber’s jointing compound applied over the PTFE tape on a worn thread will buy you considerably more service life than tape alone.
Sources
- Which? — Shower head problems and how to fix them — which.co.uk
- WaterSafe — Find an approved plumber in your area — watersafe.org.uk
- HSE — Water systems: legionella risks in domestic properties — hse.gov.uk
Safety Notice: Electrical and plumbing work can be dangerous if done incorrectly. In the UK, certain electrical work must comply with Part P of the Building Regulations and certain plumbing work with Part G. If in doubt, consult a qualified electrician (NICEIC/NAPIT registered) or plumber (CIPHE/WaterSafe registered). This guide is for general information only — it is not a substitute for professional advice.


