How to Fit Vinyl Flooring – 2026 Guide
How to Fit Vinyl Flooring
Lay durable, waterproof vinyl flooring yourself and save on professional fitting costs.
To fit vinyl flooring, prepare the subfloor until it is clean and level, cut the vinyl sheet or tiles to size, lay from the centre outwards, and secure the edges. Most rooms can be completed in a single day with basic tools.


- Tape measure
- Utility knife
- Straight edge or metal ruler
- Roller or rolling pin
- Floor scraper
- Notched adhesive spreader
- Pencil
- Rubber mallet
- Vinyl flooring sheet or vinyl floor tiles
- Self-levelling floor compound
- Floor adhesive
- Threshold strip
- Vinyl-compatible skirting or edge trim
- Sandpaper or sanding block
- Masking tape
- Underlayment (if required by manufacturer)
Step-by-Step Guide
Prepare the subfloor thoroughly
Remove all existing floor coverings, then scrape away any adhesive residue, raised nail heads, or debris. The subfloor must be clean, dry, and flat — any bumps or dips greater than 3 mm over a 1.8 m span will telegraph through the vinyl and cause it to crack or lift prematurely. Fill hollows with self-levelling compound and sand down any high spots, then allow to dry fully before continuing.
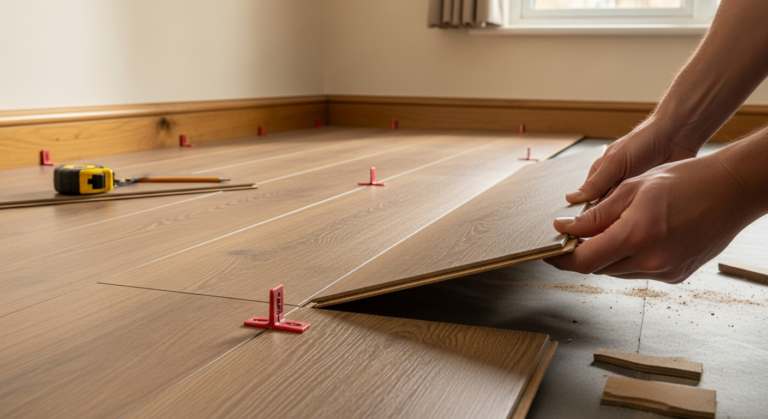
Acclimatise and plan the layout
Roll out or unbox the vinyl and leave it in the room for at least 24 hours so it adjusts to the room temperature — cold vinyl is stiff and prone to tearing during cutting. While it acclimatises, measure the room and mark the centre point if laying tiles, or identify the most prominent wall if laying sheet vinyl. Plan your layout so cut edges fall at the least visible edges of the room.
Cut the vinyl to size
For sheet vinyl, roll it out in the room and use a pencil to trace the wall profile onto the sheet, allowing an extra 50–75 mm on all sides. Use a straight edge and a sharp utility knife to cut along your lines — a dull blade drags and tears. For tiles, measure and mark each cut piece individually, score firmly on the face side, then snap or cut through cleanly.
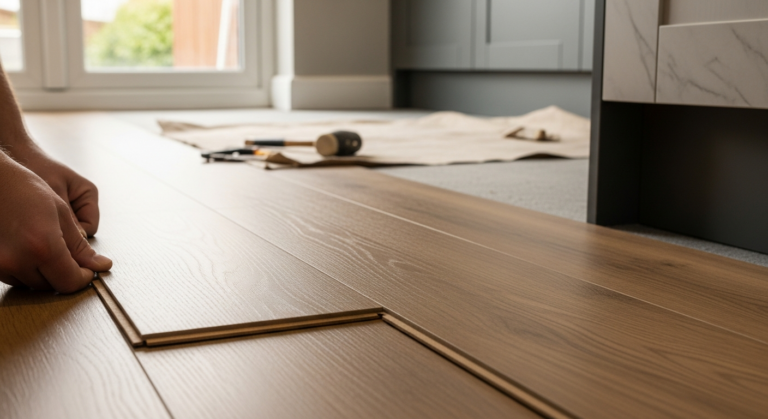
Apply adhesive and lay the flooring
For loose-lay sheet vinyl, fold back half the sheet, apply adhesive to the subfloor using a notched spreader, then carefully fold the sheet back down and press out air bubbles from the centre towards the edges using a floor roller. Repeat for the second half. For self-adhesive tiles, peel the backing and press firmly from the centre of the room outwards, butting each tile tightly against its neighbour without gaps.
Trim edges and fit finishing strips
Once the vinyl is fully laid, use a utility knife and straight edge to trim the excess flush against the skirting board or wall. At doorways and transitions to other floor types, fit a threshold strip using the fixings provided to protect the cut edge and create a neat join. Press the edges down firmly, particularly in corners where lifting is most likely.
Allow adhesive to cure before use
Keep foot traffic off the floor for the adhesive cure time stated by the manufacturer — typically 12–24 hours for full bond strength. Avoid dragging furniture across the surface during this period. Once cured, refit any skirting boards or door trims you removed during preparation.
Frequently Asked Questions
Do I need to glue down vinyl flooring or can I loose-lay it?
Many modern vinyl sheets and click-lock planks are designed to be loose-laid without adhesive, which makes future removal easier. However, in high-traffic areas, kitchens, or rooms prone to moisture, full or perimeter adhesive bonding will provide a more stable and long-lasting result.
Can I fit vinyl flooring over existing tiles or laminate?
How do I cut a neat curve around a toilet base or door architrave?
Make a paper or card template by cutting and folding it to fit the profile precisely, then transfer the shape onto the vinyl before cutting. For door architraves, undercut the architrave with a multi-tool or hand saw so the vinyl slides neatly underneath rather than being cut around it.
Is vinyl flooring suitable for bathrooms and kitchens?
Yes — vinyl is one of the most suitable flooring choices for wet rooms because it is inherently waterproof. Ensure all seams and edges are properly sealed or adhered so water cannot penetrate to the subfloor beneath, which can cause the subfloor to swell and the vinyl to lift.
How long does vinyl flooring typically last?
A quality vinyl floor that has been correctly fitted and maintained will typically last 10–20 years in a domestic setting. Wear life depends on the thickness of the wear layer — commercial-grade vinyl with a thicker wear layer will outperform budget domestic products in high-traffic areas.
Before you cut sheet vinyl to its final size, scribe the wall profile using a small block of wood and a pencil run along the wall — this accounts for walls that are not perfectly straight or square and gives you a factory-neat fit without guesswork. Do this before removing the excess, not after.
Sources
- HSE — Slips and trips: flooring materials and surfaces — hse.gov.uk
- Which? — How to lay vinyl flooring — which.co.uk
- GOV.UK — Building regulations: floors — gov.uk
This guide is for general information only. Always work safely and follow manufacturer instructions. DIYnut accepts no liability for injury or damage arising from DIY work.