Spring Window Cleaning and Maintenance
Doors & Windows › Doors & Windows
Spring Window Cleaning and Maintenance
Catch winter damage early and keep your windows performing all year.
Spring window maintenance means cleaning frames and glass, inspecting seals and sills, lubricating hardware, and resealing any gaps before warm weather sets in. Tackling these tasks in March or April prevents costly repairs and keeps your home weathertight.

Why This Season Matters
Winter is hard on windows. Freeze-thaw cycles crack sealant, condensation sits in frames for months, and driving rain forces water into gaps that weren’t properly sealed in autumn. By the time spring arrives, minor issues have often compounded into rot, mould, or failed double-glazing units.
Addressing your windows in March or April means you’re working in mild, dry conditions before summer heat bakes old sealant hard and makes it near-impossible to remove cleanly. You also give any fresh sealant or paint the time it needs to cure properly before the warmest months.
Your Complete Checklist
- Clean all glass inside and out with a squeegee and mild washing-up liquid solution
- Wipe down uPVC, aluminium, and timber frames with a damp cloth and appropriate cleaner
- Inspect timber sills for soft spots, cracks, or paint failure — see Fix a Rotting Window Sill
- Check and repair wooden window frames for cracks or movement — see Repair a Wooden Window Frame
- Examine perimeter sealant for cracks, shrinkage, or gaps — see Seal a Leaking Window
- Replace failed or brittle window seals — see Replace a Window Seal
- Check for condensation or misting between double-glazed panes — see Fix Condensation in Double Glazing
- Test all opening sashes and casements for smooth operation — see Fix a Jammed Sash Window
- Lubricate hinges, handles, and locking mechanisms with a suitable dry lubricant
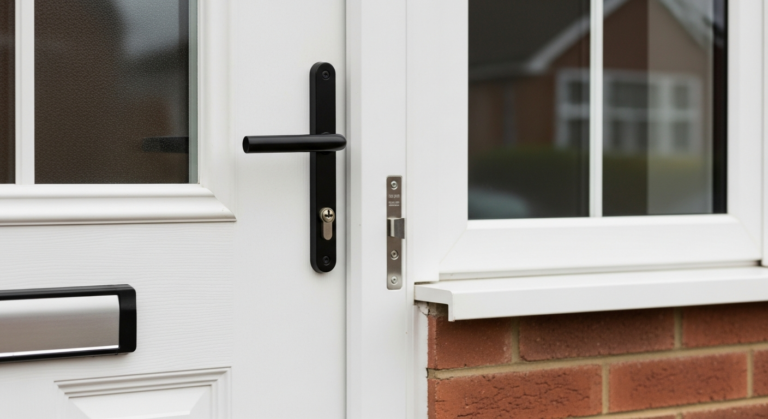
- Test and adjust uPVC window handles if stiff or loose — see Fix a uPVC Window Handle
- Clear out any debris from drainage slots and channels in uPVC frames
- Inspect surrounding internal walls for damp patches or hairline cracks near window reveals
Step-by-Step for Each Task
1. Cleaning frames and glass. Start from the top and work down. Mix a small amount of washing-up liquid in a bucket of warm water. Use a soft cloth or sponge on frames — avoid abrasive pads on uPVC as they cause micro-scratches that trap dirt. For glass, apply the solution, then draw a squeegee in overlapping vertical strokes. Finish with a lint-free cloth on the edges. Clean inside first so you can clearly see any remaining marks from outside.
2. Inspecting and replacing sealant. Run your finger along the bead of sealant where the frame meets the wall render or brickwork. Soft, crumbly, or separated sealant must be fully removed before you apply new. Use a sealant remover tool or a stiff putty knife to cut out the old material, then wipe the channel with white spirit on a rag. Apply a fresh bead of exterior-grade silicone in one continuous pass, tooling it smooth with a wetted finger or spatula immediately after.
3. Checking timber frames and sills. Press a penknife blade gently into painted timber at sill corners and joints. If it sinks more than 2–3 mm without resistance, the wood is beginning to rot. Soft areas that are still structurally sound can be treated with a wood hardener, then filled with a two-part exterior wood filler. Sand flush when cured and repaint with two coats of exterior wood paint. Extensive rot means the sill or frame section needs replacing — see the full guide to repairing a wooden window frame for detailed steps.
4. Lubricating and adjusting hardware. Open each window fully and wipe down hinge pivots, espagnolette rods, and locking cams with a dry cloth. Apply a PTFE or silicone-based dry lubricant spray — not WD-40, which attracts dust and can stiffen mechanisms over time. Operate the handle several times to work the lubricant through. If a uPVC casement feels stiff or drops when open, the friction hinges need adjusting with a hex key — most have a small adjustment screw in the friction shoe.
Tools and Materials You’ll Need
- Bucket and warm water with washing-up liquid
- Squeegee (300–400 mm blade)
- Soft microfibre cloths and lint-free glass cloths
- Sealant remover tool or stiff putty knife
- White spirit
- Exterior-grade silicone sealant (clear or colour-matched)
- Sealant gun
- Penknife (for probing timber)
- Wood hardener and two-part exterior wood filler
- Medium and fine sandpaper (80 and 120 grit)
- Exterior wood paint and small brush
- PTFE or silicone dry lubricant spray
- Hex key set (for adjusting uPVC hinges)
- Flat-head and cross-head screwdrivers
- Wooden toothpicks or cocktail sticks (for clearing drainage slots)
- Safety glasses and gloves
Common Mistakes to Avoid
- Applying new sealant over old. New sealant will not bond properly over a failed bead. Always remove the old material completely before re-sealing, or the new joint will fail within a season.
- Using abrasive cleaners on uPVC. Cream cleaners and scouring pads scratch the surface, leaving it dull and prone to staining. Use only uPVC-specific spray cleaner or mild soapy water.
- Painting over damp timber. If you paint before the wood has fully dried after winter, you trap moisture inside and accelerate rot. Allow at least two dry days after rain before painting exterior timber.
- Ignoring drainage slots. uPVC frames have small drainage holes or slots at the bottom of the outer frame to let rainwater escape. Blocked slots cause water to pond inside the frame and leak into the reveal. Clear them with a toothpick or thin wire.
- Using WD-40 on window mechanisms. It is a water displacer, not a long-term lubricant. On window espagnolette bolts and hinges it collects grime and can cause locks to stiffen within weeks. Use a dry PTFE spray instead.
Frequently Asked Questions
How often should I clean and maintain my windows?
A thorough maintenance check twice a year — spring and autumn — is sufficient for most homes. Glass can be cleaned more frequently depending on your local environment, but frame inspections and sealant checks are most critical before and after winter.
Can I fix misting between double-glazed panes myself?
In most cases, misting means the hermetic seal has failed and the sealed unit needs replacing rather than repairing. Specialist firms can drill, inject, and re-seal some units, but replacing the glazed unit is the most reliable long-term fix — see our guide to fixing condensation in double glazing for your options.
What type of sealant should I use around external window frames?
Use a low-modulus neutral-cure silicone sealant rated for exterior use. Avoid acetoxy-cure (vinegar-smell) silicone on uPVC or aluminium as it can cause long-term adhesion problems. For timber frames, a paintable acrylic frame sealant is often preferable so it can be overcoated.
My sash window is painted shut — how do I free it without causing damage?
Is spring window maintenance something I need a professional for?
Most spring maintenance tasks — cleaning, lubricating, re-sealing, and minor timber repairs — are well within beginner DIY capability. You should involve a professional if you find significant frame rot, failed double-glazed units requiring replacement, or any structural movement around the window opening.
When re-sealing external window frames, mask both sides of the joint with low-tack tape before applying silicone — this gives a sharp, professional edge and prevents silicone smearing onto brickwork or uPVC where it is notoriously hard to remove once cured. Remove the tape while the sealant is still wet, not after it has skinned.
Sources
- HSE — Working at height: ladders and stepladders — hse.gov.uk
- Which? — Double glazing problems and repairs — which.co.uk
- Historic England — Maintenance and repair of traditional windows — historicengland.org.uk
This guide is for general information only. Always work safely and follow manufacturer instructions. DIYnut accepts no liability for injury or damage arising from DIY work.