How to Draught Proof a Door – DIY Guide
Doors & Windows › Draught Proofing
How to Draught Proof a Door
Stop cold air getting in, cut heating bills, and make your home noticeably warmer.
To draught proof a door, fit self-adhesive foam or brush strip seal around the frame, add a door threshold strip or draught excluder at the bottom, and seal the keyhole and letterbox. Most doors can be fully draught proofed in under two hours.


- Tape measure
- Scissors or craft knife
- Screwdriver (cross-head and flat-head)
- Bradawl or hand drill
- Pencil
- Hammer
- Self-adhesive foam or rubber draught seal strip
- Brush pile draught strip
- Door threshold strip (aluminium with rubber insert)
- Door bottom draught excluder
- Letterbox draught excluder flap
- Keyhole cover or escutcheon cover
- Panel pins or small screws (if fixing non-adhesive strips)
Step-by-Step Guide
Assess the gaps around the door
Close the door fully and check for daylight or cold air around the frame, under the door, and at the letterbox and keyhole. Run your hand slowly around the perimeter on a cold day — you will feel where air is getting in. This tells you exactly which products you need before you buy anything. A door with a large gap at the bottom needs a threshold strip; a door that rattles in the frame needs compression seal around the head and jambs. If your door sticks, warps, or will not close properly, address that first — see our guide to fixing a door that won’t close before fitting any seals.
Measure and cut the frame seal strips
Measure the height of both side jambs and the width of the top of the door frame. Cut your foam or rubber compression seal strip to these lengths using scissors or a craft knife. For timber frames, a self-adhesive rubber P-profile or E-profile strip presses into the rebate — the channel the door closes against — and compresses to form a seal when the door shuts. For doors with little or no rebate, a brush pile strip pinned to the door stop is more effective. Cut strips cleanly at 45 degrees at the corners for a neat fit.
Fit the seal strip around the door frame
Peel the backing from self-adhesive strips a section at a time and press firmly into the door rebate, working from top to bottom on each side. Start at the top corner and keep the strip tight to the edge so it makes contact with the door face across its full length. If using a brush pile strip, position it so the bristles just touch the door face without causing resistance — too tight and the door drags, too loose and air still gets through. Secure non-adhesive strips with panel pins every 200–250 mm. Close the door to check the seal compresses evenly before moving on.
Fit a threshold strip or door bottom excluder
The gap under a door is typically where the most heat escapes. A threshold strip screwed to the floor across the full door width is the most durable solution — the door closes down onto a rubber insert, forming a continuous seal. Measure the door width, cut the strip to length with a hacksaw if needed, and screw it to the floor so the rubber insert just makes contact with the door bottom when closed. For an external door with an existing threshold that cannot be altered, a surface-mounted door bottom strip — a rubber or brush seal screwed to the door face — works well. Avoid simple fabric draught excluders pushed against the door: they move, they wear, and they let air through when the door opens. For background on related doors and windows improvements , our category guide covers the full scope.
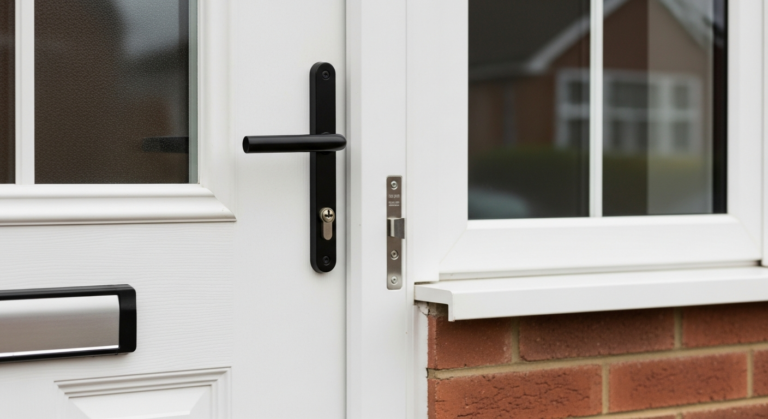
Seal the letterbox and keyhole
A standard letterbox can let in a surprising volume of cold air. Fit a letterbox draught excluder with an internal brush or flap — these screw directly to the inner face of the door over the existing aperture and take around ten minutes to fit. For the keyhole, press-fit a spring-loaded keyhole cover (escutcheon cover) over the hole; these require no fixings and pivot open when a key is inserted. If your door has a uPVC door latch issue that prevents the door closing tightly against the seals, fix the latch before relying on draught strips to do all the work.
Test the door and adjust as needed
Close the door firmly and check the action — it should close and latch without excessive force. Run your hand around the full perimeter again, or hold a thin strip of paper in the gap and pull gently: if the paper slides out freely, the seal is not compressing fully and needs repositioning. Check the threshold strip makes contact edge to edge with no raised or dipped sections. A correctly draught-proofed external door will feel noticeably stiffer to open than before, and the interior should feel warmer almost immediately on a cold day. If you have a sticking door after fitting seals, trim the compression strip back slightly — you have likely compressed it too hard against the door stop.
Frequently Asked Questions
What is the best draught seal for an external door?
A rubber compression P-profile or E-profile strip in the door rebate combined with an aluminium threshold strip at the bottom gives the most durable, weathertight result. Foam strip is cheaper but degrades faster, particularly on an external door exposed to sun, rain, and daily wear.
How much can draught proofing a door save on energy bills?
The Energy Saving Trust advises that draught proofing throughout a home — doors, windows, and floors — can save a meaningful amount annually, though exact savings depend on house size, construction, and heating habits. Even a single well-sealed external door makes a measurable difference to comfort.
Can I draught proof a uPVC door myself?
Yes, though uPVC doors use a different system — the rubber gasket seal moulded into the frame does the work, and if it has perished it can be replaced by pressing new gasket strip into the groove. A uPVC door that doesn’t latch properly will also let in draughts regardless of the seal condition, so check the latch and hinges first.
How long does draught strip last before it needs replacing?
Self-adhesive foam strip typically lasts two to five years before it compresses permanently or the adhesive fails. Rubber or silicone strip lasts longer — often ten or more years on an internal door. Brush pile strips on high-traffic doors may need replacing every three to five years as the bristles flatten.
Do I need to draught proof internal doors as well?
Draught proofing internal doors between heated and unheated spaces — such as between a hallway and a living room, or at the top of a staircase — can reduce heat loss significantly. It is less critical than external doors but worthwhile in older properties with draughty hallways or cold loft hatches.
Apply compression seal strip to a door frame in cold weather only when the frame is completely dry — adhesive backing fails on damp timber almost immediately, and you will be refitting it within weeks. If the frame is even slightly damp, pin the strip mechanically and leave adhesive-only products for dry, warm conditions.
Sources
- Energy Saving Trust — Draught-proofing — energysavingtrust.org.uk
- GOV.UK — Energy efficiency: draught proofing your home — gov.uk
- Which? — How to draught-proof your home — which.co.uk
This guide is for general information only. Always work safely and follow manufacturer instructions. DIYnut accepts no liability for injury or damage arising from DIY work.