Best Flooring for Dogs – DIY Guide
The best flooring for dogs is luxury vinyl plank or porcelain tile — both resist scratches, moisture, and pet accidents. Laminate is a budget option but can swell if wet. Avoid solid hardwood and carpet in high-traffic pet areas where claws and spills cause lasting damage.

- Tape measure
- Utility knife
- Notched trowel
- Rubber mallet
- Pull bar
- Knee pads
- Pencil
- Luxury vinyl plank flooring
- Porcelain floor tiles
- Waterproof laminate flooring
- Tile adhesive
- Waterproof grout
- Self-levelling compound
- Moisture barrier underlay
- Transition strip
Step-by-Step Guide
Assess your space and dog’s behaviour
Before buying anything, consider your dog’s size, breed, and activity level. A large active dog with long claws demands a harder-wearing surface than a small, calm breed. Measure the room accurately and note any wet zones — kitchens, utility rooms, and hallways near exterior doors take the most punishment from muddy paws and spills. This assessment drives every decision that follows.
Choose the right flooring type for your situation
Luxury vinyl plank (LVP) is the most practical all-round choice for dog owners — it’s fully waterproof, soft underfoot, and resists surface scratches from claws. Porcelain tile is the hardest-wearing option and completely impervious to moisture, but it’s cold and hard — add a washable rug for comfort. Compare vinyl plank vs laminate if you’re weighing up cost against durability — laminate is cheaper but its surface layer can scratch and its core swells when wet, making it a risk in any area where accidents are likely.
Prepare the subfloor before laying anything
A solid, level subfloor is essential — any movement or flex will cause clicks, gaps, or lifted edges over time, particularly with floating floors. Check for squeaks, loose boards, or dips greater than 3mm over a 1.8m span. Fill dips with self-levelling compound and allow it to cure fully before proceeding. Fix any dip in the floor before laying your new surface — a dog’s repeated movement across an unsupported area will accelerate failure. If laying LVP over concrete, fit a moisture barrier underlay to prevent damp migration.
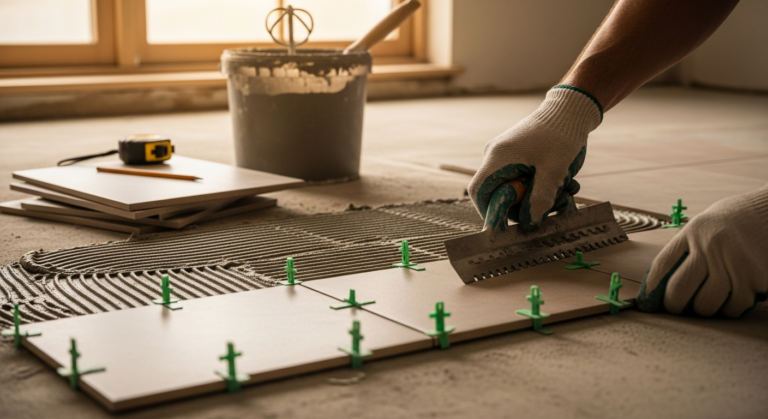
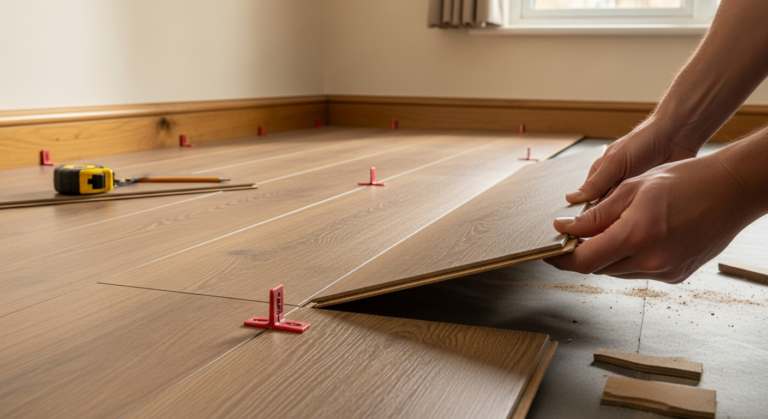
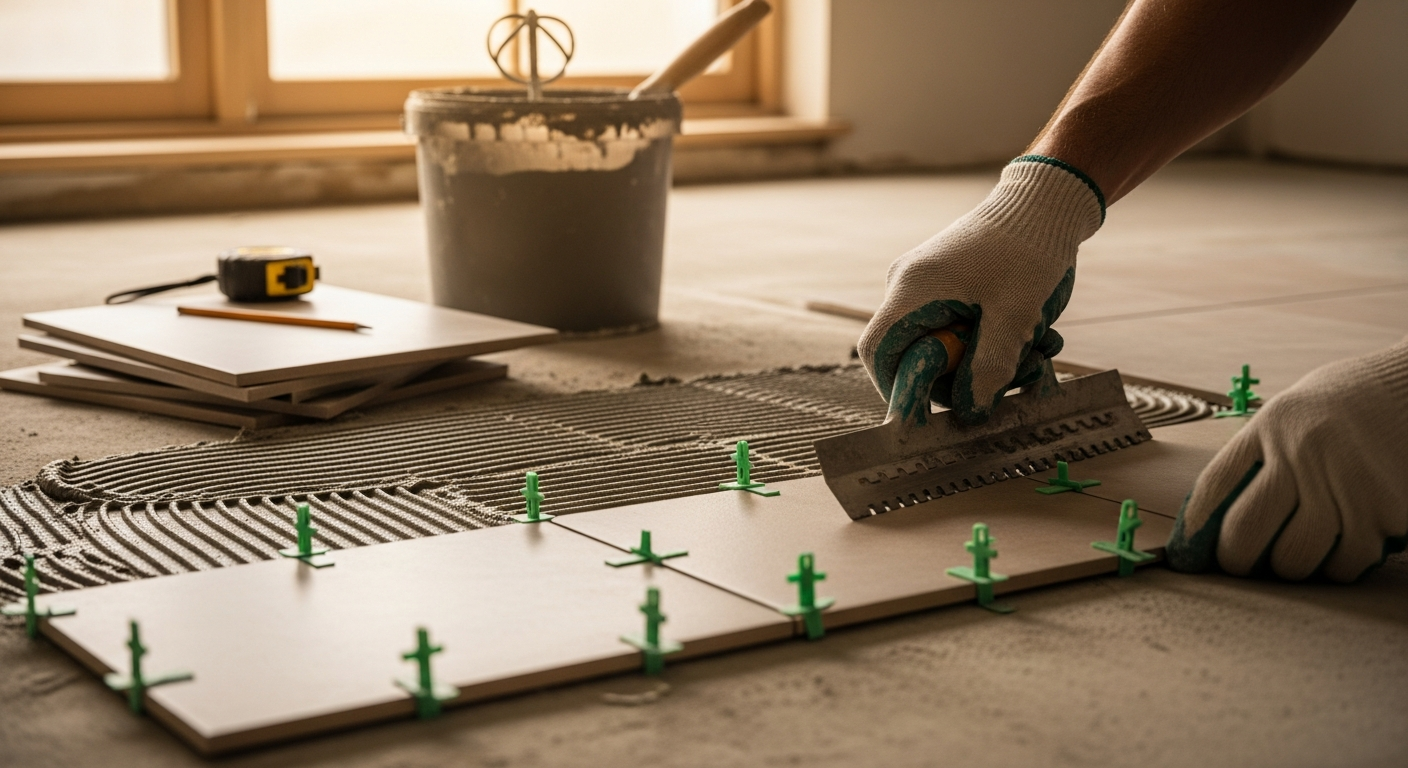
Lay your chosen floor following manufacturer guidance
For luxury vinyl plank, click boards together working from the longest wall and stagger the end joints by at least 200mm between rows — this gives structural integrity and a natural appearance. Use a pull bar and rubber mallet at the end of rows rather than forcing joints, which can crack the locking mechanism. For porcelain tiles, bed them into the correct adhesive for the substrate using a notched trowel, maintaining consistent joint widths with tile spacers. Lay floor tiles without lippage to avoid trip hazards and joints that catch dirt. Leave expansion gaps at all walls and fixed objects as specified by the manufacturer.
Seal joints and grout lines where required
If you’ve laid porcelain tiles, grout all joints once the adhesive has cured — typically 24 hours. Use a waterproof grout formulated for floors and work it in diagonally with a float, removing excess before it sets. For LVP, ensure all transition strips are fitted at doorways and floor changes to protect the exposed edge of the board. Regrout floor tiles if you’re refreshing an existing tiled floor rather than replacing it — this alone can restore a floor that looks tired and stained from pet activity.
Maintain your floor to extend its working life
Keep dog claws trimmed — this is the single most effective measure against surface scratching on any floor type. Place washable mats at exterior doors to catch mud and moisture before it reaches the main floor. Clean up pet accidents immediately; even waterproof floors can suffer if liquid is left to sit in joints or seams. For LVP and laminate, use a damp mop only — no soaking — and avoid abrasive cleaning products that strip the surface finish. Repair chipped laminate promptly if damage does occur, before moisture gets underneath the board.
Frequently Asked Questions
Is luxury vinyl plank really scratch-resistant enough for large dogs?
LVP with a wear layer of 12 mil or above handles most domestic dog traffic well, but it is scratch-resistant rather than scratch-proof. Large breeds with long claws can mark softer LVP over time — choose a thicker wear layer and keep claws trimmed. Porcelain tile is the only genuinely scratch-proof option.
Is carpet ever a good choice with dogs?
Carpet traps pet hair, dander, and odours deeply in the pile and is nearly impossible to fully clean after accidents — staining and bacterial growth are persistent problems. If you prefer a soft surface, use washable rugs over hard flooring rather than fitting wall-to-wall carpet in areas your dog uses regularly.
What is the cheapest dog-friendly flooring option?
Waterproof laminate is the most affordable entry point and performs adequately if accidents are cleaned up immediately. Standard laminate is not waterproof and will swell if liquid sits on it — always check the product is rated waterproof before buying it for a pet household. Read our laminate flooring buying guide to understand the spec differences before committing.
Does flooring colour matter when you have a dog?
Mid-tone and textured surfaces hide pet hair, muddy paw prints, and minor scratches far better than very dark or very light floors. Very dark tiles and dark laminate show every speck of dust and every claw mark, while very pale floors show mud and stains immediately — a mid-tone or natural wood-effect finish is the practical compromise.
Can I lay dog-friendly flooring myself or should I use a tradesperson?
LVP click flooring is a genuine DIY job for a reasonably capable adult — no specialist tools are required and most rooms can be completed in a day. Porcelain tiles take more skill to lay correctly, particularly keeping them flat and level. If you’re unsure about tile work, our complete flooring guide covers what each installation method involves before you decide.
Fit a continuous sheet of moisture barrier underlay — not individual strips — across the entire subfloor before laying LVP in any pet household. Overlapping and taping the seams properly prevents the one weak point (the joint) from becoming a route for moisture or pet accident liquid to reach the subfloor and cause long-term damage that only reveals itself months later.
Sources
- Which? — Best flooring for pets — which.co.uk
- PDSA — Caring for your dog: environment and home — pdsa.org.uk
- HSE — Slips and trips: guidance on floors — hse.gov.uk
This guide is for general information only. Always work safely and follow manufacturer instructions. DIYnut accepts no liability for injury or damage arising from DIY work.