How to Lay Floor Tiles – DIY Guide
To lay floor tiles, prepare a clean and level subfloor, find the centre of the room, dry-lay tiles to plan your layout, bed each tile in adhesive with spacers, then grout once fully cured. Allow 24 hours before walking on the floor.


- Tape measure
- Chalk line
- Notched adhesive trowel
- Rubber mallet
- Tile cutter or angle grinder with diamond blade
- Grout float
- Spirit level
- Bucket and sponge
- Floor tiles
- Floor tile adhesive
- Tile spacers
- Grout
- Flexible silicone sealant
- Self-levelling compound
- Primer
- Waterproof membrane (wet rooms)
Step-by-Step Guide
Prepare the Subfloor
The subfloor must be solid, clean, dry, and level before a single tile goes down. Any flex, dip, or debris will crack tiles or cause adhesive failure over time. Check for movement in floorboards — if present, overlay with 12 mm exterior-grade plywood, screwed at 200 mm centres. Fill any dips greater than 3 mm with self-levelling compound and allow it to cure fully. Prime the surface if the manufacturer’s instructions require it.
Find Your Centre and Plan the Layout
Snap chalk lines between the midpoints of opposite walls to find the true centre of the room — this is your starting point. Dry-lay a row of tiles from the centre towards each wall, including spacers, to see how the cut tiles at the edges will work out. Aim for cut tiles of at least half a tile width at each wall; if you end up with slivers, shift your starting point by half a tile. This planning stage prevents awkward cuts in the most visible spots and gives the finished floor a balanced, professional look.
Apply the Adhesive
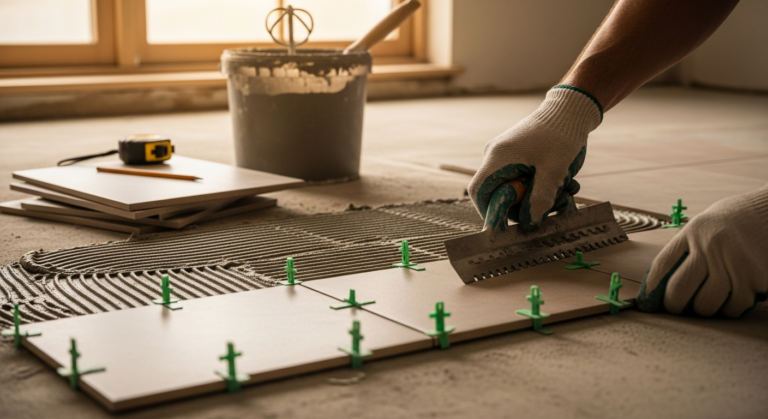
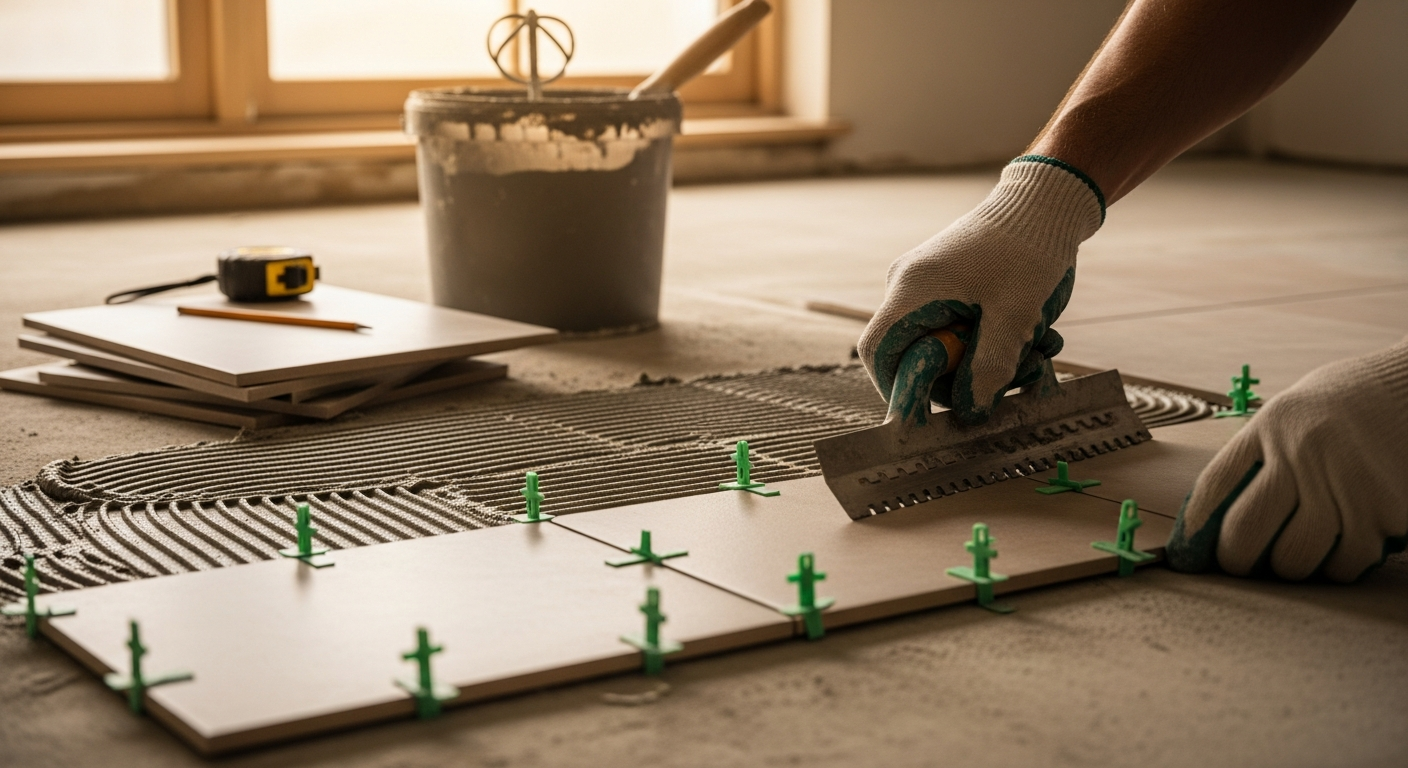
Mix floor tile adhesive to a smooth, lump-free consistency and apply it to the subfloor using the flat edge of a notched trowel, then comb through with the notched edge to create even ridges. Work in sections of roughly 1 square metre so the adhesive does not skin over before the tiles are placed. The ridges ensure full, even coverage under each tile — this is critical for heavy foot traffic areas and for tiles larger than 300 x 300 mm, which also benefit from back-buttering (applying a thin layer of adhesive directly to the tile back as well).
Lay and Bed the Tiles
Press each tile firmly into the adhesive, twisting it slightly as you push down to collapse the ridges and achieve full contact. Use a rubber mallet and a piece of scrap board to bed the tile evenly, and check regularly with a spirit level to ensure all tiles are flush. Insert tile spacers at every corner to maintain consistent grout joints. Work outward from your centre point, saving cut tiles for last. For guidance on achieving a perfectly even surface without lippage, see our advice on laying floor tiles without lippage.
Cut and Fit Border Tiles
Measure each border tile individually — walls are rarely perfectly straight, so avoid assuming one measurement fits all. Mark the cut line with a pencil, then cut using a manual tile cutter for straight cuts or an angle grinder with a diamond blade for curves and notches around obstacles. Always wear safety glasses and a dust mask when cutting tiles. Bed border tiles using the same adhesive method as full tiles, and allow the entire floor to cure for a minimum of 24 hours — longer in cold or damp conditions — before walking on it or grouting.
Grout, Seal, and Finish
Remove all tile spacers once the adhesive has fully cured. Mix grout to a smooth paste and work it into the joints using a grout float held at 45 degrees, pressing firmly to fill each joint completely. Wipe off excess grout with a damp sponge in a circular motion before it hardens, then polish off the haze with a dry cloth once the grout begins to set. Leave a flexible silicone sealant joint — not grout — at any internal corner where the floor meets the wall or a fixed unit, to allow for natural movement. This is especially important in wet rooms and bathrooms where thermal expansion and moisture are factors.
Frequently Asked Questions
Do I need to remove the old floor before tiling?
It depends on the condition and height. Old vinyl or thin floor coverings should be removed to ensure a stable bond and avoid raising floor height too much. Existing tiles can be tiled over if they are all firmly bonded, fully flat, and the added height will not cause issues with door clearance or transition strips.
What type of adhesive should I use for floor tiles?
Use a flexible floor tile adhesive rated for the tile size and substrate. In wet areas such as bathrooms and kitchens, choose a waterproof or semi-flexible adhesive. For large-format tiles over 600 x 600 mm, a rapid-set or high-strength adhesive is recommended to minimise lippage.
How long should I leave tiles before grouting?
Allow the adhesive to cure for a minimum of 24 hours before grouting — check the adhesive manufacturer’s instructions, as some products require longer, particularly in cool or damp conditions. Walking on tiles before the adhesive has set can shift them and ruin alignment.
Can I lay floor tiles on top of floorboards?
Not directly. Floorboards flex with foot traffic and temperature changes, which will crack tiles and break the adhesive bond. You must first overlay the boards with a rigid sheet such as 12 mm exterior-grade plywood, screwed down firmly at 200 mm centres, to create a stable, non-flexing base. If you are also upgrading your skirting boards to match, see our guide on how to fit skirting boards.
How do I work out how many tiles I need?
Measure the length and width of the room in metres and multiply to get the total square meterage. Add 10% for cuts and wastage on a straightforward layout, or 15% for diagonal or complex patterns. Always buy from the same batch code to ensure consistent colour and shade. Our flooring guide covers tile selection and buying in more detail.
On large-format tiles (600 mm or bigger), back-butter every tile in addition to combing the floor — this eliminates voids under the tile centre that cause hollow spots and eventual cracking, even on a perfectly flat subfloor. A solid 95%+ contact area is the trade standard for floor tiles.
Sources
- HSE — Construction dust: silica and other dusts — hse.gov.uk
- Which? — How to tile a floor — which.co.uk
- GOV.UK — Building Regulations: Part C (site preparation and resistance to contaminants and moisture) — gov.uk
This guide is for general information only. Always work safely and follow manufacturer instructions. DIYnut accepts no liability for injury or damage arising from DIY work.