How to Choose Between Oil vs Lacquer Wood Floor Finish – DIY Guide
Oil vs lacquer wood floor finish: oil penetrates the wood for a natural, repairable finish; lacquer sits on top as a hard film for maximum durability. Oil suits character-grade and aged boards; lacquer suits high-traffic areas. Both require properly sanded, dry boards before application.


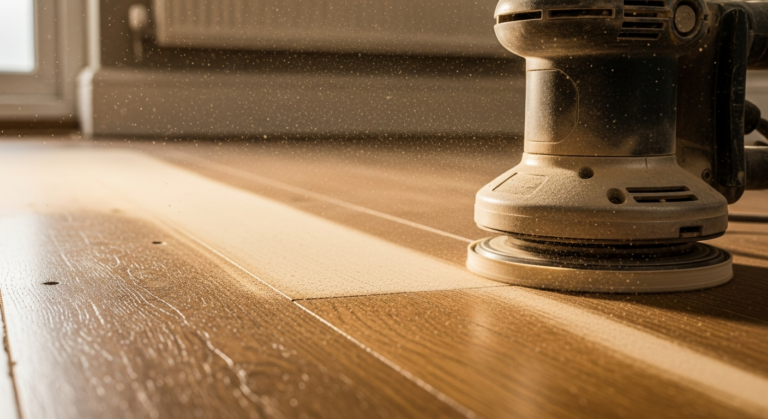
Sand and prepare the boards
Both finishes demand a properly prepared surface — this step is where most DIY finishes fail. Sand the floor progressively: start with 80 grit to remove the old finish or flatten any raised grain, then 120 grit to refine, finishing with 180 grit for a smooth, open surface. Use an orbital sander for the field and a sanding block tight to the edges. Vacuum thoroughly after each pass, then wipe down with a tack cloth. The floor must be completely dry, dust-free and at room temperature (ideally 15–20°C) before you apply anything. If you need help getting your boards back to bare wood first, read our guide on repairing a damaged hardwood floor.
Apply the first coat of oil or lacquer
For oil: pour a small amount onto the floor and spread it in the direction of the grain using a lambswool pad or lint-free cloth, working in manageable 1m² sections. Allow the oil to penetrate for 15–30 minutes, then buff off every trace of excess with a clean cloth — any oil left sitting on the surface will go sticky and tacky as it cures. For lacquer: apply a thin, even coat with a wide natural-bristle brush or applicator pad, always working with the grain and maintaining a wet edge to avoid lap marks. Thin the first coat by around 10% with clean water (for water-based lacquer) to act as a sealer coat that raises the grain slightly before you flat it back.
Flat back and apply subsequent coats
Once the first coat is fully dry — typically 2–4 hours for water-based lacquer, 8–12 hours for oil — lightly flat the surface. For lacquer, use 0000-grade wire wool or a fine abrasive pad to knock back any raised grain or dust nibs; vacuum and tack off before the next coat. Apply a second coat using the same method. Most lacquer manufacturers recommend three coats for a durable finish in normal use. For oil, a second coat is standard; some products require a third on porous timbers. Always check the product’s datasheet for re-coat windows — applying too soon traps solvents and causes clouding. If you’re later considering a full sand and re-finish, our guide to sanding and refinishing a hardwood floor covers the full process in detail.
Allow full cure before use
Dry time and cure time are not the same thing. A lacquered floor may feel dry to the touch after a few hours but won’t reach full hardness for 5–7 days. An oiled floor may be walkable after 24 hours but takes up to 14 days to fully cure. During this period, avoid dragging furniture, placing rugs or using harsh cleaning products. Keep the room ventilated but draught-free to allow even curing. Place felt pads under furniture legs before moving anything back in. For high-traffic areas like hallways, consider whether your staircase also needs attention — squeaky or worn treads are worth sorting at the same time; see our guide to fixing a broken stair tread.
Maintain your finish correctly
Oiled floors need maintenance oil applied once or twice a year — or immediately to any area that looks dry or starts to absorb water. Spot repairs are straightforward: lightly sand the damaged area, feather in fresh oil and buff off. Lacquered floors are more of an all-or-nothing system: minor scratches can sometimes be polished out with a floor renovation product, but once the lacquer film is worn through to bare wood in patches, the entire floor needs a full sand back and re-lacquer. Never use a steam mop on either finish — the moisture and heat will damage both oil and lacquer. For gaps that open between boards over time, our guide on filling gaps in floorboards explains your options.
Frequently Asked Questions
Can I use oil on a floor that was previously lacquered?
No — not without sanding back to bare wood first. Oil cannot penetrate through a lacquer film, so it will sit on top and cure as a sticky, uneven layer. Sand the floor fully before switching finish type.
Which finish is better for homes with dogs or children?
Lacquer generally holds up better to heavy daily traffic, claws and spills because the hard film protects the wood surface directly. Oil is more repairable when damage does occur, but needs more regular maintenance to stay protective. If low maintenance is the priority, lacquer wins — for more, see our guide to the best flooring for dogs.
How long does a lacquered wood floor last before it needs re-doing?
A well-applied three-coat lacquer finish in a normal domestic setting typically lasts 8–15 years before the floor needs a full sand and re-lacquer. High-traffic areas like hallways will wear faster. Annual cleaning with a ph-neutral floor cleaner extends the life significantly.
Is water-based lacquer as durable as solvent-based?
Modern water-based floor lacquers are comparable in durability to solvent-based products and have largely replaced them in the trade. They dry faster, have lower odour, and are easier to clean up. Solvent-based lacquers offer a slightly warmer amber tone but require much more ventilation during application.
Can I apply a new coat of oil to a worn oiled floor without sanding?
Yes — this is one of the main advantages of an oiled finish. Clean the floor thoroughly with a dedicated floor cleaner, allow it to dry completely, then apply maintenance oil with a cloth or pad. No sanding is needed unless the boards are physically damaged or the surface is contaminated with wax or a cleaning product residue.
When applying water-based lacquer, work in the same direction as the main light source in the room — not just the grain — so any application streaks or roller marks are invisible from the most common viewing angle. This single habit is what separates a trade finish from a DIY one.
Sources
- HSE — Wood dust: Controlling the risks (woodworking and finishing products) — hse.gov.uk
- Which? — Types of wood flooring explained — which.co.uk
- Wood Floor Association — Care and Maintenance of Hardwood Floors — thewfa.co.uk
This guide is for general information only. Always work safely and follow manufacturer instructions. DIYnut accepts no liability for injury or damage arising from DIY work.