How to Fix Rising Damp – DIY Guide
How to Fix Rising Damp
Stop rising damp at source and protect your walls for the long term.
Fix rising damp by identifying the source, clearing ground levels away from the wall, applying a chemical damp-proof course injection, and replastering with a sand-and-cement backing coat. Address the root cause first — masking it with paint alone will fail.


Clear the external ground level
Check whether the external ground level has built up above the existing damp-proof course (DPC) — a common cause of rising damp in older properties. The DPC should sit at least 150 mm above external ground level. If soil, render, or paving has risen above it, cut it back or excavate the area to reinstate that clearance. While you have access, inspect the base of the wall for damaged mortar joints and rake out any that are soft or crumbling — repoint with a fresh mix once the DPC work is complete.
Inject the chemical damp-proof course
Mark a continuous horizontal line approximately 150 mm above internal floor level. Drill holes at 120 mm intervals along this line at a slight downward angle — typically 5 degrees — using a masonry bit sized to match your injection nozzle. Clear dust from each hole using a squeeze bulb or airline. Insert the nozzle and inject the chemical DPC fluid slowly until it begins to resist, ensuring full saturation of each hole. Work along the full width of the affected wall without gaps. Allow the fluid to cure for the manufacturer’s specified time before replastering — typically 24 to 48 hours.
Hack off the contaminated plaster
Rising damp deposits salts into plaster over time. These salts continue to draw moisture from the air even after the DPC is installed, so contaminated plaster must be removed — do not skim over it. Use a cold chisel and club hammer to hack off all plaster from floor level to at least 300 mm above the tide mark. Clear the debris thoroughly and allow the exposed masonry to dry out fully before replastering. For more detail on restoring damaged wall surfaces once the masonry is dry, see our guide to repairing blown plaster.
Apply the salt-resistant backing coat
Mix a sand-and-cement backing coat at a ratio of 3:1 sharp sand to cement, adding a waterproof additive to the mix. Apply this as a scratch coat to the bare masonry, working it in firmly to ensure good adhesion. Key the surface with a serrated edge or scarifier before it sets. Once cured — typically after 24 hours — apply a salt-resistant backing plaster as a second coat and rule it off flat. This two-coat system prevents residual salts in the masonry from migrating through to the finished surface. If you need guidance on applying a skim coat over the backing plaster, follow a dedicated plastering guide once the backing coat is fully cured.
Finish, monitor, and redecorate
Allow the new plasterwork to dry thoroughly — at least four to six weeks — before applying any paint or wallpaper. During this period, keep the room well ventilated to help residual moisture escape. Use a moisture meter to confirm readings have stabilised before decorating. Once dry, apply a breathable paint rather than a vinyl or impermeable coating, which could trap residual moisture. Check the external ground level and drainage again after any heavy rain to confirm the repair is holding. For related guidance on broader wall protection, our cavity wall insulation guide covers how wall construction affects moisture management in UK homes.
Frequently Asked Questions
How do I know if I have rising damp or condensation?
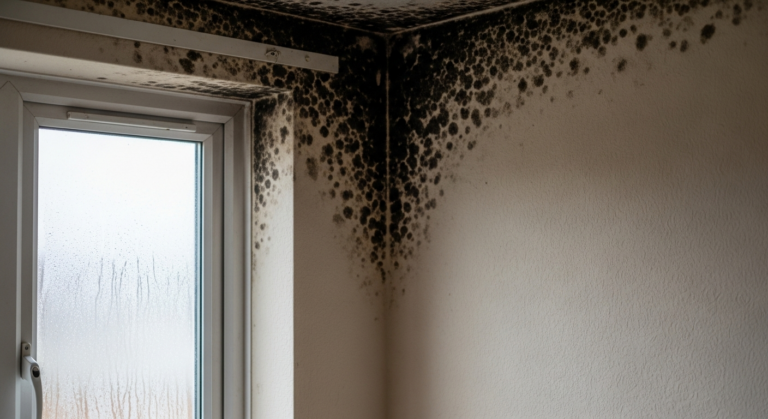
Rising damp leaves a distinct tide mark low on the wall, typically between 300 mm and 1 m up, and moisture readings decrease with height. Condensation tends to appear higher on walls and in corners, often accompanied by black mould. A moisture meter is the most reliable way to confirm which you are dealing with — a reading that drops steadily above the tide mark points strongly to rising damp. For a full comparison, see our guide on rising damp vs condensation.
Can I treat rising damp myself or do I need a specialist?
Chemical DPC injection is achievable as a DIY project in a solid brick or stone wall where access is straightforward. However, severe structural damp, cavity walls, or damp affecting floor joists and timbers should be assessed by a qualified surveyor before you start — incorrect treatment can cause further damage.
How long does a chemical damp-proof course take to work?
The chemical fluid typically cures within 24 to 48 hours, but the wall itself needs significantly longer to dry out. Allow a minimum of four to six weeks before replastering, and longer still in winter or poorly ventilated rooms. Rushing this stage is one of the most common causes of repeat damp problems.
Does rising damp always need replastering?
Yes, in almost every case. Salts deposited by rising damp remain in the old plaster and continue to cause problems even after the moisture source is cut off. Applying fresh plaster or paint directly over contaminated plaster will fail — full removal down to bare masonry is the only reliable approach.
What paint should I use after fixing rising damp?
Use a breathable, mineral-based or masonry paint rather than a vinyl or heavy plastic-based emulsion. Breathable finishes allow any remaining residual moisture to continue escaping through the wall, preventing it from becoming trapped and damaging the new plasterwork from behind.
When injecting the chemical DPC, inject slowly and pause between holes — forcing the fluid in too quickly means it runs out through weak mortar joints rather than saturating the masonry. A slow, controlled injection ensures the silane or siloxane solution bonds properly with the wall substrate and forms a continuous barrier.
Sources
- HSE — Dampness in buildings: causes and control — hse.gov.uk
- Which? — Rising damp: what it is and how to fix it — which.co.uk
- Historic England — Damp: Causes and Solutions — historicengland.org.uk
This guide is for general information only. Always work safely and follow manufacturer instructions. DIYnut accepts no liability for injury or damage arising from DIY work.