How to Choose the Right Loft Insulation Depth – DIY Guide
How to Choose the Right Loft Insulation Depth
Get the correct insulation depth and cut your heating bills for good.
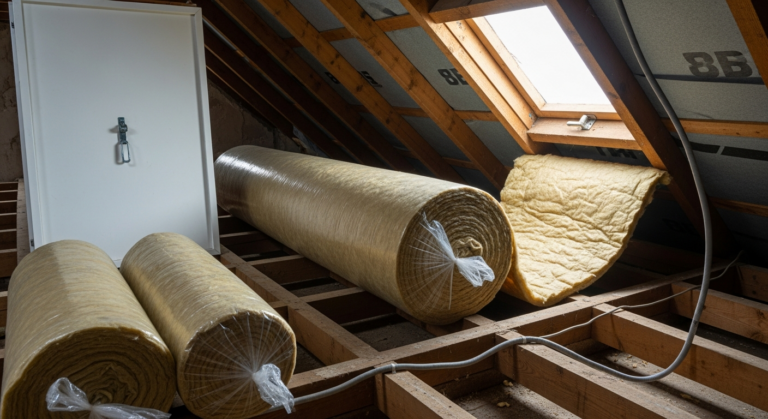
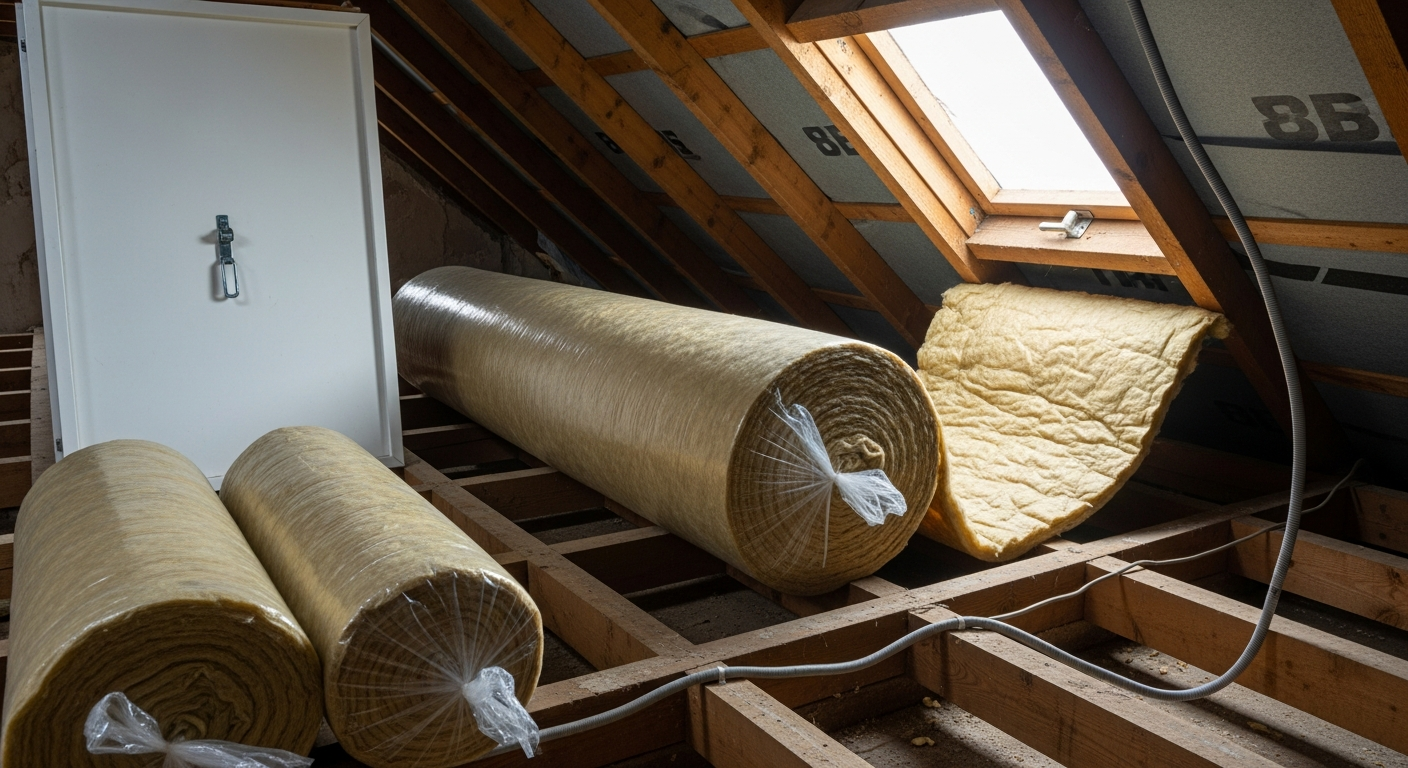
Loft insulation depth in the UK should be 270mm of mineral wool across the joists for an accessible loft. Less than this leaves heat escaping through the roof and increases energy bills. The recommended depth combines a 100mm layer between joists and 170mm laid across them at right angles.


- Tape measure
- Straight edge or ruler
- Utility knife
- Dust mask (FFP2 or higher)
- Safety goggles
- Knee pads
- Head torch
- Boards or crawl planks
- Mineral wool roll insulation (100mm)
- Mineral wool roll insulation (170mm)
- Loft hatch insulation pad
- Pipe lagging foam
- Ventilation baffles or eaves tray vents
- Cable clips or staples
Step-by-Step Guide
Check your existing insulation depth
Before buying anything, measure what is already in the loft using a tape measure. Push it down to the joist level and read off the depth. The UK government and energy efficiency advisers recommend a total finished depth of 270mm — if you have less, you are losing heat. Note whether the existing material fills the joist bays fully or sits below the top of the joists, as this tells you how much top-up layer you need.
Ensure ventilation is not blocked
Adequate airflow between the roof deck and the insulation is essential to prevent condensation and timber rot. Fit ventilation baffles or eaves tray vents at the eaves before you lay any insulation, making sure there is a clear 50mm air gap between the insulation surface and the roof deck. Blocking this gap is one of the most common and costly mistakes in loft insulation work — see the Insulation & Damp Guide for a full overview of moisture management.
Lay the first layer between the joists
Roll out 100mm mineral wool snugly between every joist, cutting lengths with a utility knife against a straight edge. The material should sit flush with the top of the joists — do not compress it, as compression reduces the thermal performance. Wear an FFP2 dust mask, safety goggles, and long sleeves throughout; mineral wool fibres irritate skin, eyes, and lungs.
Lay the second layer across the joists
Roll out the 170mm mineral wool in the opposite direction, running at right angles to the joists and crossing over the first layer. This cross-hatching eliminates thermal bridging through the joists themselves, which can account for a measurable proportion of heat loss if left unaddressed. Butt each roll tightly against the last with no gaps — cold bridges form wherever insulation does not meet fully. If you are also fitting a loft hatch insulation pad, do that at this stage.
Protect pipes, tanks, and cables
Once you insulate the floor, the loft space above it becomes significantly colder. Any water pipes or cold-water tanks sitting above the insulation level must be lagged with pipe foam to prevent freezing. Do not insulate beneath a cold-water tank — leave that area uninsulated so that residual warmth from the house below reaches the tank. Tuck electrical cables on top of the insulation rather than burying them; cables buried in insulation can overheat.
Verify the finished depth and record it
Push a tape measure through the top layer to the joist base and confirm the total depth reads at least 270mm across the whole area. Spot-check several locations, particularly near eaves where rolls can slip. Take a note of the finished depth and the material used — this is useful evidence if you ever apply for an energy efficiency assessment, sell the property, or need to demonstrate compliance with current guidance.
Frequently Asked Questions
What is the recommended loft insulation depth in the UK?
The UK government recommends 270mm of mineral wool for an accessible loft — 100mm between the joists and 170mm laid across them at right angles. This is the current standard cited by the Energy Saving Trust and is the depth most likely to qualify for energy efficiency incentives.
Is 100mm of loft insulation enough?
No. 100mm alone is below the current recommended depth and will leave your loft under-insulated by modern standards. Adding a 170mm cross layer on top brings the total to 270mm, which is what current guidance requires for optimal performance.
Can I top up existing loft insulation myself?
Yes — topping up existing mineral wool insulation is one of the most straightforward DIY jobs in the home. Provided the existing material is dry and undamaged, simply lay new mineral wool rolls across the joists at right angles to bring the total depth up to 270mm. If you are planning a full loft insulation project from scratch, follow a complete guide for best results.
Does loft insulation depth matter if I have a warm roof?
Yes, but the approach is different. A warm roof — where insulation is fixed between and below the rafters rather than at floor level — requires different depth calculations and materials. The 270mm mineral wool guidance applies specifically to cold loft floors. For warm roof or room-in-roof insulation, consult a specialist or your local authority building control.
Will more insulation than 270mm make a difference?
Beyond 270mm the returns diminish significantly — you spend more on materials for a proportionally smaller improvement in heat retention. That said, some newer builds and energy-efficient renovation projects target 300–400mm, and there is no harm in going deeper if access and joist height allow. Consider also cavity wall insulation as the next biggest heat-loss fix after the loft.
When laying the cross layer, offset the roll joins by at least 300mm from the joins in the layer below — staggering them prevents a continuous cold line running through both layers. Most people don’t bother, but it makes a measurable difference at corners and around the hatch opening where gaps are most likely to align.
Sources
- Energy Saving Trust — Loft insulation — energysavingtrust.org.uk
- GOV.UK — Great British Insulation Scheme: loft insulation standards — gov.uk
- HSE — Mineral wool insulation: health and safety guidance — hse.gov.uk
This guide is for general information only. Always work safely and follow manufacturer instructions. DIYnut accepts no liability for injury or damage arising from DIY work.