Autumn Draught Proofing
Insulation & Damp › Insulation & Damp
Autumn Draught Proofing
Seal your home before winter and cut heating bills noticeably.
Autumn draught proofing means sealing gaps around doors, windows, floors, and loft hatches before cold weather arrives. Tackle it in October or November using self-adhesive strips, flexible sealant, and brush seals. Most jobs take an hour or less and require no specialist skills.

Why This Season Matters
Draughts are hardest to detect in summer when warm air masks cold spots, but autumn gives you a narrow window: the air is cool enough to feel gaps clearly, yet dry enough for sealants and adhesives to cure properly before temperatures drop further. Tackle draught proofing now and your heating system works less hard from day one of winter.
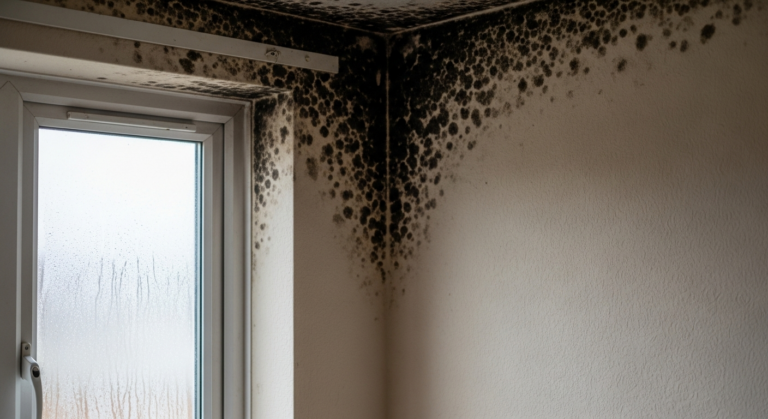
Leaving gaps unsealed into November means condensation risk rises sharply as warm indoor air meets cold surfaces — a combination that quickly leads to mould. Acting in October or early November lets materials bond well and gives you time to recheck any areas that need a second pass before the first hard frost.
Your Complete Checklist
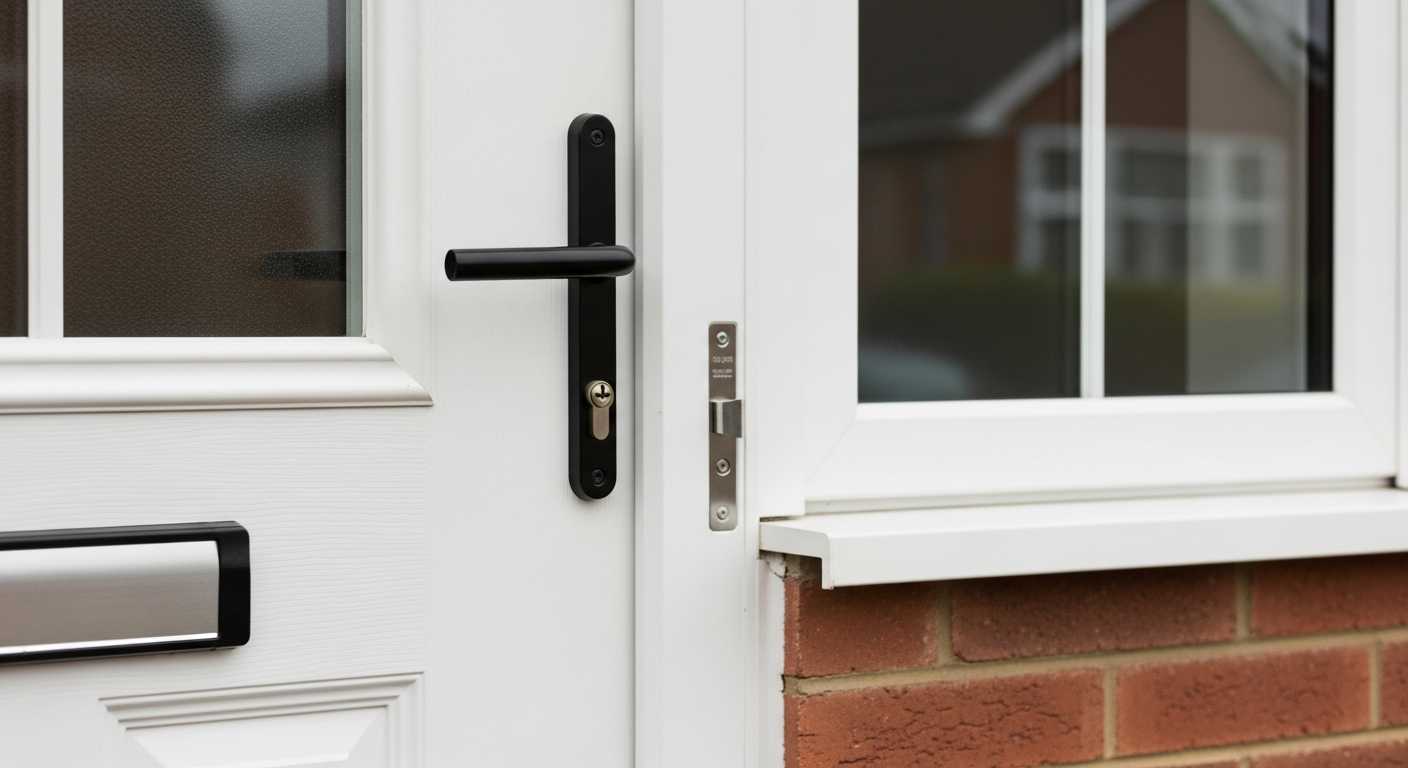
- Seal external door frames with self-adhesive foam or rubber strip — see Draught Proof a Door
- Fit or replace a door threshold strip to close the gap at the bottom of external doors
- Seal sash window channels and meeting rails — see Draught Proof Sash Windows
- Replace perished window frame sealant — see Replace a Window Seal
- Fit a draught-proof flap to the letterbox — see Draught Proof a Letterbox
- Insulate and seal the loft hatch — see Insulate a Loft Hatch
- Fill gaps between skirting boards and floorboards with flexible filler or silicone — see Insulate a Cold Floor
- Block unused chimney flues with a chimney balloon or draught excluder
- Seal around pipework and cables entering through external walls with expanding foam or silicone
- Check and reseal gaps around window boards and reveals — see Seal a Leaking Window
- Fill wall cracks near window and door frames — see Fill Wall Cracks
- Check loft insulation depth is adequate once hatch is sealed — see Loft Insulation Depth Guide
Step-by-Step for Each Task
External door frames: Clean the rebate with a damp cloth and allow to dry. Cut self-adhesive foam or rubber compression strip to length — mitre the corners for a tight fit. Press firmly into the rebate so the door compresses the strip when closed. Check the door closes without sticking; if it binds, switch to a thinner profile strip. Fit a brush or rubber threshold strip to the bottom, cutting to the exact door width and fixing with the screws provided.
Sash windows: Raise the lower sash fully and clean the channel. Cut brush pile strip to length and press into the channel groove on both sides. At the meeting rail, apply a length of flexible rubber or foam strip to the top face. Lower the sash to check it still slides smoothly — if not, use a slimmer profile. Apply a thin bead of flexible sealant where the outer frame meets the surrounding reveal, smoothing it with a wetted finger.
Loft hatch: Staple or glue 100mm rigid insulation board to the top face of the hatch board, then weatherstrip the frame rebate with foam strip so it compresses when the hatch is pushed shut. Add a simple barrel bolt or turn-button to hold the hatch closed under its own weight — most loft hatches hang slightly loose otherwise, defeating the seal.
Floorboard gaps: For gaps up to 3mm, a flexible silicone or acrylic filler pressed in with a finger works well. For wider gaps between boards, pre-cut strips of softwood can be glued and tapped in, then sanded flush once the adhesive has cured. Always leave skirting-to-floor gaps for last; apply a thin, continuous bead of flexible sealant and smooth immediately before it skins.
Tools and Materials You’ll Need
- Tape measure and scissors or craft knife
- Self-adhesive foam or rubber compression strip (various profiles)
- Brush pile draught strip (for sliding sashes and doors)
- Door threshold strip (brush or rubber wiper type)
- Letterbox draught-proof flap or brush seal
- Flexible silicone or acrylic sealant and sealant gun
- Low-expansion foam in a can (for pipework penetrations)
- Rigid insulation board cut to loft hatch size
- Weatherstrip foam for loft hatch rebate
- Chimney balloon sized to your flue
- Fine surface filler for small wall and skirting cracks
- Damp cloth for surface prep
- Pencil, utility knife, and mitre block for accurate cuts
- Torch or draught detector (a joss stick works well)
Common Mistakes to Avoid
- Sealing in damp weather: Applying sealant or adhesive strips to cold, damp surfaces causes poor adhesion and early failure — always work on dry days above 5°C.
- Blocking essential ventilation: Underfloor vents, air bricks, and trickle vents on windows must stay clear; sealing them traps moisture and risks condensation damp — only seal gaps, never designed ventilation openings.
- Using rigid filler on floorboards: Floorboards expand and contract with humidity; hard filler cracks within weeks — always use flexible sealant or timber fillets for board gaps.
- Forgetting the loft hatch: Warm air rises, and an unsealed hatch is one of the largest single draught points in many homes — it is often missed entirely during autumn checks.
- Over-compressing foam strip: Fitting door strip that the door squashes completely flat removes all sealing effect; choose a profile depth that compresses by roughly half when the door is closed.
Frequently Asked Questions
When is the best time to draught proof a house in the UK?
October and early November are ideal — temperatures are cool enough to feel draughts clearly, surfaces are dry, and sealants and adhesives cure reliably before the coldest weather arrives.
Can I draught proof my home myself, or do I need a professional?
The vast majority of draught proofing tasks — door strips, window seals, letterboxes, loft hatches, and floorboard gaps — are beginner DIY jobs requiring only basic tools and readily available materials. Professionals are only needed for specialist jobs such as suspended floor insulation in inaccessible sub-floors.
Will draught proofing cause condensation or damp problems?
Only if designed ventilation is accidentally blocked. Seal gaps in the building fabric, but always leave trickle vents, air bricks, and extractor fan outlets completely unobstructed to maintain background ventilation and prevent moisture build-up.
How do I find hidden draughts before I start?
On a windy day, hold a lit joss stick or a thin strip of tissue near door frames, window edges, skirting boards, and loft hatches — any movement in the smoke or tissue indicates a draughty gap worth sealing.
Is draught proofing eligible for any UK government grants or schemes?
Draught proofing is sometimes included under the Great British Insulation Scheme and the Energy Company Obligation (ECO4) for eligible households. Check current eligibility on GOV.UK as schemes and criteria change regularly.
Before applying any new door seal strip, use a feeler gauge to measure the actual gap around the rebate — gaps vary between the hinge side and latch side on most doors, so you often need two different profile thicknesses on the same door for a consistent seal. Matching profile to gap depth, rather than using the same strip all round, prevents both air leakage and door binding.
Sources
- Energy Saving Trust — Draught proofing advice for UK homes — energysavingtrust.org.uk
- GOV.UK — Great British Insulation Scheme eligibility — gov.uk
- Which? — Draught proofing: how to do it and is it worth it? — which.co.uk
This guide is for general information only. Always work safely and follow manufacturer instructions. DIYnut accepts no liability for injury or damage arising from DIY work.