Walls & Plastering: Complete UK DIY Guide 2026
Walls & Plastering: Complete UK DIY Guide 2026
Walls take a beating — cracks, damp patches, dodgy old wallpaper, tiles falling off in the bathroom. This section covers everything you need to tackle your walls properly: Plastering, Repairs, Tiling, and Wallpaper. Whether you’re skimming a ceiling, patching a hole, or stripping back decades of woodchip, you’ll find straight-talking guidance built on real trade experience.
Browse Walls & Plastering Guides
Cracks & Repairs
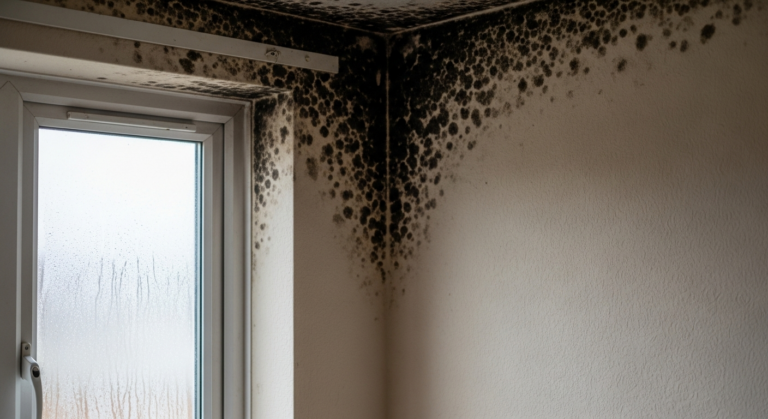
Damp & Condensation
General
Plaster Repairs
Plasterboard
Plastering & Skimming
Wallpaper
Costs & Pricing
Materials Guide
Common Problems
Trade vs DIY
Frequently Asked Questions
Can I plaster over old paint or does it need to come off first?
You can plaster over painted walls in most cases, but the surface needs to be properly prepared first — loose or flaking paint must come off and the wall should be primed with a PVA solution (one part PVA to four parts water) and left to go tacky before you apply plaster. Skipping the PVA is one of the most common DIY plastering mistakes and leads to the skim drying out too fast and cracking. Glossy or oil-based painted surfaces are trickier and may need a bonding agent rather than standard PVA.
What’s the difference between bonding coat and finishing plaster, and which do I need?
Bonding coat (also called backing coat or browning) is a thicker, rougher plaster used to build up depth on bare brick, block, or heavily uneven surfaces — it’s not designed to be finished smooth on its own. Finishing plaster, such as Thistle Multi-Finish, is the thin top coat applied over bonding or existing plaster to give you that smooth, paintable surface. For most patch repairs on existing plastered walls, you’ll only need finishing plaster; for major repairs back to the masonry, you’ll need both.
How long should I leave new plaster before painting it?
Fresh plaster needs a minimum of four weeks to fully dry before you apply standard emulsion, though this can be longer in winter or in rooms with poor ventilation. The first coat should always be a mist coat — emulsion diluted roughly 70/30 with water — which allows the plaster to breathe and prevents the paint from peeling or bubbling. Applying undiluted paint straight onto new plaster is one of the most common decorating mistakes and it will almost always lift within months.
My wall tiles keep cracking along the grout lines — what’s causing it?
Cracking grout on wall tiles is usually caused by movement in the substrate behind them, either through thermal expansion, a wall that isn’t solid enough, or tiles that were fixed to a surface that wasn’t properly prepared or dried out before tiling. If it’s happening consistently in one area — particularly around bath panels, window reveals, or corners — check whether the tile adhesive has failed by pressing gently on the tiles to see if they flex or sound hollow. Regrouting is only a temporary fix if the underlying movement hasn’t been addressed; the tiles may need to come off and the substrate sorted properly.
Is woodchip wallpaper difficult to remove and what’s the best approach?
Woodchip is notoriously tough to strip because it’s often been painted over multiple times, sealing it tight to the wall — a good scorer (like a Paper Tiger), a pump sprayer, and patience are your best tools. Score the surface thoroughly, soak it well with warm water or a proprietary wallpaper stripper solution, and give it five to ten minutes to penetrate before you start scraping. Be prepared for the plaster beneath to need repair once it’s off, as woodchip was frequently used to hide poor-quality walls in the first place.
- HSE — Silica dust in construction — hse.gov.uk
- GOV.UK — Building Regulations Part E — gov.uk
Get the Full Guide with DIYnut AI
Photograph your space, tell the app what you want, and get an AI-generated after image, full materials list, and step-by-step guide in seconds.