How to Replace a Kitchen Sink Waste – DIY Guide
To replace a kitchen sink waste, turn off the water supply, place a bucket under the trap, unscrew the old waste fitting and trap, clean the recess, fit the new waste with a fresh rubber seal and plumber’s putty, then reassemble the trap and check for leaks.


Disconnect and Remove the Existing Trap
Unscrew the slip-nut at the top of the bottle trap where it connects to the waste outlet, then unscrew the slip-nut at the wall or floor end. Older traps may be tight — use an adjustable spanner, but take care not to crack plastic fittings. Tip any remaining water into your bucket. If the trap is corroded or smells, this is a good moment to replace it alongside the waste fitting. For more on dealing with drain odours, see our guide on fixing a slow draining sink.
Remove the Old Waste Fitting
From above the sink, use a flat-head screwdriver to hold the waste grating steady while you unscrew the large retaining nut beneath the sink from below — it threads onto the tail of the waste body. On older fittings the nut may have seized; a basin wrench gives better leverage in tight spaces. Once the nut is off, push the old waste body up and out through the hole from underneath. Use a utility knife and cloth to scrape away all old putty, silicone, and debris from the sink recess until the surface is clean and dry.
Fit the New Waste Body and Seal
Roll a thick rope of plumber’s putty (roughly the diameter of a pencil) and press it into the underside groove of the new waste grating. Drop the waste body down through the sink hole from above so the grating seats firmly in the recess. From underneath, slide the rubber washer onto the waste tail — this is the primary watertight seal — then hand-thread the retaining nut. Hold the grating steady from above with a screwdriver and tighten the nut firmly with a spanner until the rubber washer compresses and excess putty squeezes out around the grating. Wipe away the surplus putty with a damp cloth. Wrap two or three turns of PTFE tape clockwise around the male thread on the waste tail before fitting the trap.
Reconnect the Trap and Check All Joints
Refit the bottle trap — or a new replacement trap — by threading the slip-nuts hand-tight first to ensure they align correctly, then snug them up with a spanner (a quarter-turn past hand-tight is usually enough for plastic fittings; overtightening cracks the body). Turn the water supply back on and run both taps at full flow for 30 seconds. Crouch down and inspect every joint — the waste-to-sink seal, the top of the trap, and the wall outlet — with a dry cloth pressed against each one. Any dampness means the joint needs another quarter-turn or the PTFE needs reapplying. A persistent leak at the grating usually means the putty seal needs redoing with fresh material.
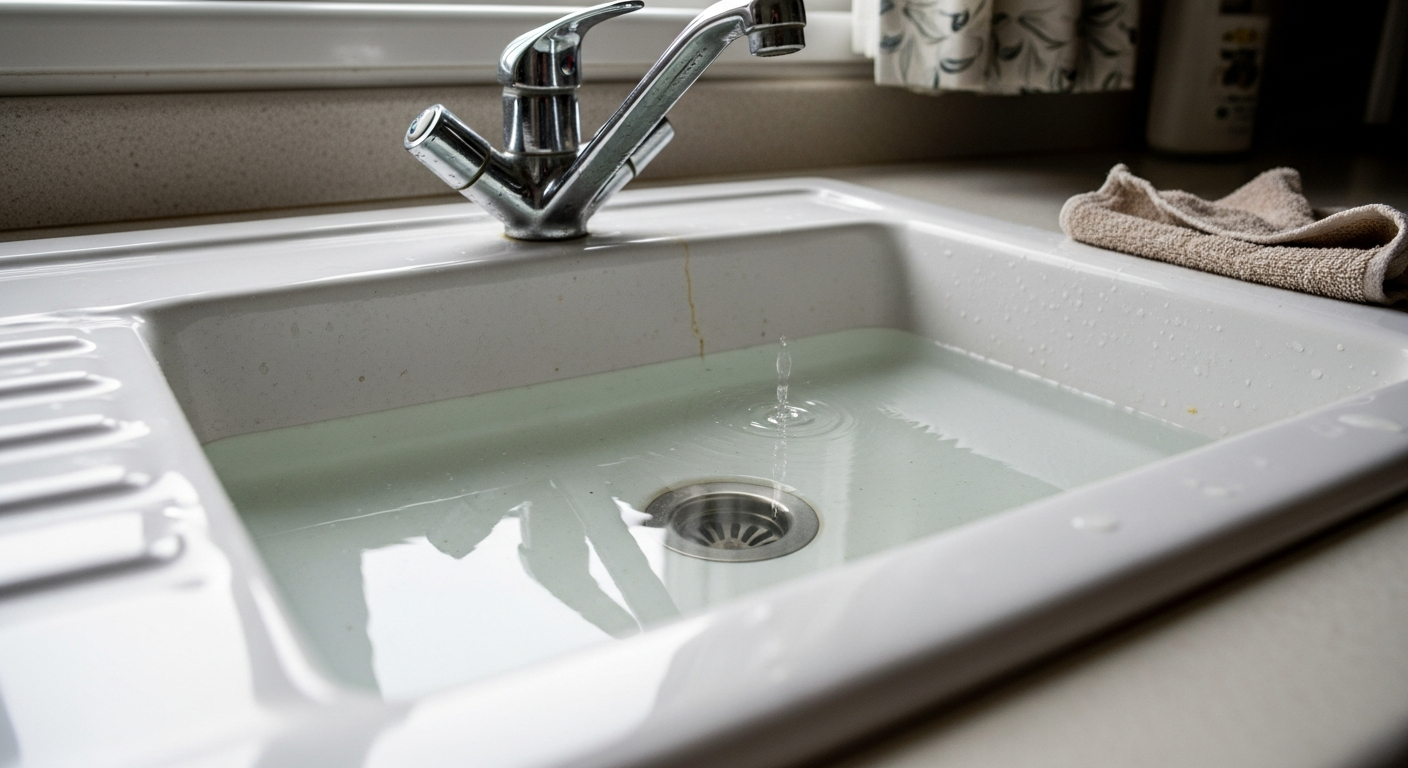
Test the Plug Seal and Finish
Fill the sink to the brim using the plug supplied with the waste kit, then pull the plug and observe the full flow rate draining through the new fitting. Watch underneath for the full drain cycle. If you notice slow drainage unrelated to the waste fitting, our guide on how to clean a drain without chemicals covers the next steps. Once satisfied there are no leaks, apply a thin bead of clear waterproof silicone around the top edge of the grating on older sinks where the putty has not fully compressed against a textured surface, and leave it to cure before using the sink again.
Frequently Asked Questions
Do I need to turn off the water to replace a sink waste?
You do not need to turn off the water to remove the waste body itself, but it is good practice — especially when disconnecting the trap — to prevent accidental splashing or drips. Isolating the supply also lets you work dry and check for leaks properly when you turn it back on.
What size kitchen sink waste do I need?
Most UK kitchen sinks take an 89 mm (3.5 inch) waste outlet, but always measure the diameter of the existing hole before buying. Confirm the depth of the sink bowl too, as this affects the trap specification. If you are also experiencing issues with the tap, our guide to fixing a tap that won’t turn off is worth reading alongside this job.
Should I use plumber’s putty or silicone to seal a sink waste?
Plumber’s putty is the traditional and most practical choice for the grating-to-sink seal — it stays workable, seals immediately, and is easy to remove later. Silicone sets permanently and is harder to dismantle; use it only on sinks where the manufacturer specifies it, such as composite or acrylic bowls where putty can stain.
How do I know if my sink waste needs replacing rather than just cleaning?
Replace the waste if you see corrosion or pitting on the grating, a persistent leak at the sink seal that resealing does not fix, or cracking in the plastic body or trap. If the issue is simply slow drainage, try unblocking the kitchen sink before replacing any parts.
Can I replace a kitchen sink waste without a plumber?
Yes — replacing a kitchen sink waste is a straightforward DIY task that requires no specialist skills or certifications. It is not notifiable work under Part P of the Building Regulations, which covers fixed electrical installations, not general plumbing. The job takes under two hours with basic tools.
Before threading the retaining nut, wrap a single layer of PTFE tape around the waste tail threads in addition to the rubber washer — this takes ten seconds and eliminates the fine weeping leaks that rubber-only seals can develop over time as the washer ages. It also makes future removal significantly easier because the nut won’t bond to the thread.
Sources
- HSE — Domestic plumbing and water supply: what you can do yourself — hse.gov.uk
- Which? — How to fix a leaking sink waste pipe — which.co.uk
- Gov.uk — Building Regulations: Part H (Drainage and Waste Disposal) — gov.uk
This guide is for general information only. Always work safely and follow manufacturer instructions. DIYnut accepts no liability for injury or damage arising from DIY work.