How to Fix Uneven Paint Finish – DIY Guide
How to Fix Uneven Paint Finish
Identify the cause, prep correctly, and repaint for a smooth, consistent result.
To fix an uneven paint finish, sand back the affected area, clean off any dust, apply a mist coat or primer where needed, then repaint using a consistent technique and the correct roller nap for your wall surface.


Sand Back the Problem Area
Lightly sand the uneven area using a medium-grit sanding block (120 grit) to knock back any raised texture, roller stipple, or dried drips. Follow with fine-grit sandpaper (180–240 grit) to feather the edges of the sanded zone into the surrounding wall so the repair blends without a visible edge. Work in circular motions, then finish with straight strokes. If you have visible paint drips or runs, refer to our guide on fixing paint drips and runs before sanding — scraping hardened runs with a filling knife first will save time.
Clean the Surface Thoroughly
Wipe the entire wall with a damp cloth to remove all sanding dust, then follow with a dry lint-free cloth. Any dust left on the surface will embed into the new coat and create a gritty, uneven texture. Use a tack cloth on sanded patches for a thorough clean. Allow the wall to dry completely — at least 30 minutes in a ventilated room — before applying any paint.
Apply a Mist Coat or Primer on Bare or Porous Areas
If sanding has exposed raw plaster, bare filler, or the original surface is clearly absorbing paint unevenly, apply a mist coat before the finishing colour. Mix one part emulsion with four to five parts clean water and apply thinly across the porous section. This seals the surface and gives the topcoat a consistent base to adhere to, preventing the blotchy sheen that porous patches cause. Allow the mist coat to dry fully — typically one to two hours — before painting. If the affected area has any underlying hairline cracks , fill and sand these before applying the mist coat.
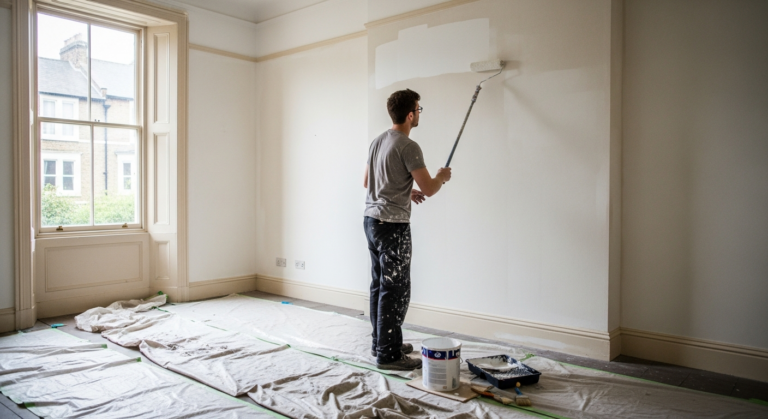
Repaint Using a Consistent Roller Technique
Load the roller evenly in the tray — roll off excess paint until the sleeve stops dripping — then apply paint in a series of overlapping W or M strokes, finishing with light straight strokes to lay off the paint without leaving roller marks. Maintain a wet edge throughout by working quickly and never rolling over paint that has started to dry. Use the correct roller nap for your surface: 5–6 mm short pile for smooth walls, 9–12 mm medium pile for textured or slightly rough walls. Applying too much paint in a single coat is one of the main reasons finishes go uneven — two thin coats will always produce a better result than one thick one. For guidance on how many coats to apply, see our article on how many coats of paint you need.
Check in Raking Light and Touch Up
Once the final coat is dry, angle a torch or handheld lamp low and flat across the wall surface — this raking light reveals any remaining patches, roller marks, or sheen inconsistencies that are invisible under normal lighting. Mark problem areas lightly with a pencil, then touch up with a brush or roller using the same technique and paint batch. Allow 24 hours between topcoats for emulsion, or follow the manufacturer’s recoat time printed on the tin. Cutting in neatly around edges and corners at this final stage will give the finished wall a professional, consistent appearance.
Frequently Asked Questions
Why does my paint look patchy even after two coats?
Patchy coverage after two coats is usually caused by a porous or unprimed surface absorbing paint unevenly. Apply a mist coat — diluted emulsion — to seal the wall before adding further topcoats, and the patchiness should disappear.
Can I paint directly over an uneven finish without sanding?
If the unevenness is purely about missed patches or thin coverage, you can apply another coat without sanding. However, if there is visible texture variation, roller stipple, or dried drips, you must sand first — painting over without sanding will magnify rather than hide the problem.
How do I fix sheen differences in the same colour paint?
Sheen differences — where some patches look flat and others look shiny — are almost always caused by inconsistent paint loading or a porous surface. Sand the affected area lightly, apply a mist coat, and then repaint the entire wall in one continuous session to ensure a uniform sheen throughout.
Does roller type affect how even the finish looks?
Yes, significantly. A roller sleeve that is too long in the nap will leave heavy stipple on smooth walls, while too short a nap on a textured surface will leave uncoated hollows. Match sleeve length to your wall texture — 5–6 mm for smooth plaster, 9–12 mm for light texture.
Why do I get roller marks when I paint over a previously painted wall?
Roller marks on a repaint are typically caused by overloading the roller, rolling over partially dried paint, or using a worn sleeve. Lightly sand the marked area, use a fresh roller sleeve with a consistent paint load, and maintain a wet edge by working in manageable sections without stopping mid-wall.
Mix all tins of the same colour together in a large bucket before you start — this is called ‘boxing’ the paint. Subtle batch-to-batch colour and viscosity differences between tins are one of the most overlooked causes of uneven finishes, and boxing eliminates the problem entirely.
Sources
- Which? — How to paint a room — which.co.uk
- HSE — Personal protective equipment for painting — hse.gov.uk
- Historic England — Practical Building Conservation: Decorative Finishes — historicengland.org.uk
This guide is for general information only. Always work safely and follow manufacturer instructions. DIYnut accepts no liability for injury or damage arising from DIY work.