Paint Bubbling
Painting & Decorating › Painting & Decorating
Paint Bubbling
Diagnose why your paint is blistering and fix it for good.
Paint bubbling is almost always caused by moisture trapped beneath the paint film, painting over a surface that wasn’t fully dry, or applying paint in direct heat or sunlight. Identify the source, strip the affected area, treat the cause, and repaint with the correct preparation.

What’s Causing This?
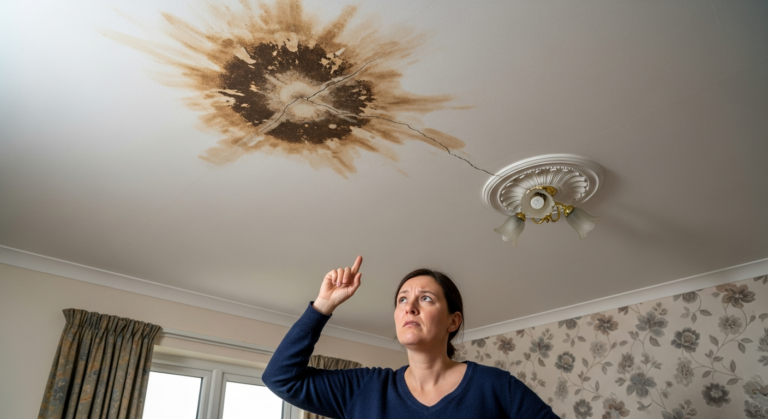
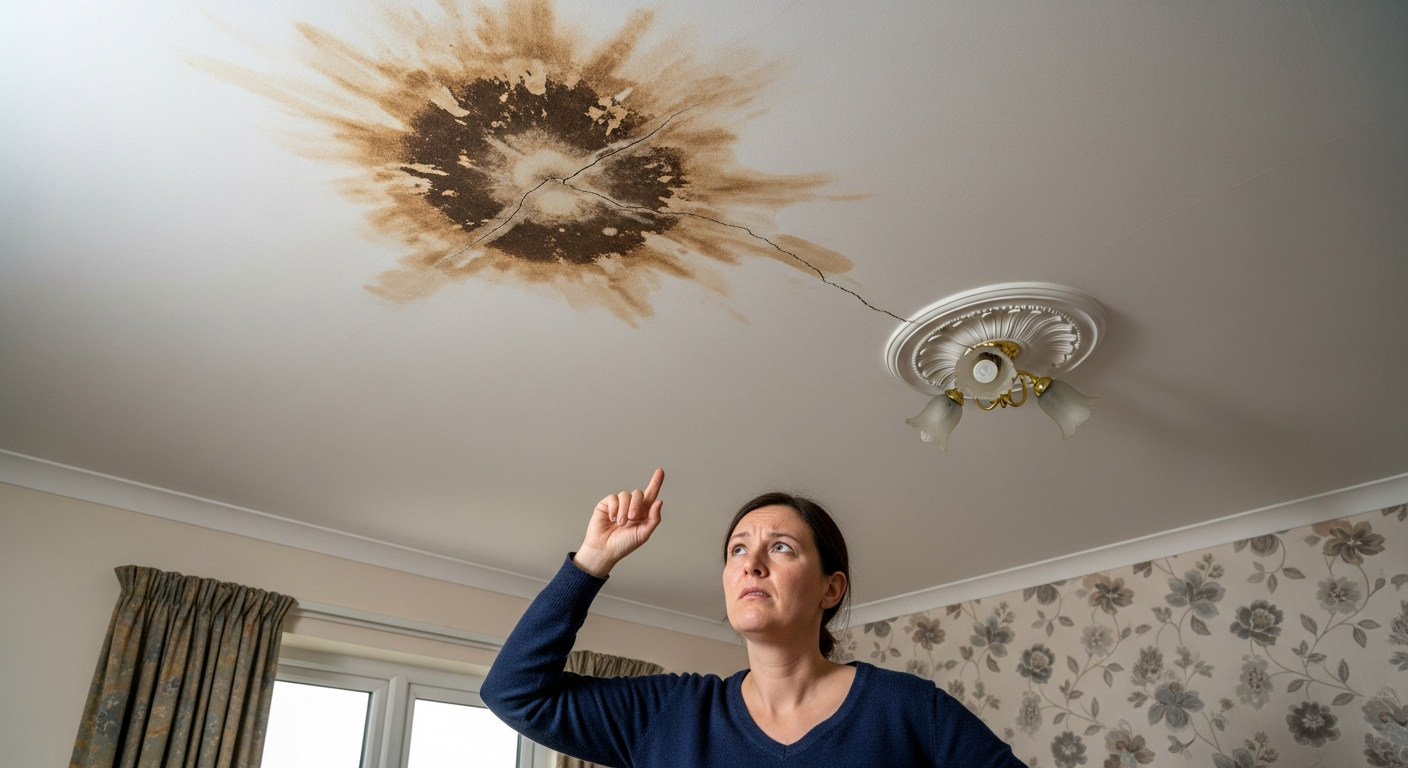
Moisture trapped beneath the paint film is the most frequent culprit. Water — from condensation, a leak, rising damp, or a wet substrate — forces its way through the paint layer and lifts it. This is particularly common in bathrooms and kitchens. See the full fix in our guide to fix peeling ceiling paint.
Painting onto a damp or inadequately prepared surface is the second most common cause. If plaster, filler, or a previously washed wall hasn’t fully dried before paint is applied, moisture is sealed in and the film blisters as it cures. Always allow fresh plaster to dry for a minimum of four weeks before painting, and spot-prime any filled areas first.
Applying paint in direct heat or sunlight causes the surface layer to skin over before the solvents beneath can escape. This is especially common on exterior walls facing south or west during summer, and on radiators painted while hot. Read our guide to painting exterior walls for advice on timing and conditions.
Incompatible paint layers — for example, applying a water-based topcoat directly over a glossy or oil-based surface without appropriate preparation — can cause adhesion failure and localised blistering. Sanding the existing coat and applying a suitable primer resolves this.
Contamination on the surface — including grease, dust, or residue from cleaning products — prevents paint from bonding properly. Even a thin film of grease on a kitchen wall is enough to cause lifting. Check our matt vs silk paint guide for advice on choosing finishes that suit high-humidity and high-traffic areas.
How to Diagnose the Exact Cause
- Look at the location. Bubbles in a bathroom, kitchen, or on a ceiling directly below a bathroom almost always indicate moisture. Bubbles on an exterior wall or south-facing surface after a hot day point to heat-induced blistering.
- Pop a blister carefully. If the interior of the bubble is wet or the substrate behind it feels damp, moisture is the cause. If it’s dry inside, heat or adhesion failure is more likely.
- Check for damp on adjacent surfaces. Run your hand over the surrounding wall. Cold spots, tide marks, or efflorescence (white salt deposits) confirm moisture ingress. Investigate the source — leaking pipe, failed render, or condensation — before repainting.
- Examine the existing paint layers. Scrape back a small area with a filling knife. If multiple old layers peel away together, the entire paint system has lost adhesion — often due to incompatible products or moisture over a long period.
- Check when the wall was last painted or plastered. If it was within the last four weeks and it’s fresh plaster, the surface almost certainly wasn’t ready. New plaster requires a diluted mist coat first — neat emulsion applied to unprimed plaster traps moisture and blisters reliably.
- Smell the affected area. A musty or mildew smell alongside bubbling confirms damp penetration rather than a surface preparation issue alone. Read our guide to fix damp on interior walls before attempting any repainting.
How to Fix It
Moisture from damp or leaks: Locate and fix the source of moisture first — no paint job will hold until the underlying problem is resolved. Once dry, strip the bubbled paint back to a sound surface, allow the wall to dry thoroughly, apply a damp-resistant primer, and repaint with a suitable product. In bathrooms, use a specialist bathroom paint or a moisture-resistant finish — see our guide to the best paint for a bathroom ceiling.
Painting onto an unprepared or damp surface: Strip the affected area back to bare plaster or substrate. Allow to dry fully — use a damp meter if unsure. Apply a diluted mist coat (approximately 80% emulsion to 20% water) to new plaster, or a stabilising primer to porous surfaces, before applying topcoats. See our guide to how many coats of paint you actually need.
Heat-induced blistering on exterior surfaces: Strip the blistered paint, lightly sand the surrounding area, and repaint in cooler conditions — early morning on shaded elevations. Apply thin coats and allow each to cure fully before adding the next. Our guide to painting a fence covers exterior timing and preparation in detail.
Incompatible paint layers: Sand the entire surface to key it, degrease thoroughly, apply a suitable bonding primer, and repaint using compatible products. Refer to our gloss vs satinwood paint guide to ensure you’re using the right finish for the substrate.
Surface contamination: Clean the wall with a sugar soap solution and rinse well. Allow to dry completely, sand lightly, and repaint. Never paint over a surface that has been cleaned with a bleach-based product without rinsing and neutralising first.
When to Call a Tradesman
Call a qualified tradesman if bubbling is caused by structural damp — such as rising damp or penetrating damp through failed external render or masonry. These require a damp-proofing specialist or a builder to resolve before any decorator can achieve a lasting result. If you discover wet rot in timber behind the paint (particularly around window frames or sills), this should be assessed by a joiner or builder, as structural integrity may be compromised. Similarly, if you suspect a hidden leak from plumbing or a roof, engage a plumber or roofer first. Attempting to repaint over active moisture ingress is unsafe and will fail quickly. Where external walls are involved, working at height on ladders or scaffolding above single-storey level carries significant risk — consider hiring a professional decorator with appropriate access equipment. HSE guidance on working at height applies to DIY as well as trade work.
How to Prevent It Happening Again
- Always test for damp before painting. Use a damp meter on plaster and masonry before starting any paint job, particularly in older properties. A reading above 20% moisture content generally means the surface isn’t ready.
- Never skip priming or mist coating. New plaster must be mist coated; bare wood must be primed; previously glossy surfaces must be sanded and primed. Skipping these steps is the single most common cause of paint failure including blistering.
- Ventilate properly in wet rooms. Fit an extractor fan in bathrooms and kitchens if one isn’t already present, and ensure it vents to outside rather than into a void. Condensation is the leading cause of paint bubbling in these rooms.
- Don’t paint in extreme heat or direct sunlight. On exterior surfaces, paint in the shade during mild, dry weather. On interior surfaces, avoid painting near radiators that are switched on — turn heating off and allow the room to reach ambient temperature first.
Frequently Asked Questions
Why is my newly painted wall bubbling straight away?
This usually means the surface was damp, dusty, or greasy before you painted, or the room was too warm and the paint skinned over before solvents could escape. Strip the affected area, prepare the surface properly, and repaint in suitable conditions.
Can I just pop the bubbles and repaint over them?
No. Popping bubbles without addressing the underlying cause will result in the same problem returning quickly. You need to strip back to a sound surface, resolve the root cause (usually moisture or poor adhesion), and repaint from scratch.
Does paint bubbling always mean I have a damp problem?
Not always. Bubbling can also be caused by painting in direct sunlight, applying incompatible paint products, or painting over a contaminated surface. However, moisture is the most common cause, so always rule it out first.
How long should I wait before painting new plaster?
New plaster should be left to dry for a minimum of four to six weeks, depending on thickness, room temperature, and ventilation. Apply a diluted mist coat first rather than neat emulsion, which can blister on fresh plaster.
Will a damp-proof paint stop bubbling from coming back?
A damp-resistant paint can help manage minor condensation but won’t fix structural damp or a leak — it will simply blister again. The moisture source must be resolved before any decorative finish will hold long-term.
On walls with a history of bubbling, apply paint in thin coats and back-roll after each one with a roller rather than relying on brush application — this eliminates air pockets trapped during application that can resemble moisture blistering but are actually mechanical in origin. Letting each coat flash off fully before the next, rather than watching the clock, produces a far more reliable finish.
Sources
- HSE — Working at Height Regulations 2005 — hse.gov.uk
- Which? — How to deal with damp in the home — which.co.uk
- PaintQuality Institute — Why Paint Blisters — paintquality.com
This guide is for general information only. Always work safely and follow manufacturer instructions. DIYnut accepts no liability for injury or damage arising from DIY work.