Paint Peeling: Causes, Diagnosis and Fixes
Painting & Decorating › Painting & Decorating
Paint Peeling: Causes, Diagnosis and Fixes
Identify why your paint is peeling and fix it properly the first time.
Paint peeling is most commonly caused by moisture getting behind the paint film or poor surface preparation. Identify the location and pattern of peeling to pinpoint the cause, then strip, prepare and repaint correctly to get a lasting result.

What’s Causing This?
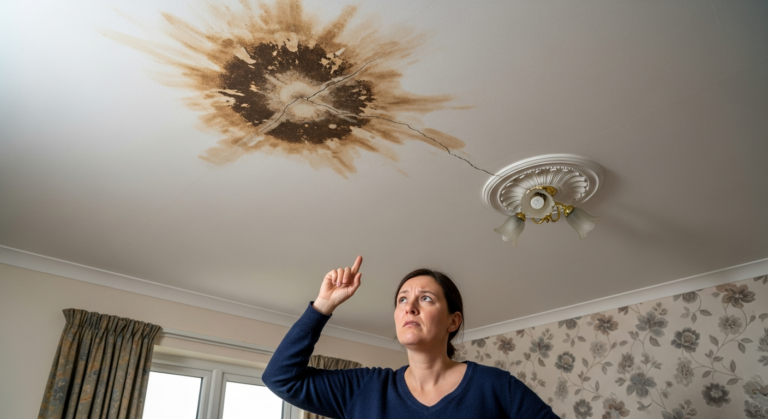
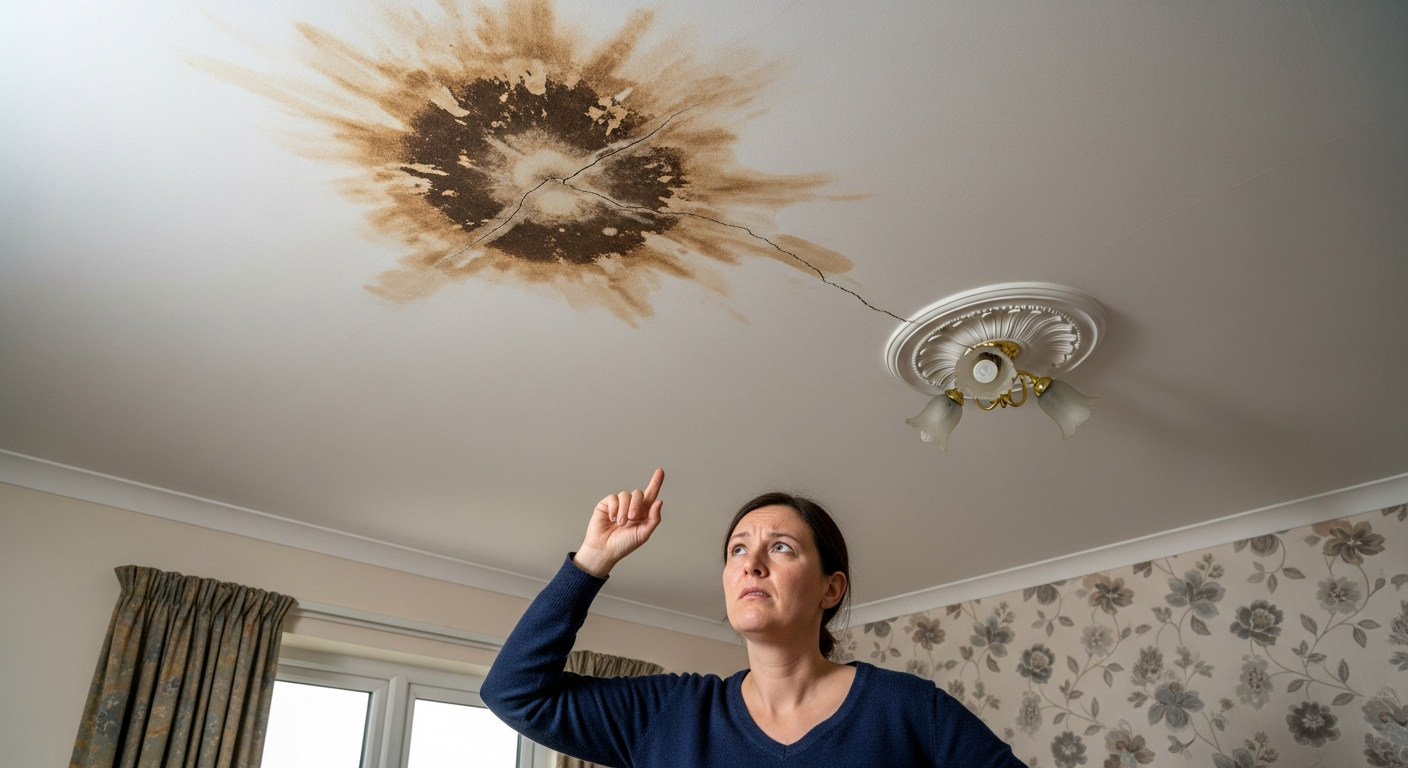
Moisture or damp penetrating behind the paint is the most frequent reason paint peels, particularly on bathroom ceilings, kitchen walls and exterior surfaces. Steam, condensation and water ingress all break the bond between paint and substrate. If your bathroom ceiling is flaking, see our guide to the best paint for bathroom ceilings to choose a moisture-resistant finish before you redecorate.
Poor surface preparation is the second most common culprit. Paint applied over a dusty, greasy, glossy or previously flaking surface cannot key properly. This causes sheets of paint to lift cleanly away from the substrate rather than flaking in small pieces — a reliable sign that prep was skipped or rushed.
Applying paint over unsuitable or incompatible layers causes delamination. Applying water-based paint directly over oil-based gloss without sanding and priming is a classic example. If you are unsure which paint type suits your surface, our Gloss vs Satinwood Paint Guide explains finish compatibility.
Too many coats of paint built up over years creates a thick film that eventually loses adhesion under its own weight, especially on woodwork such as skirting boards and door frames. Multiple coats of gloss over old coats is a very common cause of peeling on interior woodwork.
Painting onto new or damp plaster that has not fully dried traps moisture and causes rapid peeling. Fresh plaster typically needs at least four weeks to dry before painting, and should receive a diluted mist coat first rather than full-strength emulsion.
How to Diagnose the Exact Cause
- Note the location. Peeling concentrated on a bathroom or kitchen ceiling, or behind a radiator, points strongly to moisture or condensation. Peeling on exterior walls or window frames suggests water ingress or inadequate exterior-grade paint.
- Look at how the paint is coming away. Large sheets peeling cleanly = poor adhesion or incompatible paint layers. Small flakes or blistering = moisture working from behind. Chalky, powdery surface underneath = old, failed paint or poorly prepared substrate.
- Tap and press the surrounding paint. If it feels hollow or bubbles when pressed, there is moisture trapped behind the film. This is especially common on ceilings — our guide to fixing peeling ceiling paint covers the full process.
- Check for an active damp source. Look for tide marks, staining, mould growth or a musty smell near the peeling area. Check the room above for plumbing leaks, or inspect the roof and gutters if the problem is on an upper-floor ceiling.
- Assess the paint layers on woodwork. Use a sharp tool to scratch through the paint at the edge of a peel and count the layers. More than three or four layers of old gloss on woodwork indicates a build-up problem. Our guide to stripping paint from wood explains when full stripping is necessary.
- Test the existing surface adhesion. Apply a strip of masking tape firmly over sound-looking paint, press it down, then pull it away sharply. If paint lifts with the tape, the whole area has poor adhesion and will need stripping before any remedial work.
How to Fix It
Moisture or damp: Resolve the source of moisture first — this is non-negotiable. Improve ventilation, fix any leaks, or address rising or penetrating damp. Once the surface is fully dry, strip back all affected paint, treat with a stain-blocking primer, and repaint using the correct moisture-resistant product. Full guidance is in our Fix Peeling Ceiling Paint guide. If you suspect active damp in the wall, see the guide to fixing damp on interior walls before touching the paint.
Poor surface preparation: Strip back to a sound substrate, fill any holes or cracks, sand smooth, and apply an appropriate primer before repainting. For cracks discovered once paint is removed, the guide to fixing hairline cracks in walls covers repair before decoration.
Incompatible paint layers: Sand the existing surface thoroughly to provide a key, apply a bonding or adhesion primer suited to the substrate, and repaint with a compatible finish. If the layers are too thick to key effectively, full stripping is the only reliable solution.
Paint build-up on woodwork: Strip back to bare wood using a heat gun or chemical stripper, prime bare timber with an appropriate primer, then apply no more than two finish coats. See Strip Paint from Wood for a step-by-step approach.
Painting over new or damp plaster: Allow the plaster to dry fully (at least four weeks for standard skim), then apply a mist coat of diluted emulsion before full coats. If the plaster has been damaged by moisture, consult our guide to repairing blown plaster before decorating.
When to Call a Tradesman
Call a qualified damp-proofing specialist or surveyor if you find evidence of rising damp, penetrating damp or a persistent leak that you cannot identify and resolve. Painting over active damp without treating the cause will always result in peeling recurring, regardless of the paint used. If the peeling is widespread across a large area and reveals crumbling or blown plaster beneath, a plasterer should assess and repair the substrate before any decoration takes place — attempting to paint over failed plaster is a false economy. On older properties, if stripping paint from woodwork or walls reveals layers that may date from before 2000, have the material tested for lead paint before sanding or using a heat gun; the Health and Safety Executive (HSE) publishes guidance on working safely with lead paint. Any work affecting the structural fabric of the building — such as repairing a roof or fixing a leaking soil stack that is causing damp — must be carried out by a competent tradesperson.
How to Prevent It Happening Again
- Always prepare the surface properly before painting. Clean, sand, prime and ensure the substrate is fully dry. Skipping prep is the single biggest reason paint fails prematurely — our Painting & Decorating Guide covers correct preparation for every surface type.
- Choose the right paint for the environment. Use moisture-resistant or specialist bathroom and kitchen paints in high-humidity rooms, and exterior-grade products on all outside surfaces. Selecting the best paint finish for each wall type significantly reduces the risk of early failure.
- Ventilate rooms adequately. Install or use extractor fans in bathrooms and kitchens, open windows during and after cooking or bathing, and keep trickle vents open on window frames. Reducing condensation protects both the paint film and the substrate beneath it.
- Do not apply too many coats. Strip back build-up on woodwork before repainting rather than simply adding another coat. Adhere to the manufacturer’s guidance on the correct number of paint coats for the surface you are covering.
Frequently Asked Questions
Why is my freshly painted wall already peeling?
The most likely causes are painting onto a surface that was not properly cleaned or primed, applying paint to plaster that had not fully dried, or using a water-based paint directly over an oil-based layer without adequate preparation. Strip the affected area, prepare the surface correctly and repaint.
Can I just paint over peeling paint without stripping it?
No. Painting over peeling or flaking paint will always fail because the new coat has nothing sound to bond to. You must scrape back all loose material, sand the edges, prime, and then repaint for a result that will last.
Why is my bathroom ceiling paint peeling?
Bathroom ceilings peel because standard emulsion cannot withstand the high humidity created by baths and showers. Use a paint specifically formulated for bathrooms, ensure the extractor fan is working properly, and always prime bare patches before repainting.
Is peeling paint a sign of damp?
It can be, particularly if the peeling is accompanied by blistering, staining, mould growth or a musty smell. However, peeling can also result from poor preparation or incompatible paint types, so check for other signs of moisture before assuming damp is the cause.
How long should I wait before painting new plaster?
New plaster should be left to dry for a minimum of four weeks, though thicker coats or high-humidity conditions may require longer. The plaster should be a uniform pale pink or cream colour throughout before you apply a diluted mist coat as the first layer.
When stripping peeling paint from a wall that will be repainted rather than re-plastered, feather the edges of the stripped area with fine-grit sandpaper rather than leaving a sharp step — fill the recess with a flexible filler, sand flush, and the repainted surface will not show a visible outline where the old paint was removed. A sharp edge under new paint telegraphs through even multiple finish coats.
Sources
- HSE — Lead Paint: Working Safely with Lead Paint in Buildings — hse.gov.uk
- Which? — How to fix peeling and flaking paint — which.co.uk
- NHS/GOV.UK — Condensation and damp in the home — gov.uk
This guide is for general information only. Always work safely and follow manufacturer instructions. DIYnut accepts no liability for injury or damage arising from DIY work.