How to Fix a Sagging Gutter – DIY Guide
To fix a sagging gutter, reposition or replace the gutter brackets so the gutter slopes at least 6mm for every 3 metres towards the downpipe. Tighten or renew fixings into sound fascia board. The job takes one to two hours and costs under £20 in parts.


Set Up Your Ladder Safely and Check the Fascia
Position a ladder on firm, level ground and use a ladder stay to keep it off the gutter itself — resting a ladder against plastic guttering will crack it. Once at height, press firmly along the fascia board behind the failing bracket. Soft, spongy, or crumbling timber means the fascia has rotted and cannot hold a new screw in the same hole. Minor softness can be stabilised with exterior-grade wood hardener and filler; serious rot means the fascia board needs replacing before the bracket repair will hold long term. The HSE provides guidance on safe ladder use at height (hse.gov.uk).
Mark the Correct Fall Line With a String
Tie a string line from the highest point of the gutter run (furthest from the downpipe) down to the outlet at the downpipe end, pulling it tight. This gives you a reference slope to work to — aim for at least 6mm drop per 3 metres. Where the existing gutter sits below this line, the bracket needs lifting; where it sits above, it needs lowering. Mark bracket positions on the fascia with a pencil as you go. Getting the fall right at this stage means water runs away freely rather than pooling and overflowing — which is the root cause of leaking gutters .
Remove and Reposition the Failing Brackets
Unclip the gutter section from the bracket — most uPVC gutters simply snap out. Unscrew the old bracket and set it aside. If the original screw hole is stripped or soft, move the new bracket 40–50mm along the fascia to find solid timber. Drill a 2mm pilot hole first to avoid splitting the fascia, then drive a 50mm stainless steel screw firmly home. Clip the replacement bracket to your string line to confirm the height before fixing it permanently. Aim for a bracket every 600mm as a maximum spacing on a standard uPVC run. For more context on gutter systems and profiles, our Roofing Guide covers the full picture.
Refit the Gutter and Check All Joints
Snap the gutter back into the repositioned brackets, working from one end to the other. Check every union joint along the repaired section — any that have pulled apart or lost their rubber seal should be cleaned, dried, and resealed with waterproof gutter sealant before refitting. Run your hand along the underside of the joints once refitted; you should feel no movement or flex. If a union clip is cracked or brittle, replace it rather than sealing over it. A failed joint here will cause water to drip down the wall, which can eventually lead to damp on interior walls if left long enough.
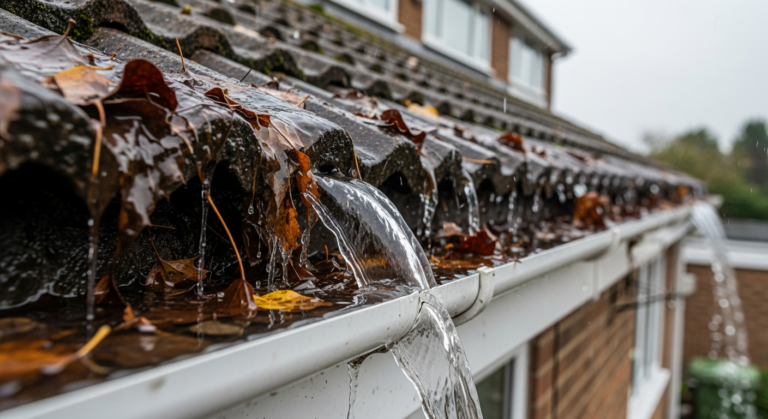
Test the Flow With Water and Confirm the Fix
Pour a full bucket of water into the highest end of the gutter run and watch it travel towards the downpipe. It should flow steadily with no pooling, no overflow at the back edge, and no drips at joints. If water sits in any spot for more than a few seconds, that bracket still needs adjusting up or down. Once satisfied, remove the string line and check the downpipe outlet is clear at ground level. A clean, fast flow confirms the fall is correct and the fix is holding.
Frequently Asked Questions
How do I know if my gutter is sagging or just blocked?
A blocked gutter overflows during heavy rain but usually holds its line and sits level against the fascia. A sagging gutter visibly dips at a point along the run and may overflow even in light rain because water pools at the low spot. Check from ground level — if you can see a clear dip in the profile, it’s a bracket issue. If the run looks straight but water spills over, start with clearing the blockage first.
Can I fix a sagging gutter without replacing it?
Yes, in most cases. If the gutter section itself is uncracked and the joints are sound, repositioning or adding brackets is all that’s needed. You only need to replace the gutter section if it has split, bowed permanently out of shape, or the profile is discontinued and replacement parts are unavailable.
How often should gutter brackets be replaced?
uPVC brackets typically last 20–30 years, but exposure to UV and frost accelerates brittleness. If a bracket cracks or snaps when you remove it, replace all brackets of the same age on that run — they will all be similarly degraded and failing one by one wastes repeat trips up the ladder.
What fall should a gutter have towards the downpipe?
The standard recommended fall for residential guttering in the UK is approximately 6mm drop for every 3 metres of run. On longer runs, you can increase this slightly to improve flow, but excessive fall makes the gutter visually obvious and can cause the high end to sit proud of the roofline, allowing water to overshoot the back.
Is fixing a sagging gutter a job I need to hire a roofer for?
Not usually. Repositioning brackets and reseating a gutter section is a straightforward task for a confident DIYer with a stable ladder, a drill, and basic fixings. The only times to involve a professional are when the fascia board needs full replacement or when the gutter sits at an inaccessible height above a two-storey extension or roof valley.
When drilling replacement bracket fixings, angle the screw slightly upward into the fascia — about 10 degrees above horizontal — rather than straight in. This uses the timber grain more effectively and dramatically improves pull-out resistance, particularly in older fascia boards where the surface timber is drier than the core.
Sources
- HSE — Work at Height Regulations: Ladders and Stepladders — hse.gov.uk
- Which? — How to fix and maintain gutters — which.co.uk
- Building Regulations Approved Document H — Drainage and Waste Disposal — gov.uk
This guide is for general information only. Always work safely and follow manufacturer instructions. DIYnut accepts no liability for injury or damage arising from DIY work.