How to Install a Gutter Guard – DIY Guide
Install a gutter guard by cleaning the gutters thoroughly, then cutting the mesh or foam insert to length and fitting it along the full gutter run, securing it under the first row of roof tiles or to the gutter lip. Most standard UK gutters take 30–90 minutes per section.


Measure the Full Gutter Run
Measure each straight section of guttering from end to end, including any internal or external angles. Add 50mm to each measurement to allow for overlap at joints. Note the gutter profile — half-round, square, or ogee — as this determines whether you need a mesh roll, foam insert, or rigid plastic guard, and how it clips or tucks into place.
Cut the Guard to Length
Lay the mesh or foam insert flat and cut to your measured lengths using tin snips for metal mesh or heavy-duty scissors for foam. For angled corners, cut a mitre into the guard rather than trying to fold it — a folded guard creates a gap that lets debris pass through. Always cut outdoors or over a work surface, not balanced on the ladder.
Fit the Guard Along the Gutter
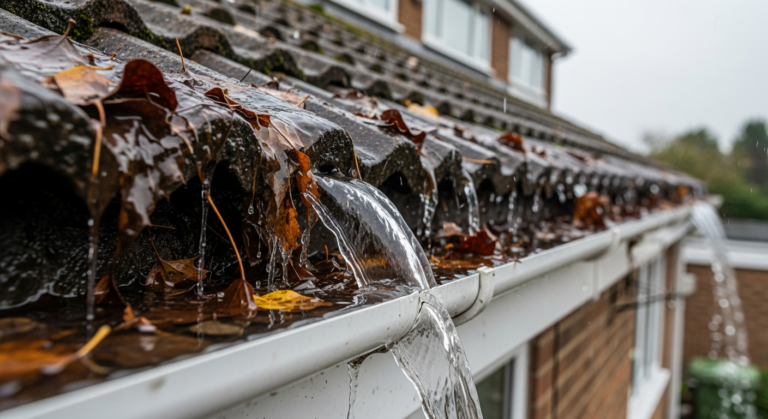
Starting at the downpipe end and working back along the run, tuck the inner edge of mesh guard underneath the first row of roof tiles so it sits flush against the back of the gutter. The outer edge hooks over or clips to the front lip of the gutter. For foam inserts, simply press the foam firmly into the gutter channel — it should sit just below the rim so water can still run over it freely. If your gutters are prone to sagging , re-secure the gutter bracket before fitting the guard.
Secure Overlaps and Downpipe Outlets
Overlap consecutive sections of guard by at least 50mm and secure with gutter clips or cable ties at each overlap point to prevent wind lift. At downpipe outlets, cut the guard around the opening rather than covering it — a dedicated downpipe filter cap can then be fitted over the outlet to stop debris entering the vertical pipe. If you are dealing with a leaking gutter joint near the downpipe, seal it with exterior silicone before fitting the guard.
Test with Water and Inspect from Ground Level
Once the full run is fitted, pour a bucket of water into the highest point of the gutter and watch how it flows. Water should pass through mesh freely and run to the downpipe without pooling. Step back and check from ground level that the guard sits flat and has not lifted any roof tiles at the eaves. Descend the ladder and check the downpipe discharge is clear at ground level.
Frequently Asked Questions
Do gutter guards actually work on UK gutters?
Yes — mesh and foam gutter guards are effective at keeping out leaves, moss, and most windblown debris, which are the primary causes of blocked gutters in the UK. They do not eliminate maintenance entirely, as fine silt and seed debris can still accumulate over time, but they significantly extend the interval between cleans.
Which type of gutter guard is best — mesh or foam?
Mesh guards are more durable and easier to remove for periodic cleaning, making them better suited to properties surrounded by trees. Foam inserts are simpler to fit and work well on roofs with less leaf fall, but can absorb moisture and support moss growth if left unchecked for several years.
Will a gutter guard void my roof warranty?
Tucking a guard under roof tiles without disturbing them does not typically void a warranty, but you should check the terms of any flat roof or roofing system guarantee you hold. If in any doubt, fit a clip-on guard that attaches only to the gutter lip and makes no contact with the tiles.
How often should I check gutter guards once fitted?
Can I fit a gutter guard myself or do I need a tradesperson?
Installing a gutter guard is a straightforward beginner-level task for a single-storey or accessible first-floor roof line. The work itself is simple — the main safety consideration is working safely at height. For two-storey or higher properties, or where ladder access is restricted, consider hiring a professional with appropriate equipment. The DIYnut roofing guide covers safe working at height principles you should read before starting any roof-level task.
Run the mesh guard 10–15mm past the inner back edge of the gutter before tucking it under the tile — this slight upward angle channels debris towards the outer edge rather than letting it rest flat and block the mesh face. A flat or slightly downward-angled install is the single most common reason mesh guards need cleaning within months of fitting.
Sources
- HSE — Working at Height Regulations: Ladders and Stepladders — hse.gov.uk
- Which? — Gutter guards and gutter cleaning advice — which.co.uk
- RHS — Managing moss and debris in gutters near gardens — rhs.org.uk
This guide is for general information only. Always work safely and follow manufacturer instructions. DIYnut accepts no liability for injury or damage arising from DIY work.