How to Replace a Broken Roof Tile – DIY Guide
To replace a broken roof tile, lift the surrounding tiles using a slate ripper or trowel, remove the damaged tile, slide the new tile into position, and secure it. Match the tile type and profile before you buy. Most single-tile replacements take under two hours.


Set Up Safe Access to the Roof
Secure a ladder against the eaves using a standoff bracket — never rest it directly against the guttering. Only work in dry, still conditions; wet tiles are extremely slippery. Wear a safety harness secured to a certified roof anchor. The HSE requires working-at-height risks to be properly managed even for short domestic jobs. Never walk directly on tiles — use a roof ladder (cat ladder) hooked over the ridge to distribute your weight.
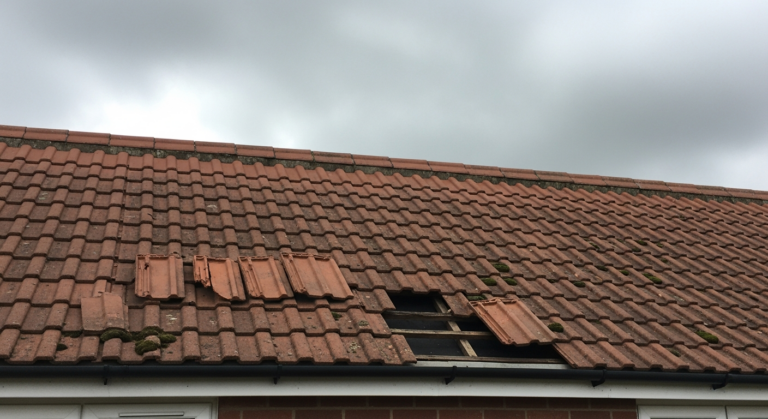
Lift the Surrounding Tiles to Free the Broken One
Slide timber wedges carefully under the tiles in the courses above and to either side of the broken tile to raise them clear without cracking them. On mortar-bedded tiles, use a trowel to gently break the bond. On nailed or clipped tiles, use a slate ripper to cut or hook out the nail or clip holding the damaged tile in place. Work slowly — forcing tiles risks creating two problems instead of one.
Remove the Broken Tile and Check the Underlay
Slide the broken tile downward and out. Clear any debris, old mortar, or fragments from the batten below using a stiff brush. Inspect the roofing felt or underlay beneath — if it is torn or degraded, patch it with roofing felt repair tape before fitting the new tile. If you can see daylight through the underlay in multiple places, this is a sign of wider felt failure; consider the emergency roof repair guide for a temporary fix while you plan a more thorough repair.
Fit the Replacement Tile and Secure It
Slide the new tile up into the gap, engaging the nibs on the batten and aligning it flush with the tiles on either side. On a roof pitch above 35° or in an exposed location, nail or clip the tile in accordance with BS 5534 — do not rely on nibs alone. If the original tiles were mortar-bedded at the verge or ridge, apply fresh mortar or tile adhesive as required. Once the new tile is seated, remove the timber wedges and allow the surrounding tiles to settle back into position.
Inspect the Repair and Check Inside the Loft
Once back on the ground, check the repair from a distance — the new tile should sit flush with no visible gaps. Go into the loft within 24 hours of the next rainfall and check with a torch for any drips or damp patches on the rafters or felt. If you spot internal damp after a storm and cannot locate its source from outside, our guide on finding a roof leak from inside will help you trace it systematically.
Frequently Asked Questions
Can I replace a roof tile myself or do I need a roofer?
A single tile replacement is within the capability of a confident DIYer with the right access equipment and safety gear. However, if you are uncomfortable working at height, the damage is widespread, or the roof is very steep, call a qualified roofer. Always comply with HSE working-at-height regulations.
How do I find a matching replacement tile?
Do I need planning permission to replace a roof tile?
Like-for-like tile replacement on a standard pitched roof does not require planning permission in England, Wales, or Scotland. If your property is listed or in a conservation area, check with your local planning authority before proceeding, as restrictions may apply.
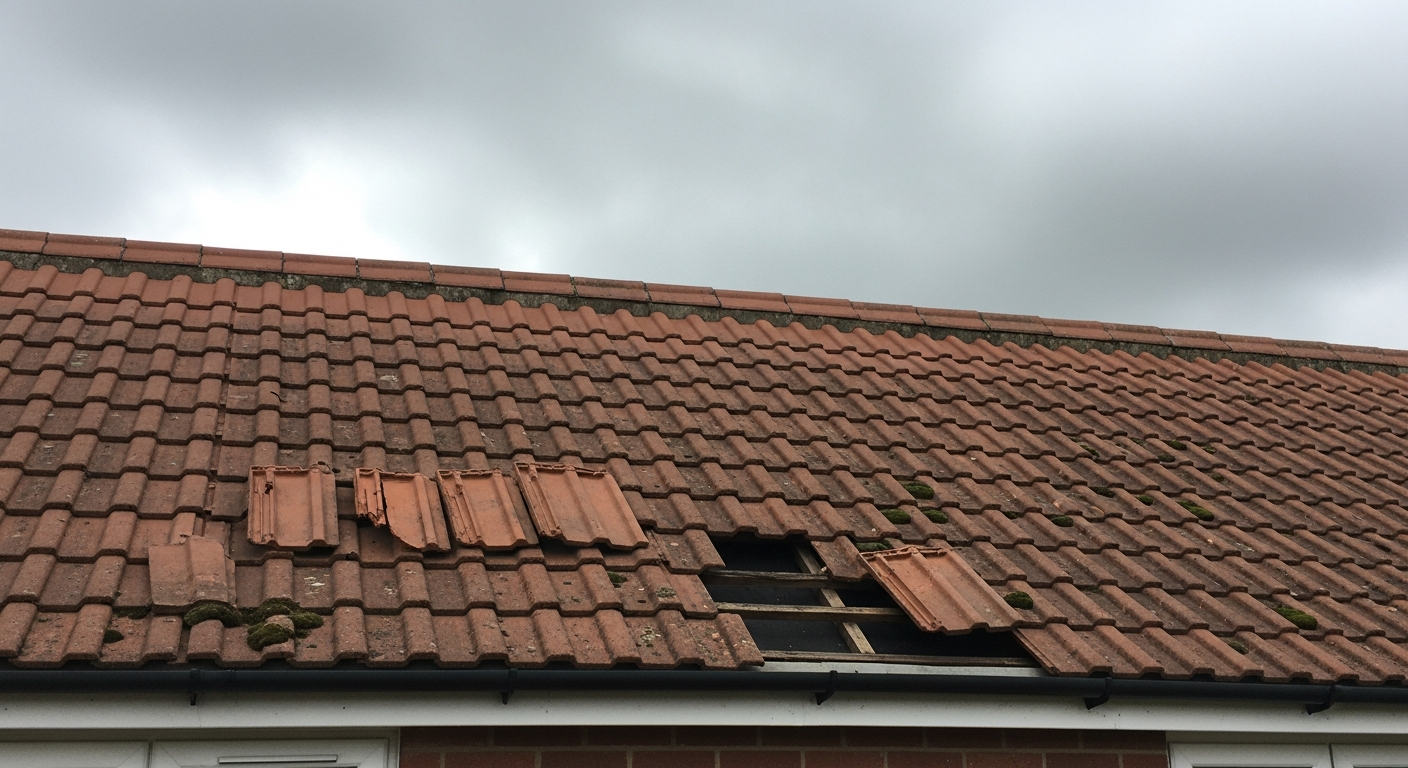
What causes roof tiles to break or slip?
Tiles crack due to thermal movement, impact from debris, or age-related brittleness. Slipping is usually caused by corroded or missing nibs, failed nail fixings, or deteriorated mortar on verge or ridge tiles. If multiple tiles are slipping at once, the nail fixings across the whole roof may be at end of life.
How do I know if a broken tile has caused a leak inside?
Inspect your loft after the next significant rainfall using a torch. Look for damp patches, drip marks, or discolouration on rafters, felt, and insulation. Water can track sideways along timbers before dripping down, so the visible wet patch inside is not always directly below the damaged tile. Our roof leak repair guide covers how to trace and fix the source.
When lifting surrounding tiles to access a broken one, number them lightly with a chalk pencil in the order you removed them — this makes reinstating the original lapping sequence straightforward and prevents accidental cross-lapping, which is a common cause of re-leaking after a DIY tile repair.
Sources
- HSE — Working at Height Regulations 2005: Guidance for the Construction Industry — hse.gov.uk
- Which? — How to repair a roof tile — which.co.uk
- GOV.UK — Permitted development rights for householders: technical guidance — gov.uk
This guide is for general information only. Always work safely and follow manufacturer instructions. DIYnut accepts no liability for injury or damage arising from DIY work.