Damp & Condensation: Complete UK DIY Guide 2026
DIY Guides › Damp & Condensation
Damp & Condensation
Rising damp, penetrating damp, and condensation — identify the cause and fix it for good.
The single most important step with any damp problem is correct diagnosis. Rising damp, penetrating damp, and condensation are three different problems with three completely different solutions. Treating the wrong type wastes money and does not fix the problem. Condensation (the most common type in UK homes) is solved by ventilation and heat — not damp-proof paint.
- Damp meter (capacitance type)
- Torch
- Wire brush
- Filling knife and scraper
- Spray bottle
- Paintbrush and roller
- Protective gloves and dust mask
- Anti-mould surface wash
- Anti-mould paint or anti-condensation paint
- Breathable masonry paint (for solid walls)
- Damp-proof membrane or tanking compound
- Expanding foam or hydraulic cement (for cracks)
- Extractor fan (bathroom or kitchen)
The Process Overview
Identify the Type of Damp
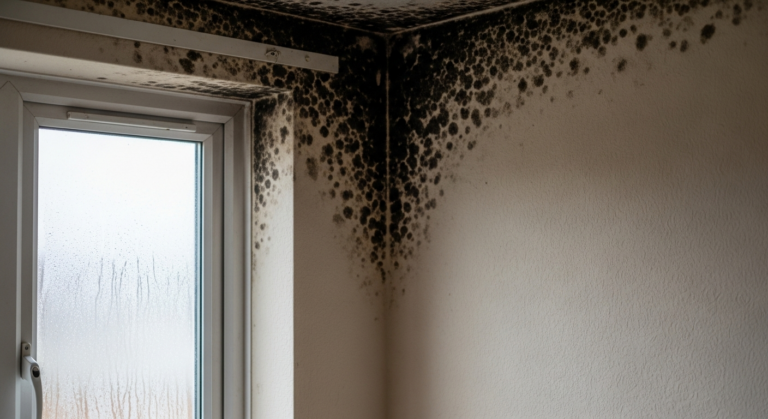
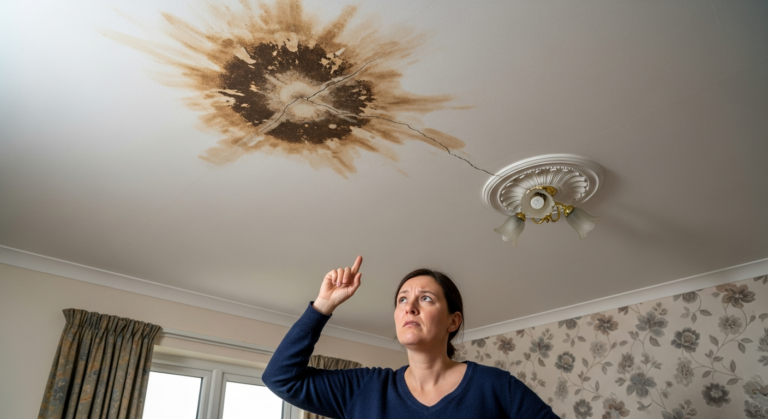
Condensation appears on cold surfaces (windows, external walls, behind furniture) as water droplets or black mould, and is worst in winter. Rising damp appears as a ‘tide mark’ on the lower section of walls, often with white salt crystallisation (efflorescence). Penetrating damp appears after rain, in localised patches, often near windows, roof lines, or external wall cracks. Each requires a different fix.
Fix the Root Cause First
For condensation: increase ventilation (extractor fans, trickle vents, open windows daily) and maintain a consistent background heat. For rising damp: repair or inject a new DPC (damp-proof course) at low level. For penetrating damp: repair the external defect — cracked render, failed pointing, blocked guttering, leaking flashing, or defective window seals. Do not treat the internal surface until the external cause is fixed.
Allow the Wall to Dry
Once the root cause is fixed, allow the wall to dry out before applying any treatment. This takes weeks to months depending on the extent of saturation and the weather. Use a damp meter to track the reading — below 16% is dry for plaster. Applying treatment over a wet wall traps moisture and causes the treatment to fail.
Kill Mould and Prepare the Surface
Wash down all affected surfaces with a proprietary anti-mould surface wash (Polycell Mould Killer, Zinsser Mold Killer) and leave for the specified dwell time. Scrape off any loose, flaking paint or plaster. On solid walls with salt crystallisation, brush off white efflorescence with a stiff dry brush — do not wash it in. Allow to dry completely before applying any treatment.
Apply the Appropriate Treatment
For condensation: apply anti-condensation paint or anti-mould emulsion to internal surfaces. For rising damp (after DPC repair): apply salt-inhibiting primer, then renovating plaster. For penetrating damp (after external repair): apply breathable masonry paint externally or a breathable waterproofing cream. Never use non-breathable coatings on solid stone or brick walls — they trap moisture inside.
Improve Ventilation Long Term
Condensation is the most common damp problem in UK homes and is solved by ventilation. Fit an extractor fan in every bathroom and kitchen if one is not present. Set a timer on bathroom fans to run for 15 minutes after the room is vacated. Leave trickle vents open on all windows. Leave a 50mm gap between furniture and external walls. These habits cost nothing and eliminate most condensation.
Frequently Asked Questions
How do I tell the difference between condensation and rising damp?
Condensation typically appears as black mould on cold surfaces (window reveals, corners, behind furniture) and worsens in winter when the house is closed up. Rising damp appears as a horizontal tide mark at low level (typically below 1m) with white salt deposits (efflorescence) and does not dry out in summer. A professional damp meter reading across the wall height will confirm which is present.
Is rising damp common in UK homes?
Genuine rising damp (ground moisture wicking up through masonry via capillary action) is far less common than it is diagnosed. Many cases diagnosed as rising damp are actually condensation, penetrating damp, or a bridged DPC. A failed or bridged DPC can be fixed by injecting a chemical DPC cream and re-plastering at low level — a job many experienced DIYers can tackle.
What causes black mould in bedrooms and bathrooms?
Black mould (Cladosporium, Aspergillus, or Stachybotrys in severe cases) grows where surfaces remain damp. In bedrooms, the usual cause is condensation — warm moist air from occupants hits cold walls and windows. In bathrooms, it is steam and poor ventilation. The fix is the same: reduce moisture production (shorter showers, pan lids on cooking), increase ventilation (extractor fans, open windows), and maintain background heat.
Do I need a damp survey before buying a house?
A standard RICS home survey includes a visual damp inspection. If any damp is flagged, commission a specialist independent damp survey (not one from a damp-proofing company, who have a financial interest in finding problems). The Property Care Association provides a register of independent assessors. Many damp ‘problems’ flagged by vendors’ remediation companies are condensation and require no remediation work at all.
Can I remove black mould myself?
Surface mould on paintwork and tiles can be cleaned with a proprietary mould killer or a diluted bleach solution (1 part bleach to 4 parts water). Wear gloves and ensure ventilation. Mould on plasterboard indicates deep penetration — the board needs removing and replacing, not just cleaning. Severe widespread mould covering large areas of a property warrants professional assessment.
To test whether a damp patch is condensation or penetrating damp, tape a small square of cling film tightly over the affected area and seal the edges with tape. Leave it for 24–48 hours. If moisture forms on the room-side of the film, it is condensation (water vapour condensing from the room air). If moisture forms between the film and the wall, it is penetrating or rising damp coming through the wall. This simple test saves the cost of a damp survey in most straightforward cases.
Sources
- Property Care Association — independent damp and timber specialists — property-care.org
- NHS — health effects of damp and mould in the home — nhs.uk
- HSE — workplace damp and health guidance — hse.gov.uk
This guide is for general information only. Always work safely and follow manufacturer instructions. DIYnut accepts no liability for injury or damage arising from DIY work.
Step-by-Step Guides
Step-by-step guides for this category are being published now. Check back soon — or use the app to get an instant plan for your specific job.