Plaster Blowing
Walls & Plastering › Walls & Plastering
Plaster Blowing
Identify why your plaster is blowing and fix it before it spreads.
Plaster blowing means the plaster has separated from the wall or substrate beneath it. Tap the surface — a hollow sound confirms it. The most common cause is damp penetrating behind the plaster. Act quickly to stop the failure spreading further.

What’s Causing This?
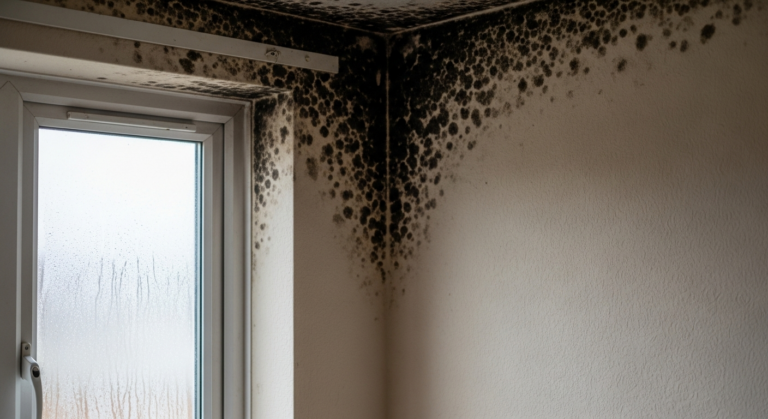
Damp penetration. This is the most common cause of blown plaster. Water from a leak, rising damp, or penetrating damp gets behind the plaster, breaks down the bond between plaster and masonry, and causes it to separate. You may also notice staining or a damp smell. Before any repair, the source of moisture must be identified and resolved — see the Insulation & Damp Guide for a full overview of damp types.
Contaminated or sulphate-affected backing coat. Old lime plaster applied over brickwork can be attacked by sulphates from the masonry. These salts expand within the backing coat, pushing the plaster away from the wall — a process sometimes called sulphate attack. It is common in pre-1950s properties and often affects chimney breasts or external walls.
Poor key or unsuitable substrate. If the surface was not properly prepared before plastering — for example, if it was too smooth, too dusty, or not primed — the plaster never achieved a strong mechanical bond. Over time, even minor vibration or thermal movement causes it to detach. If you ever need to replaster, follow the steps in Mix Plaster Correctly to get the consistency right from the start.
Thermal movement or structural movement. Repeated expansion and contraction of the wall — especially on external or solid masonry walls — can gradually loosen plaster over years. This is more pronounced where different materials meet, such as where a timber lintel meets brickwork. Related cracking often accompanies blowing in these areas; see Why Do Walls Crack for more on movement-related failures.
Old age and general deterioration. Victorian and Edwardian lath-and-plaster walls have a finite lifespan. As the timber laths shrink and the lime mortar keys crumble, sections of the plaster float progressively detach. This is normal wear in older properties and usually requires patch or full-room replastering rather than a like-for-like repair.
How to Diagnose the Exact Cause
- Tap test the wall. Use your knuckle or a wooden handle to tap firmly across the affected area. A solid, dense sound indicates sound plaster. A hollow, drum-like sound means the plaster has separated from the substrate. Mark the extent of the blown area with low-tack tape so you know exactly what needs to come off.
- Check for damp signs. Look for tide marks, dark staining, efflorescence (white salt deposits), or peeling paint around the blown area. If you find any of these, moisture is almost certainly involved. Check above for leaking pipes or gutters, and at skirting level for rising damp. Address damp before plastering — applying new plaster over active moisture will cause it to fail again.
- Inspect the age and type of plaster. Scratch the surface gently with a screwdriver. Hard, grey plaster with a sand aggregate is likely cement-based. Soft, pale plaster that crumbles easily is likely old lime. If the substrate behind feels sandy and loose, sulphate attack may be the cause.
- Look at the location. Blown plaster on a chimney breast or external wall is strongly associated with sulphate attack or penetrating damp. Blown plaster around a window or door opening suggests thermal movement or a lintel issue. Widespread blowing on an old ceiling points to failing lath keys rather than damp.
- Assess the structural context. Prod the plaster edges around the blown patch. If large sections lift away easily or the laths behind are visibly rotten or broken, you are dealing with end-of-life substrate failure. If the plaster is otherwise sound and only a small patch is hollow, a localised repair is likely sufficient.
How to Fix It
Damp-related blown plaster: Eliminate the moisture source first — fix any leaks, improve ventilation, or apply a damp-proof solution as needed. Once the wall is fully dry, hack off all blown plaster back to firm edges, treat the masonry with a suitable stabilising solution, and replaster in layers. Full instructions are in Repair Blown Plaster. Also see Fix Damp on Interior Walls to address the root cause.
Sulphate attack: All affected plaster and render must be stripped back to bare masonry — do not simply patch over it. The masonry should be allowed to dry thoroughly and then treated before applying a sulphate-resistant backing coat. This is a specialist task in severe cases; see when to call a tradesman below.
Poor key or failed bond: Hack off the blown section, clean the substrate, and apply a bonding coat before replastering. On very smooth or impervious surfaces such as engineering brick, use a bonding agent. For a step-by-step approach, see Skim Coat a Wall.
Thermal or structural movement: Small patches can be cut back and filled with a flexible filler or thin coat plaster if the movement has stabilised. Where movement is ongoing, address the structural cause first. Hairline cracks at the edges of repaired patches can be treated with the method in Fix Hairline Cracks in Walls.
Old lath-and-plaster failure: Where the laths are rotten or the keys have crumbled across large areas, consider replacing the entire wall with plasterboard. See Cut and Fit Plasterboard for the full process. This gives a stable, modern substrate that can be skimmed straight over.
When to Call a Tradesman
Call a qualified plasterer or damp specialist if the blown area covers more than a couple of square metres, if the cause is active damp that you cannot trace and resolve yourself, or if sulphate attack is suspected across a large section of wall. Sulphate attack requires full strip-back, substrate treatment, and specialist materials — applying standard plaster on top will simply fail again. If the blown plaster is on a ceiling and the lath-and-plaster is failing across a wide span, there is a risk of the ceiling dropping in sections, which is a safety hazard. A tradesman should also be called if the blown plaster is associated with structural cracking, movement in lintels, or signs of subsidence — these require a structural engineer’s assessment before any plastering work begins. According to the HSE, any work that disturbs plaster in properties built before 2000 may risk exposure to asbestos-containing materials in textured coatings; if you suspect artex or similar textured finishes on the ceiling, get it tested before hacking off.
How to Prevent It Happening Again
- Control moisture rigorously. Keep gutters, downpipes, and external render in good repair. Ensure bathrooms and kitchens are ventilated to prevent condensation soaking into walls over time. Deal with any leaks the moment they appear.
- Prime and key substrates properly before plastering. Always apply a PVA bonding agent or specialist primer to bare masonry before applying new plaster, and allow it to become tacky before plastering. Never plaster onto a dusty, painted, or excessively smooth surface without proper preparation.
- Use the correct plaster for the substrate. Lime plaster on old masonry, gypsum on modern blockwork and plasterboard, and cement-based renders on exposed external surfaces. Mismatching materials is one of the most common reasons new plasterwork fails prematurely.
- Monitor older properties annually. In pre-1950s homes, carry out a tap test on lath-and-plaster walls and ceilings each year. Catching a small hollow patch early means a simple patch repair rather than a full replaster.
Frequently Asked Questions
How do I know if my plaster is blown without pulling it off?
Tap the wall firmly with your knuckle or a wooden handle. Sound plaster gives a solid, dense knock; blown plaster sounds hollow or drum-like. You can map the full extent of the blown section this way before touching the surface.
Can I just fill over blown plaster rather than hacking it off?
No. Applying filler or a skim coat over blown plaster will not bond properly and will fail quickly. All detached plaster must be removed back to firm edges before any repair material is applied.
How long does replastered wall take to dry before painting?
New plaster typically needs a minimum of four weeks to dry fully before painting, though this varies with room temperature and ventilation. Paint it too soon and moisture trapped beneath will cause peeling and further adhesion problems.
Is blown plaster a sign of serious damp?
Not always, but it should always be investigated. Blown plaster can result from past damp that has since dried out, but if the moisture source is still active you will see staining, efflorescence, or a persistent damp smell alongside the hollow plaster.
Can blown plaster contain asbestos?
The plaster itself rarely contains asbestos, but textured coatings such as artex applied over plaster in properties built before 2000 may do. If you are unsure, have a sample tested by an accredited laboratory before disturbing any surface. The HSE provides guidance on managing asbestos in homes.
When hacking off blown plaster, undercut the edges of the surrounding sound plaster at a slight angle rather than cutting straight — this creates a mechanical key that helps the new patch lock in rather than shrinking away from the edges as it dries. Straight-cut edges are one of the main reasons patch repairs crack or detach within months.
Sources
- Which? — Cost of replastering a room — which.co.uk
- HSE — Asbestos in textured coatings (artex): homeowner guidance — hse.gov.uk
- Historic England — Practical Building Conservation: Plaster and Renders — historicengland.org.uk
This guide is for general information only. Always work safely and follow manufacturer instructions. DIYnut accepts no liability for injury or damage arising from DIY work.